How to Create and Manage Professional Customer Quotations in Invent ERP
Learn how to create, customize, send, and track customer quotations while improving sales efficiency and customer response times.
Step-by-Step Process
Step 1: Access the Sales Module

Step 2: Choose Quotation

Step 3: Fill Out Order Details

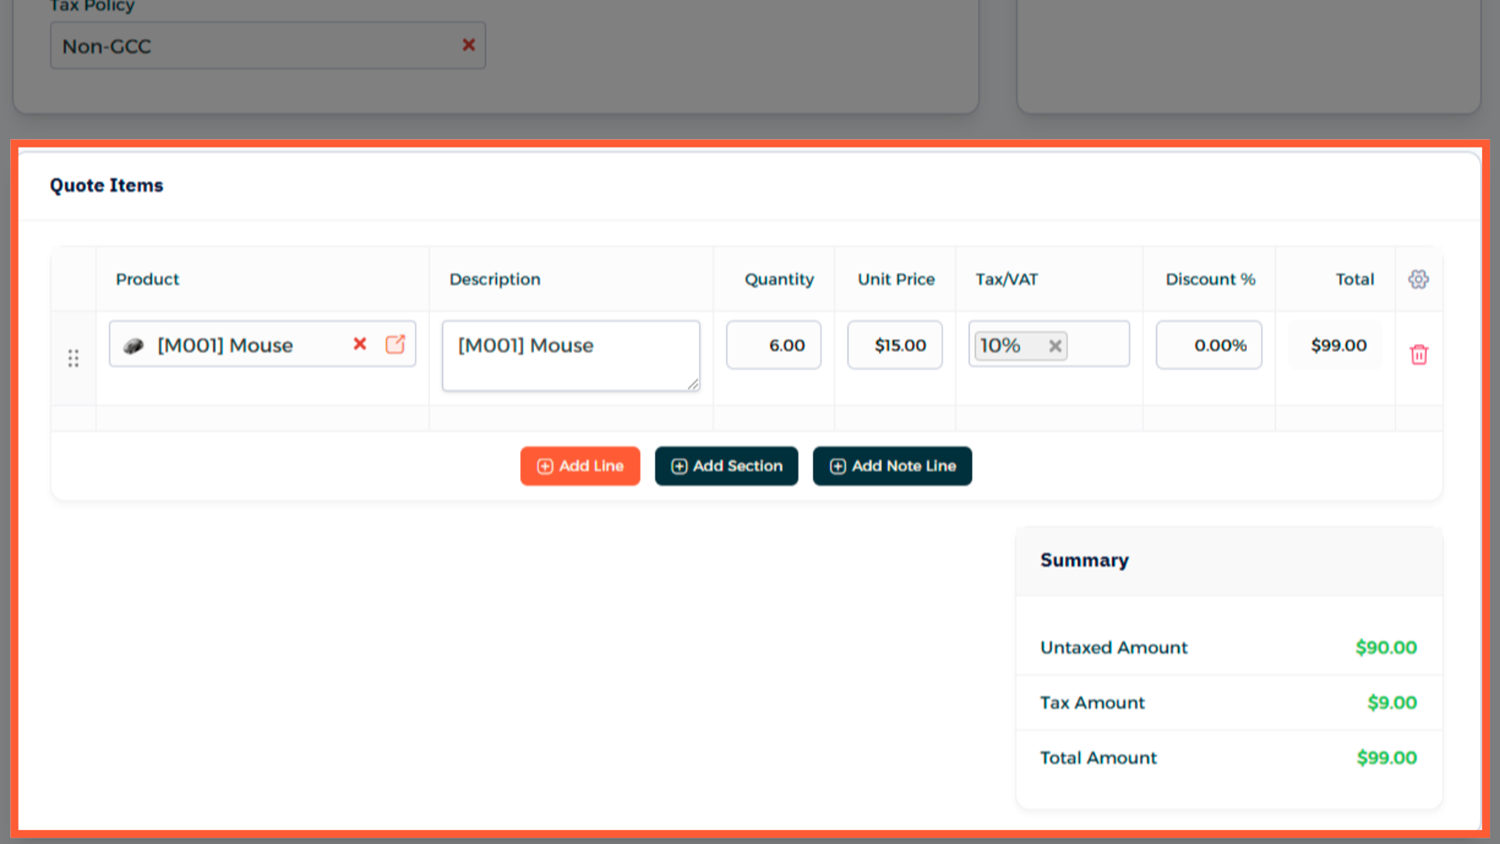
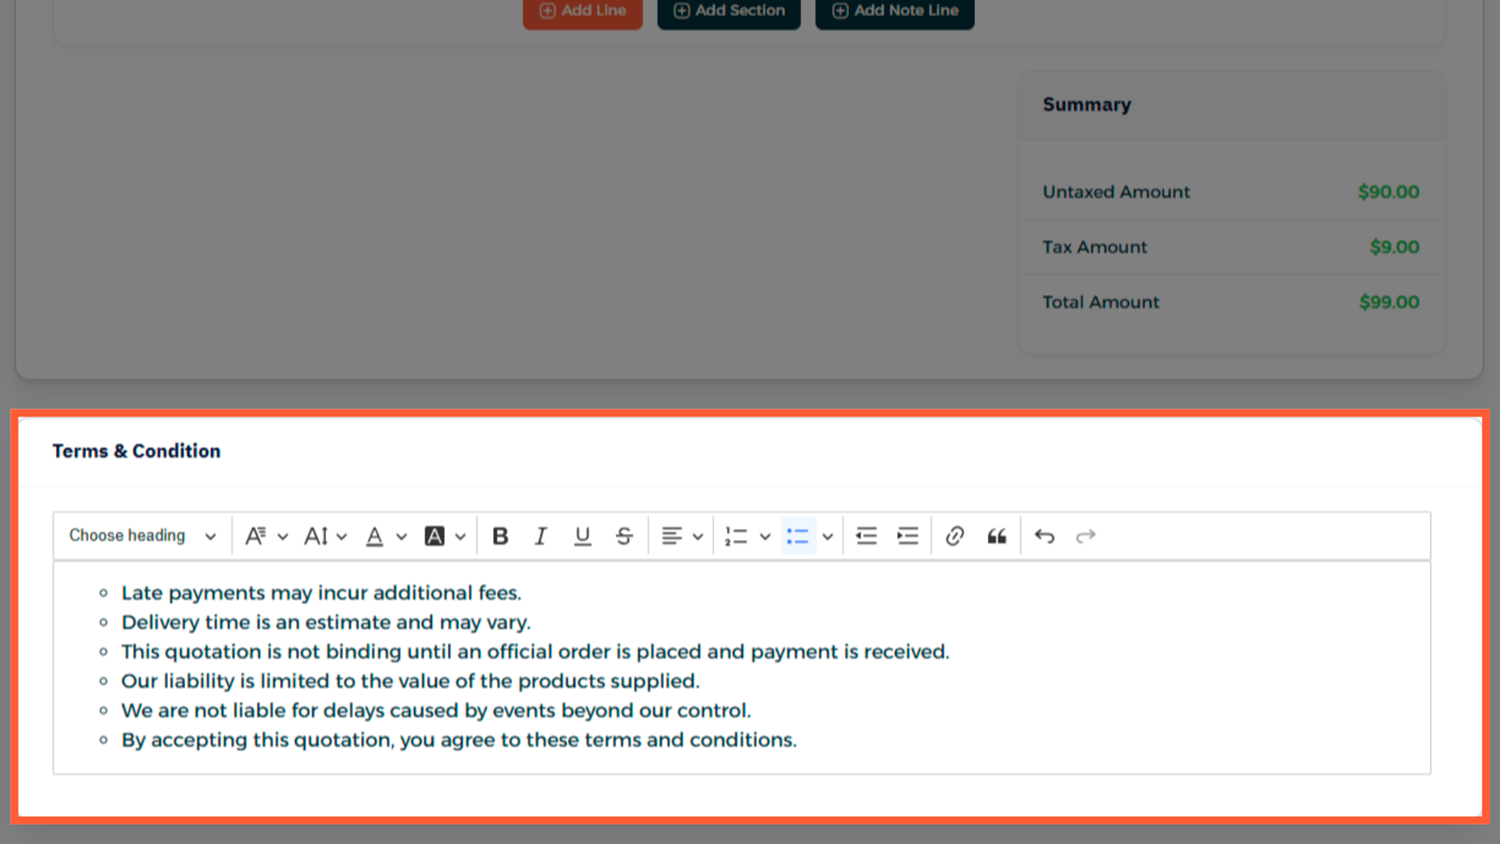
Step 4: Add Product and Terms & Conditions
What Happens After Sending?
- Customer accepts → Convert to Sales Order
- Sales order inherits all quotation data
- Continue to invoicing, delivery, and payment
Best Practices
- Use product templates for repeated offers.
- Keep notes professional and clear.
- Always set an expiration date.
- Add attachments to avoid back-and-forth emails.
- Use naming conventions for easier search later.
FAQ
Q: Can I make changes after confirming a quotation? You can't edit a confirmed quote directly, but you can duplicate it, make changes, and resend it.
Q: Can I include taxes or shipping charges? Yes Invent ERP handles taxes, delivery charges, and discounts as part of the quotation lines or totals.
Q: Is there a way to customize the PDF format? Yes You can use custom templates or branding under system settings.