How to Document Patient Encounters and Manage Clinical Records in Invent Medical
Learn how to log procedures, allergies, medications, and diagnoses, document and lock an encounter, record and chart vitals, attach medical forms, update patient history, write prescriptions, create referrals, manage lab orders and results, and use quick actions and dashboard tools in the Encounters module.
Module Overview & Layout
The Encounters module is where doctors and clinical staff manage everything tied to a patient's visit — all within Invent Medical. From a single patient's Medical Summary screen, staff can log clinical data, document the visit itself, track vitals over time, attach forms, and trigger prescriptions, referrals, and lab work.
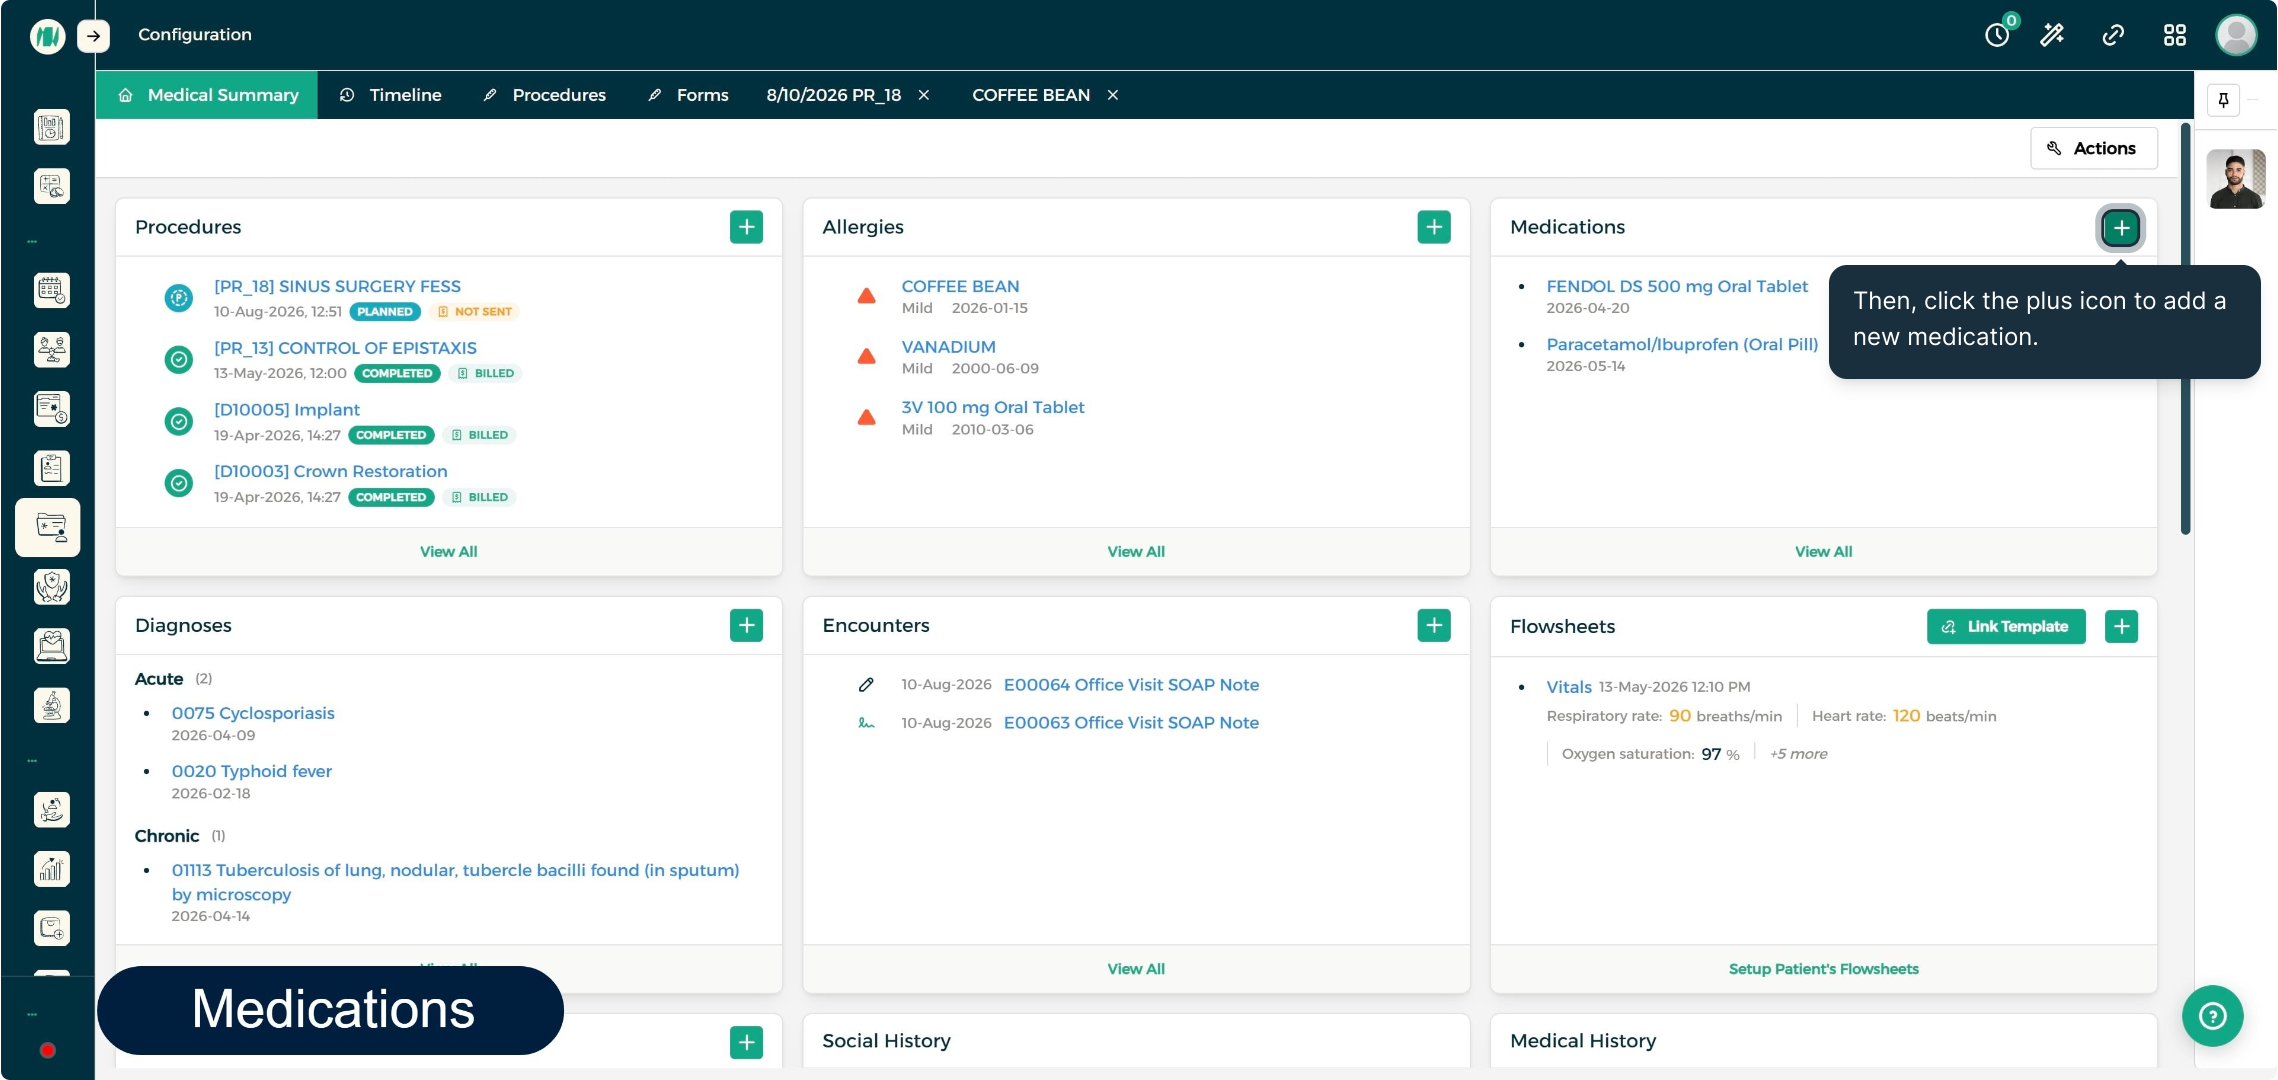
When you open a patient's Medical Summary screen, you'll typically see:
- Procedures, Allergies, Medications, and Diagnoses cards — the patient's core clinical data, each with its own quick-add button
- Encounters card — documented visits, using configurable note templates
- Flowsheets card — vitals and other tracked observations, with linked charts for viewing trends
- Medical Forms card — examination sheets, consent forms, and other templated documents
- Social History and Medical History cards — background and lifestyle information
- Prescriptions, Referrals, and Lab Orders / Lab Results cards — downstream clinical actions tied to the visit
- Timeline, Procedures, and Forms tabs — a full chronological and filterable view of everything on file for the patient
Each card follows the same rhythm — click the plus icon to add an entry, fill in the details, and save — so once you're comfortable with one, the rest of the dashboard feels familiar.
Step-by-Step Process
Procedures
Step 1: Add a New Procedure
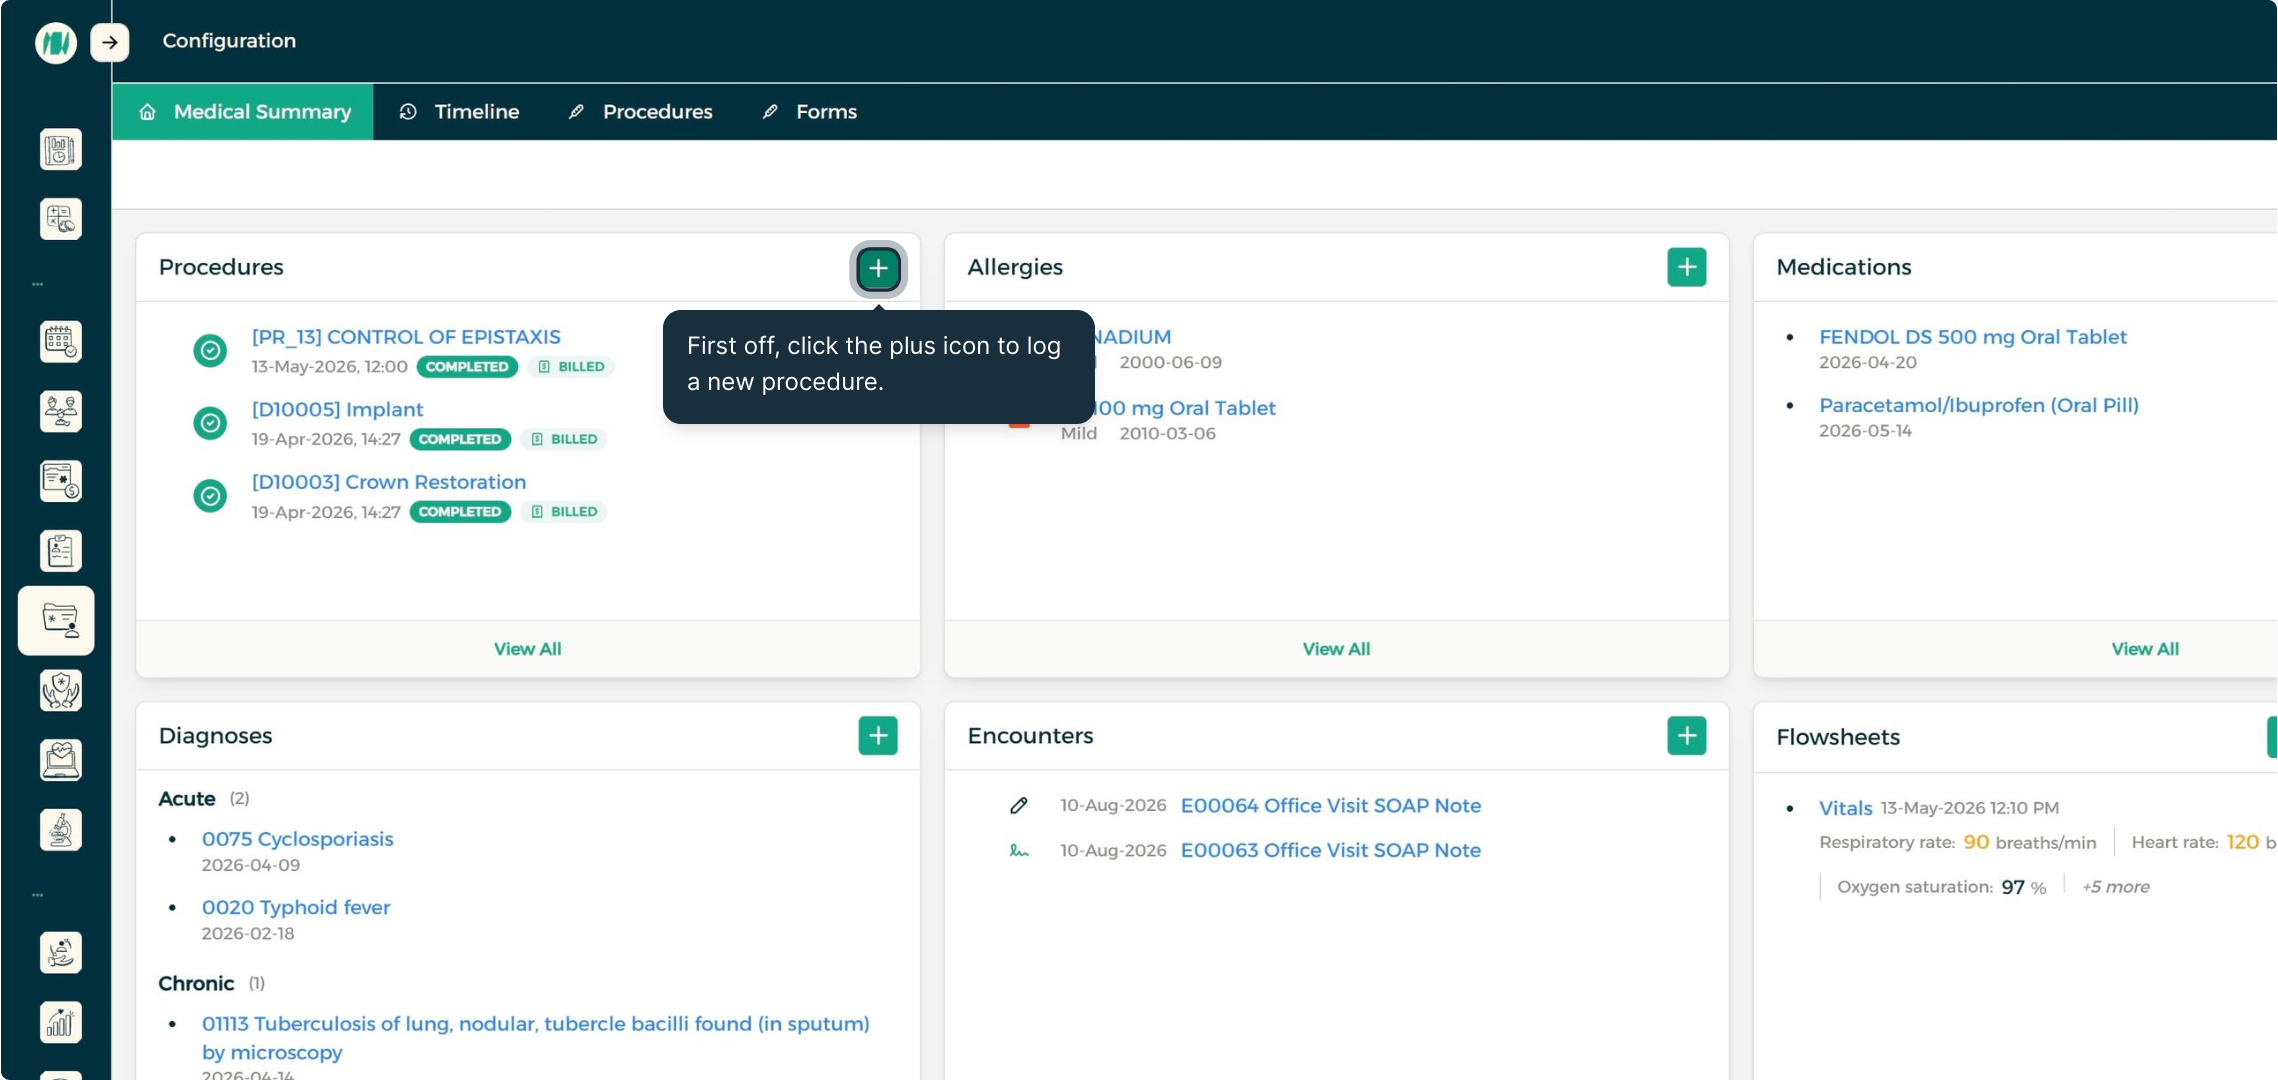
Click the plus icon on the Procedures card to log a new procedure.
Step 2: Fill In and Save the Procedure
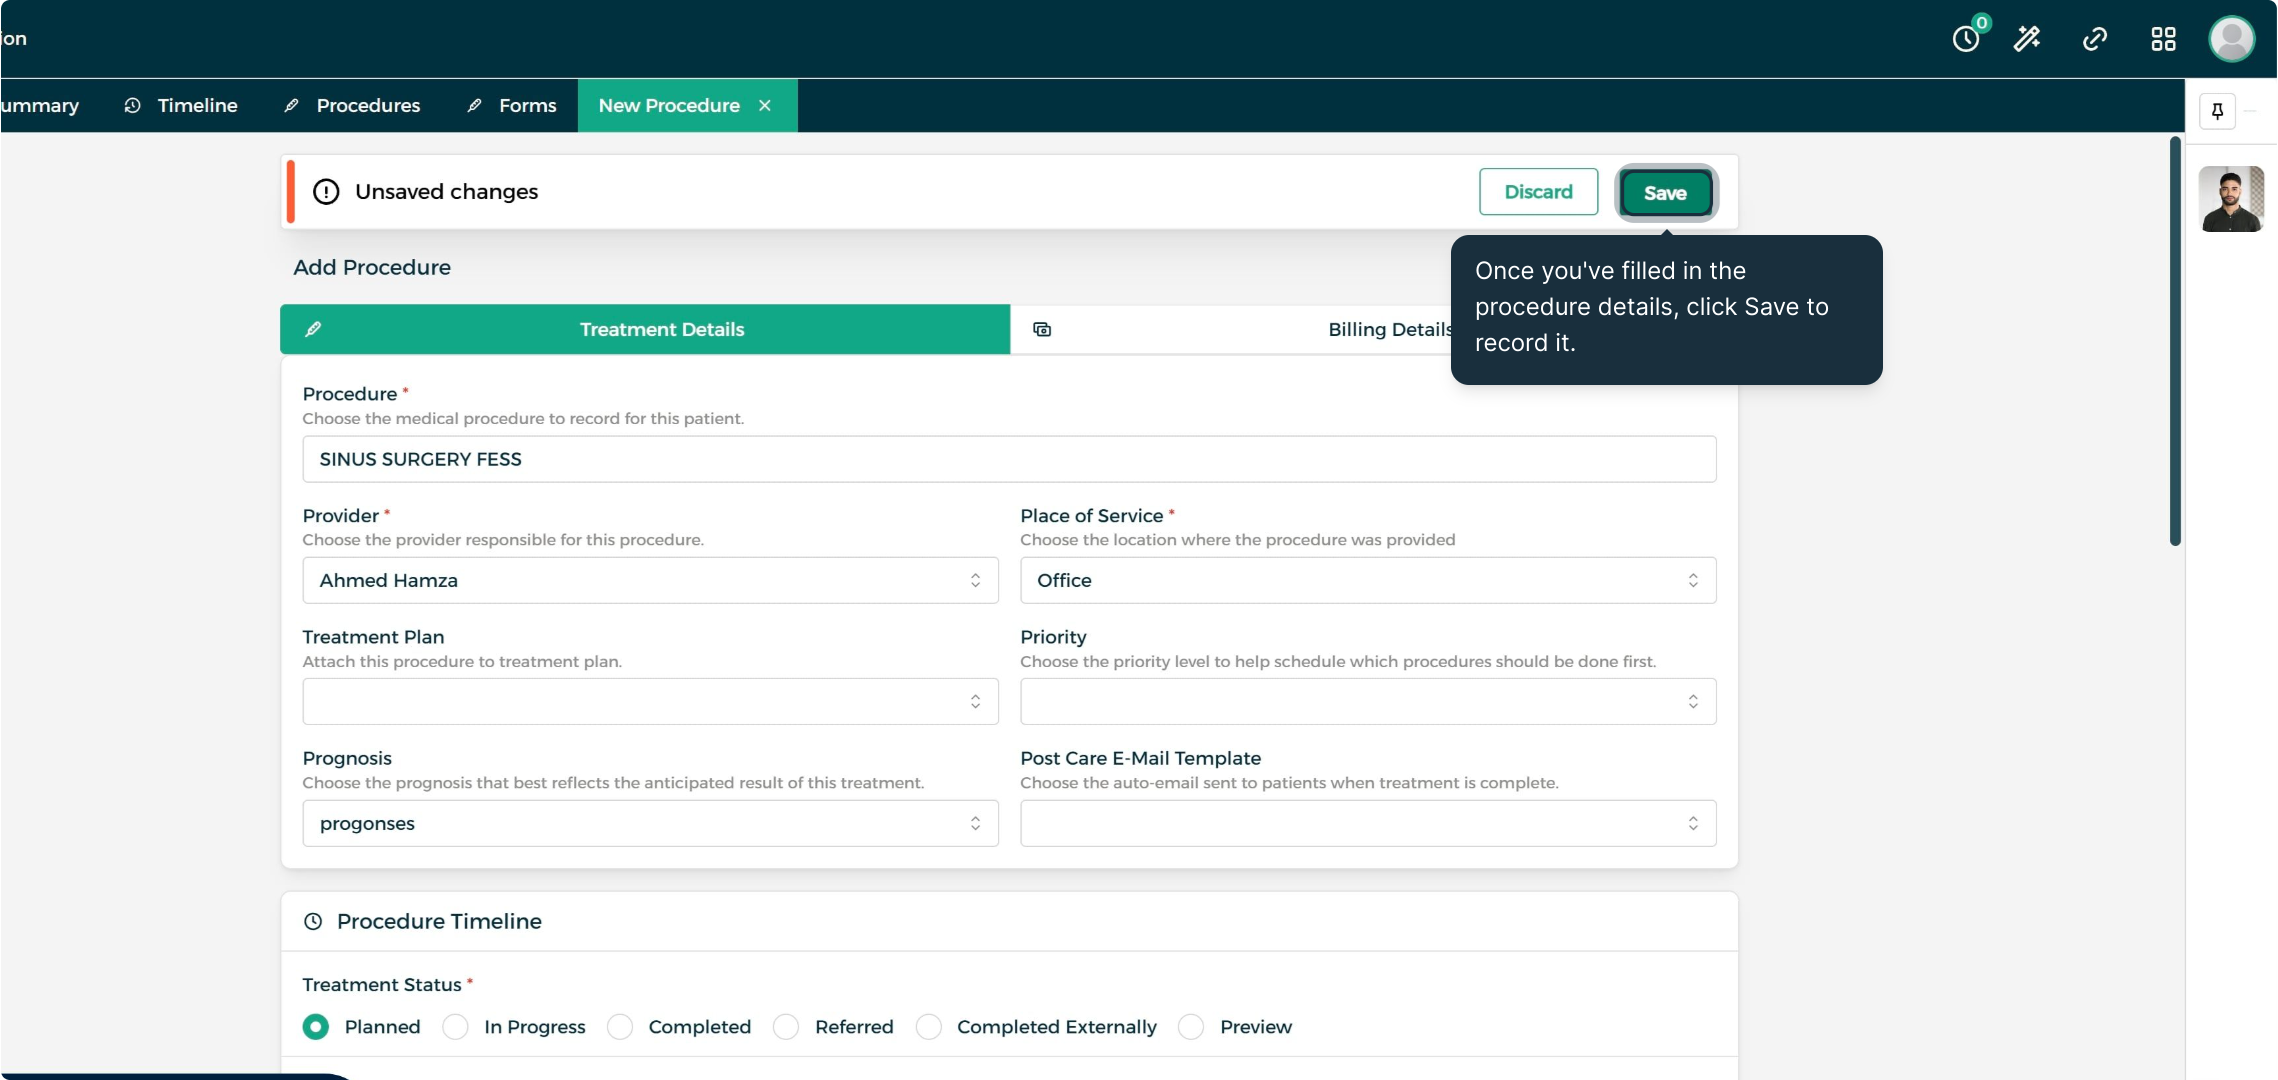
With the procedure details filled in — provider, place of service, and treatment status — click Save to record it.
Allergies
Step 1: Add a New Allergy
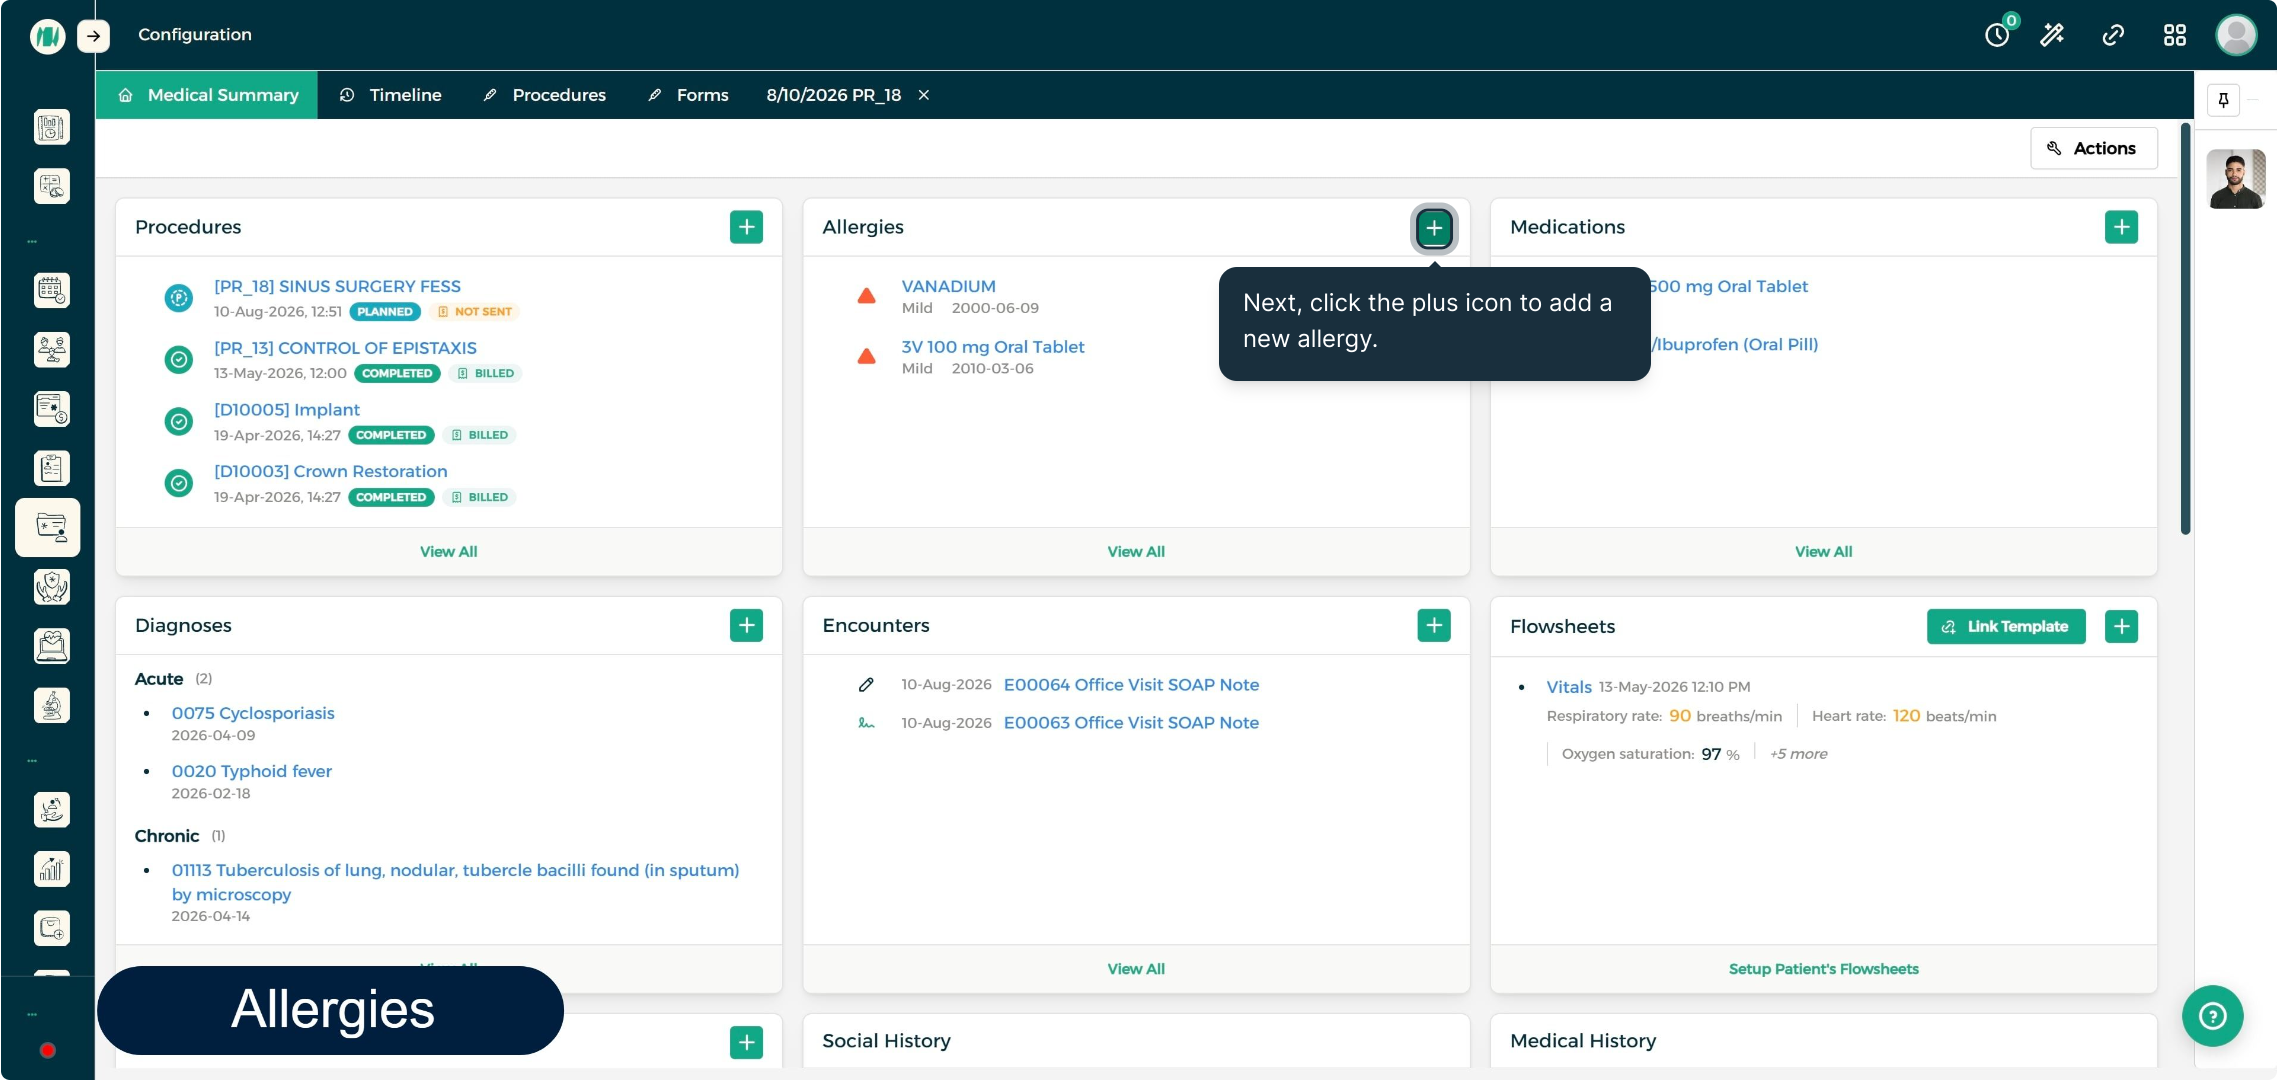
Click the plus icon on the Allergies card to add a new allergy.
Step 2: Fill In and Save the Allergy
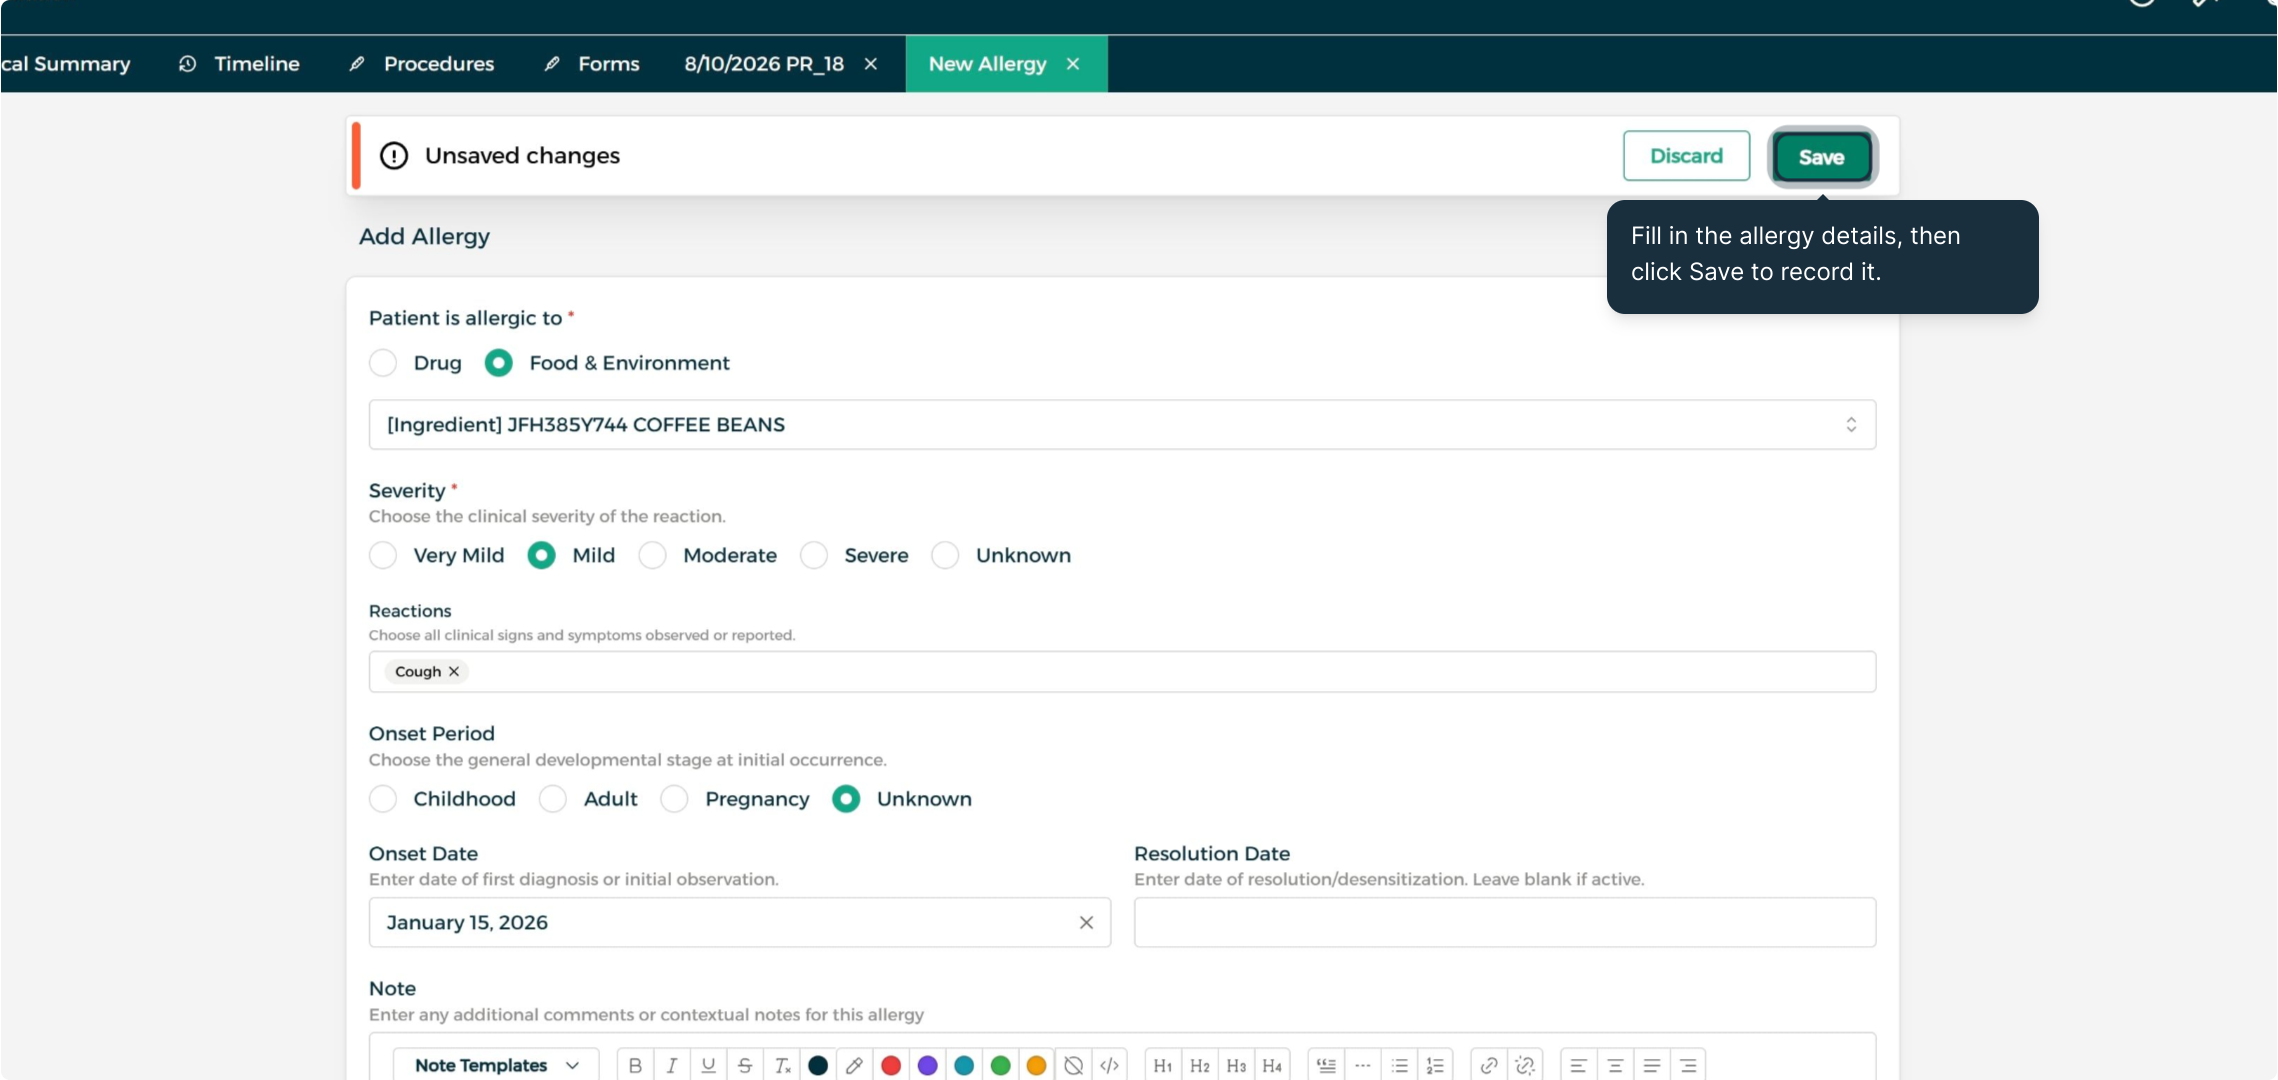
With the allergen and severity selected, click Save to add it to the patient's list.
Medications
Step 1: Add a New Medication
Click the plus icon on the Medications card to add a new medication.
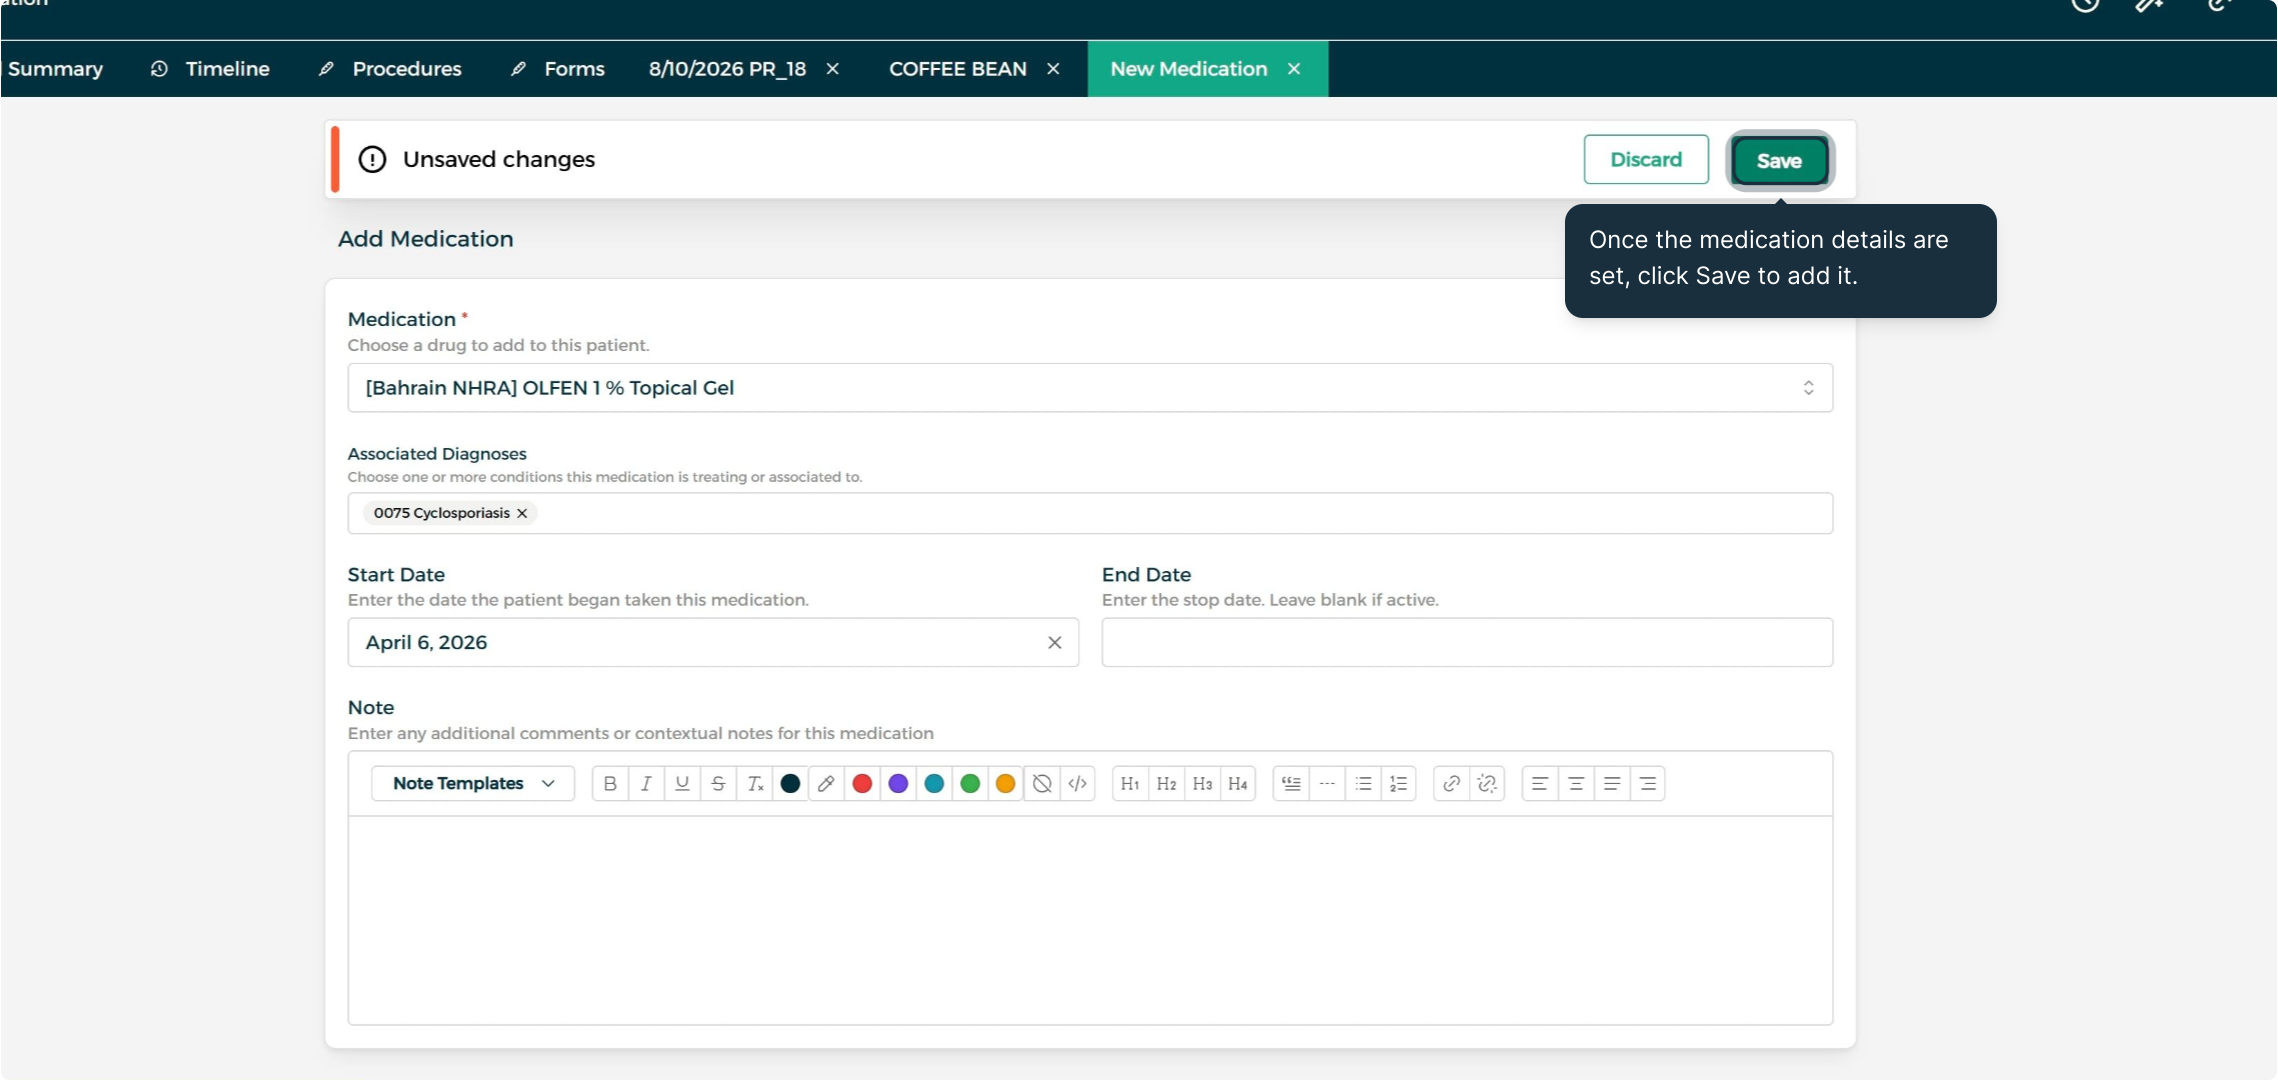
Step 2: Fill In and Save the Medication
With the medication selected and linked to a diagnosis if applicable, click Save.
Diagnoses
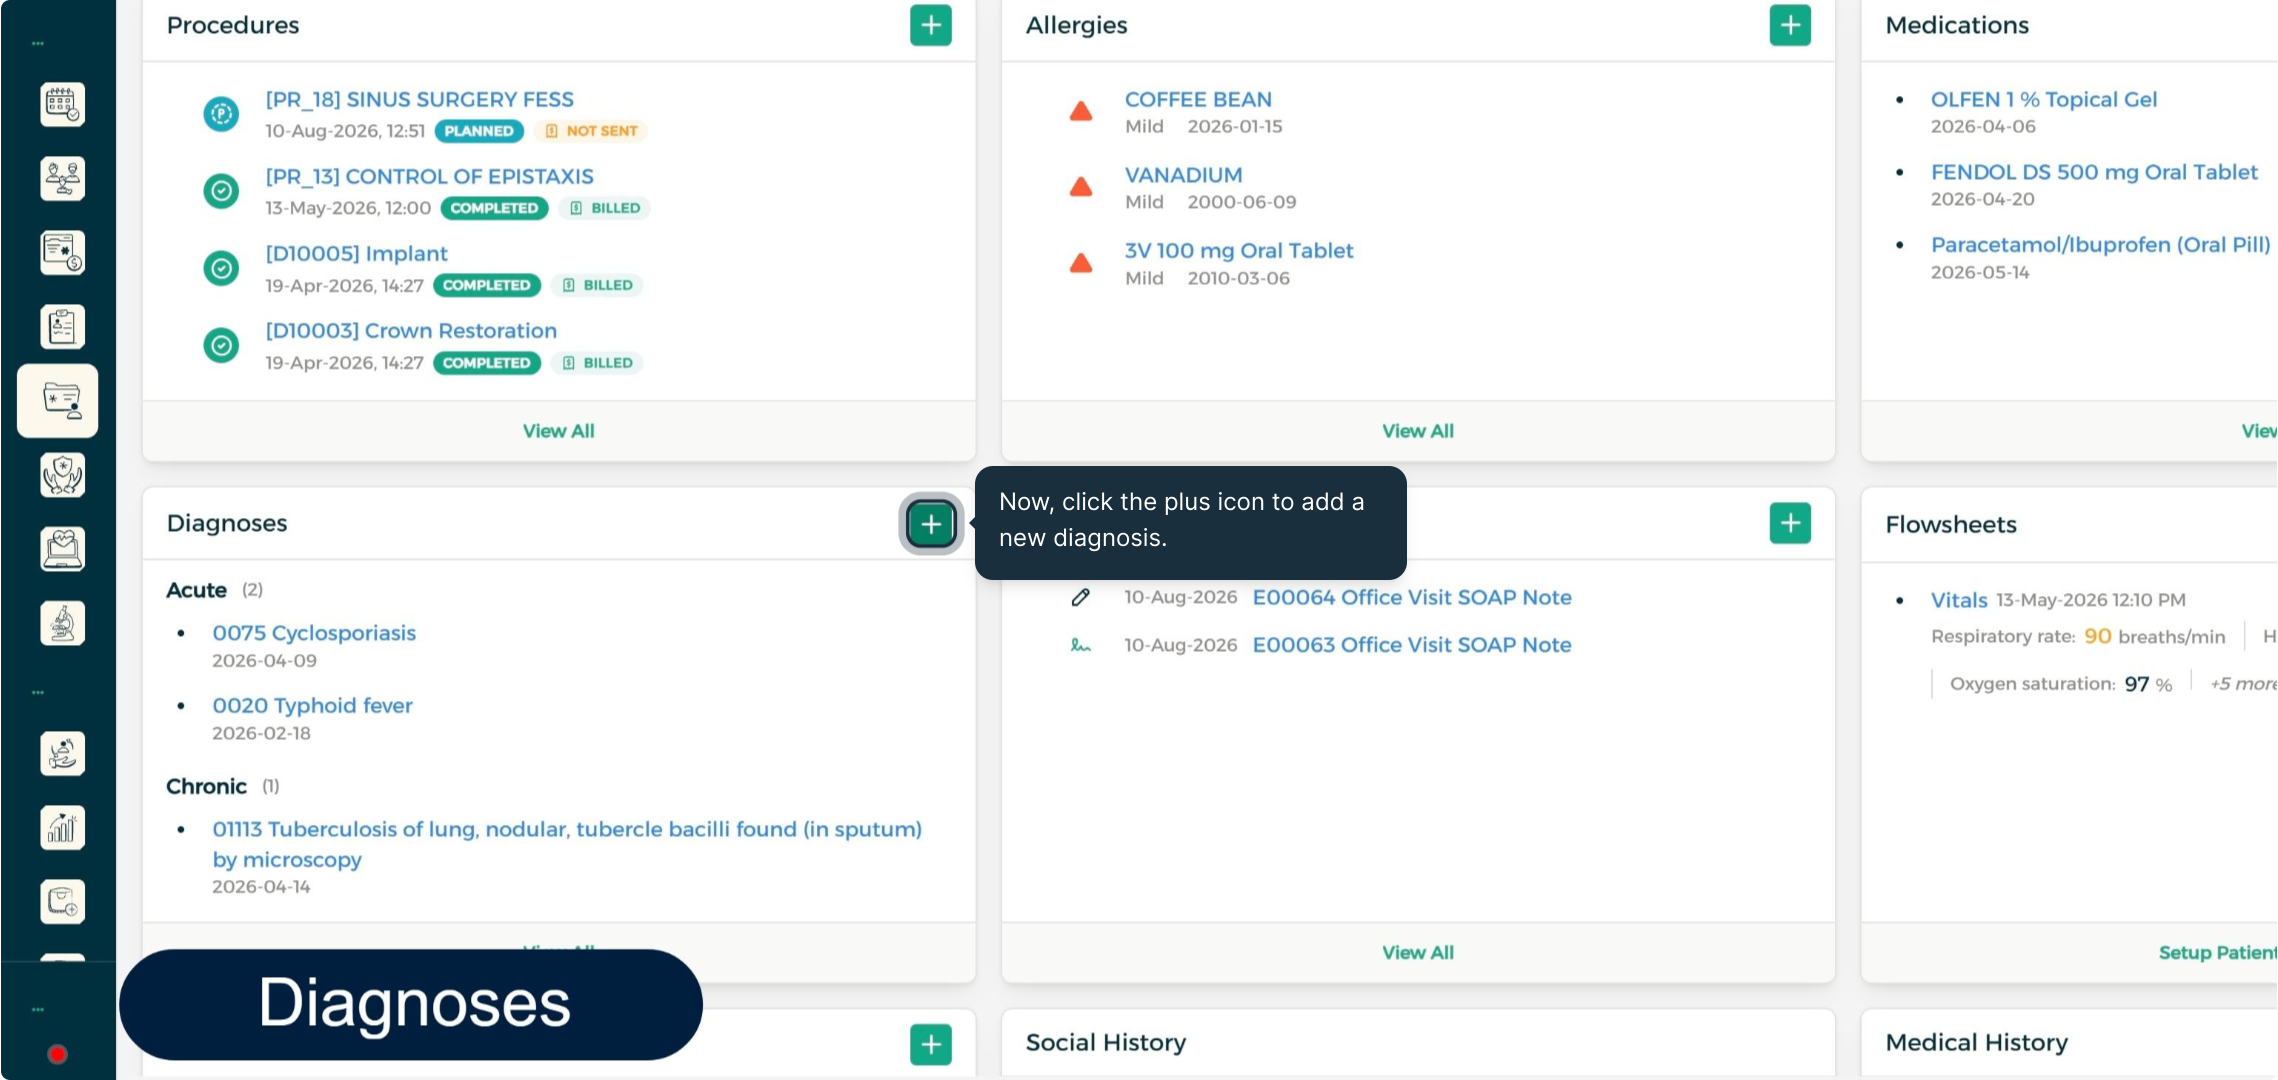
Step 1: Add a New Diagnosis
Click the plus icon on the Diagnoses card to add a new diagnosis.
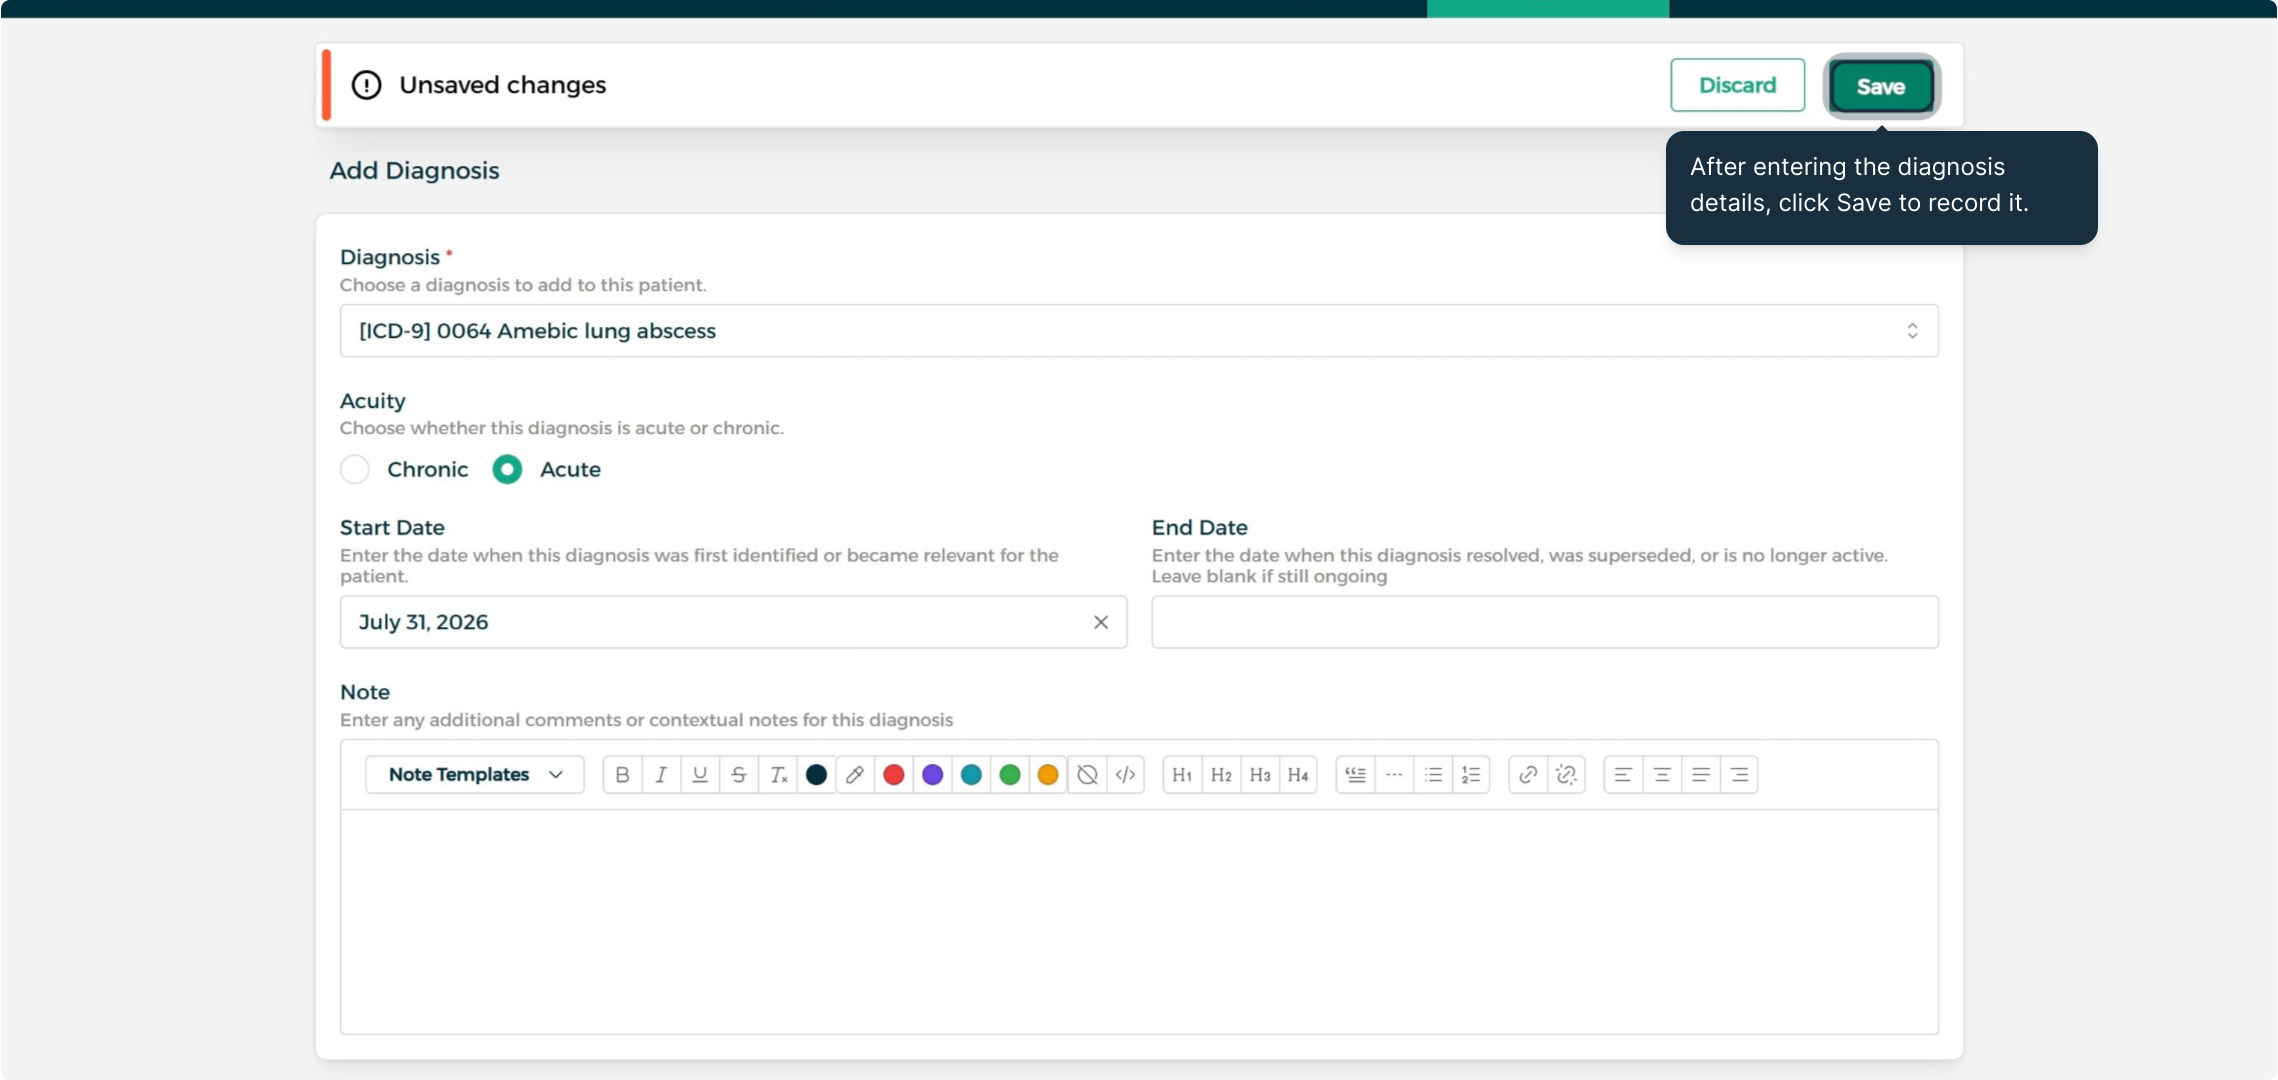
Step 2: Fill In and Save the Diagnosis
With the diagnosis chosen and flagged as Acute or Chronic, click Save.
Encounters
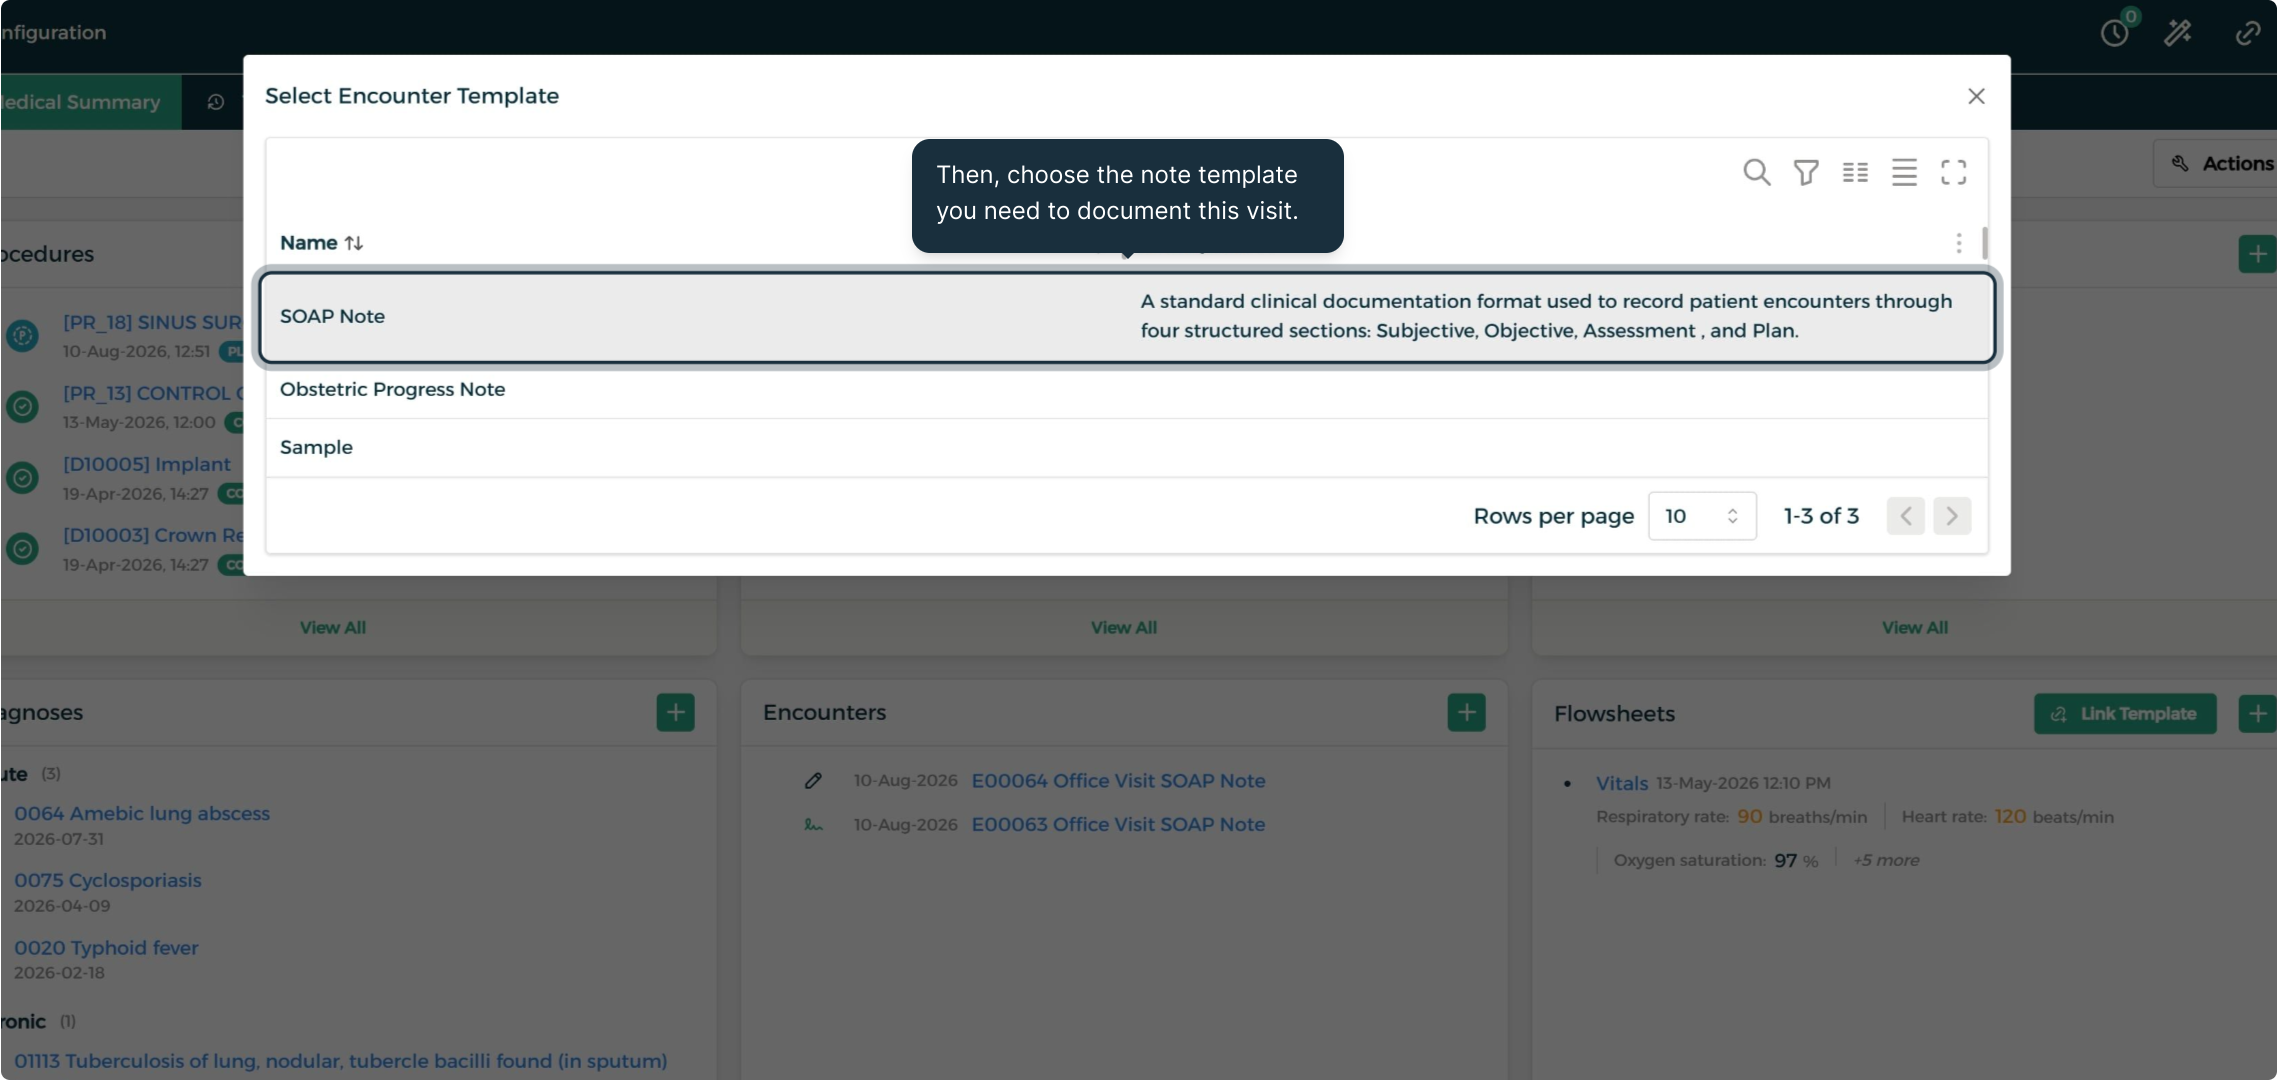
Step 1: Start a New Encounter
Click the plus icon on the Encounters card and choose the note template that fits this visit — or build a custom one from the Configuration tab.
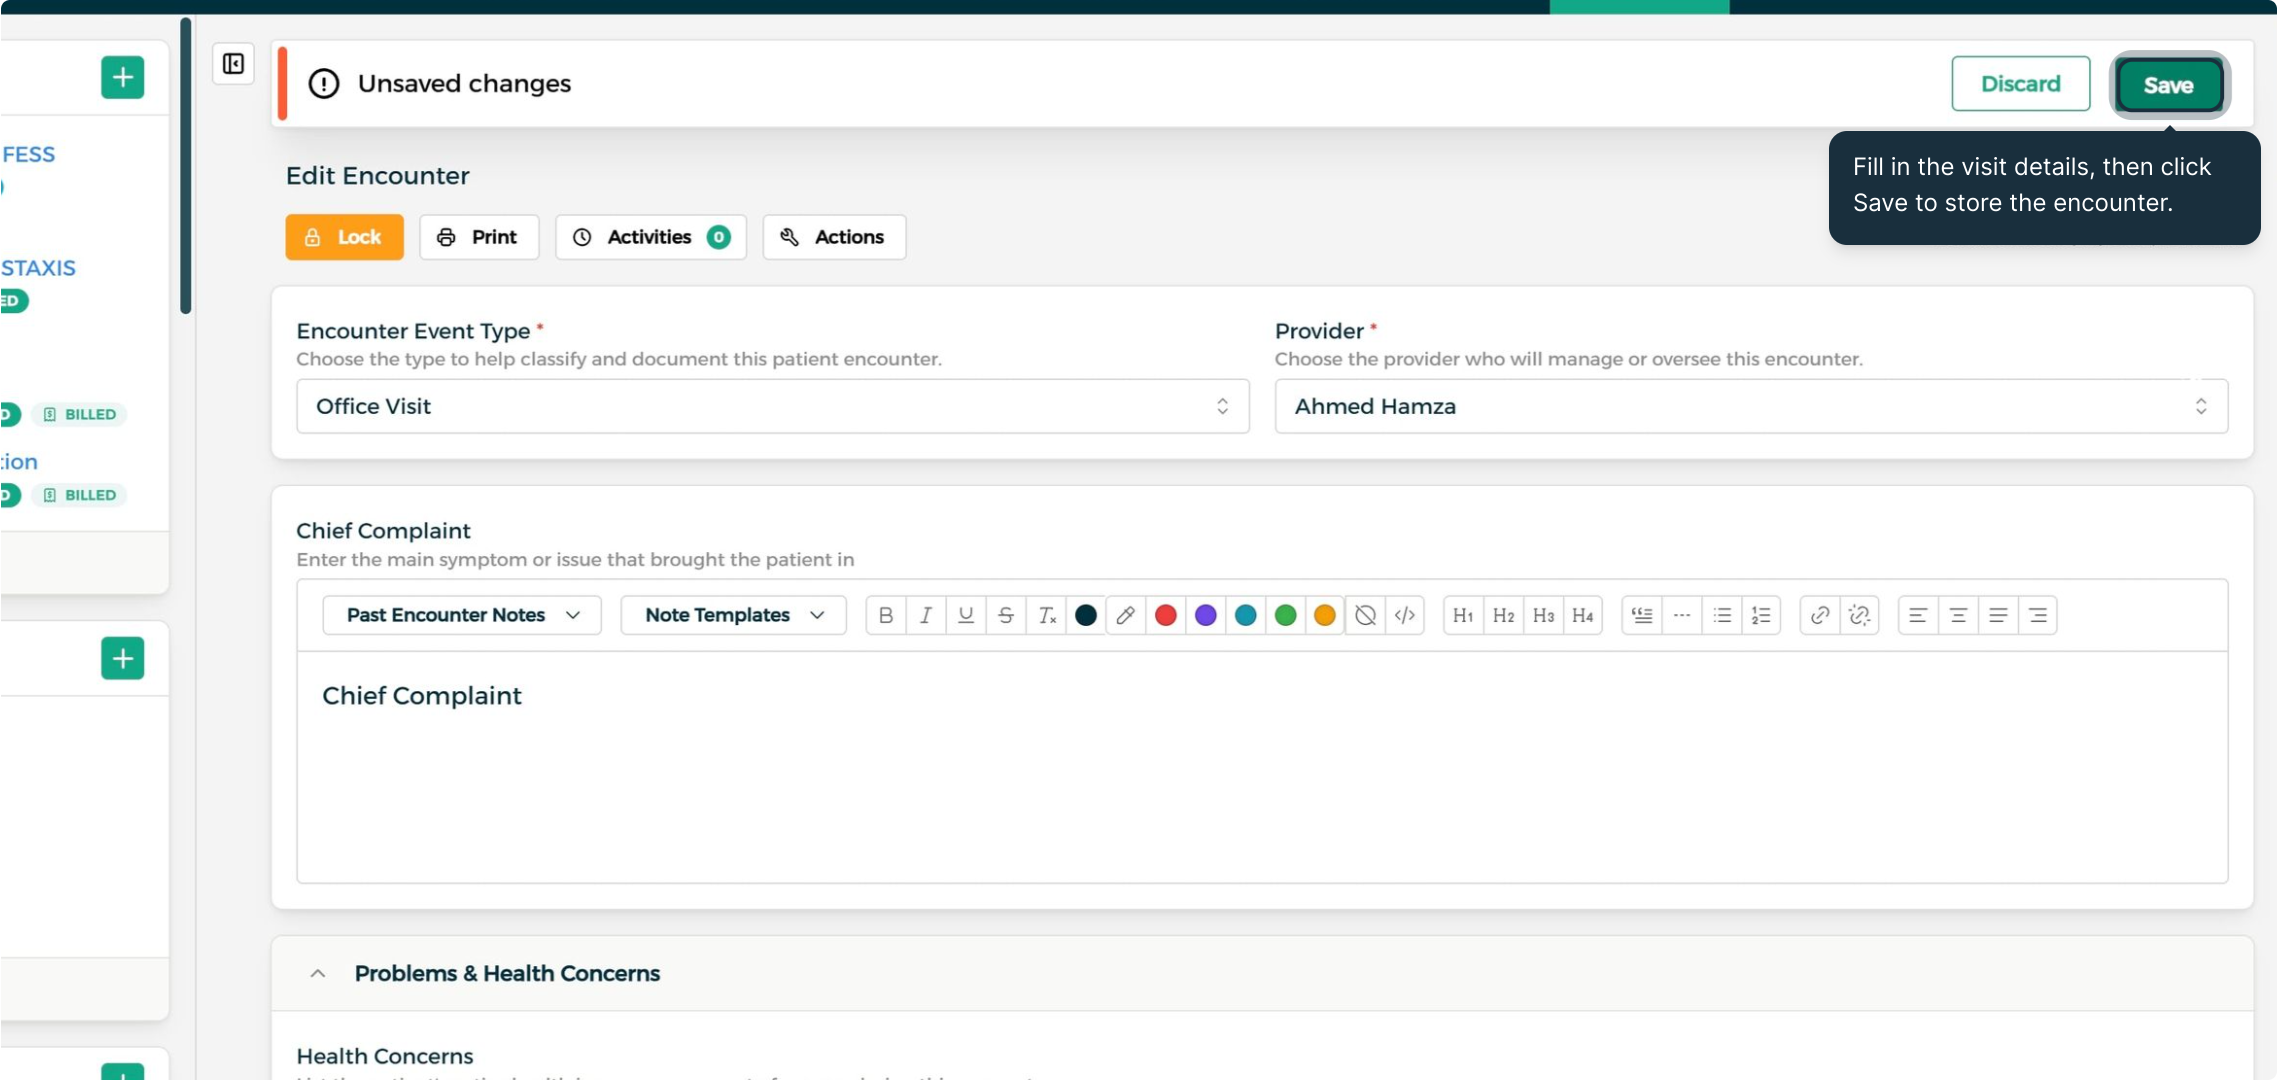
Step 2: Document and Save the Encounter
With the encounter details filled in, click Save to store it.
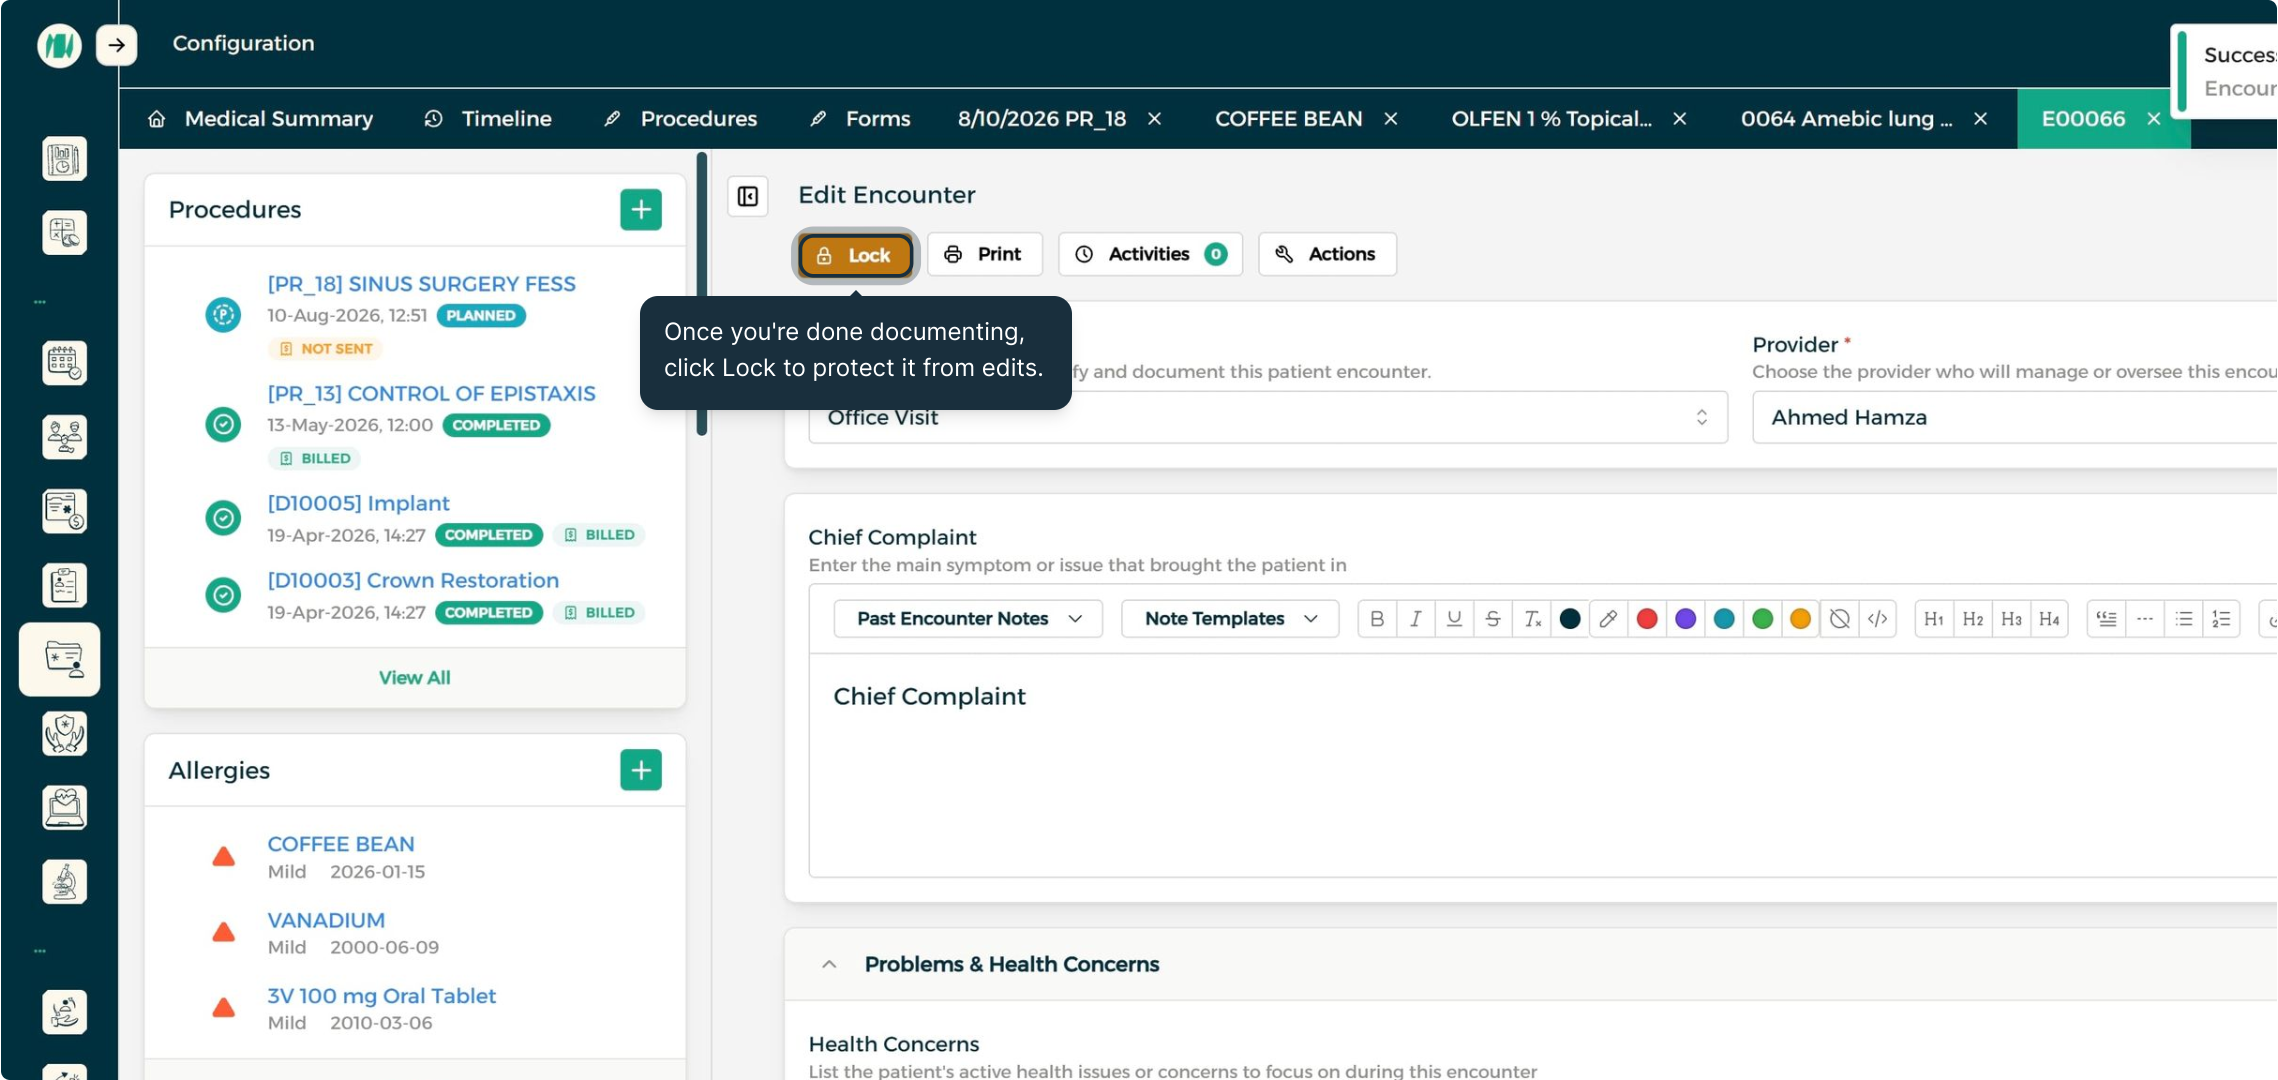
Step 3: Lock the Encounter
Once documentation is complete, click Lock to protect the encounter from further edits.
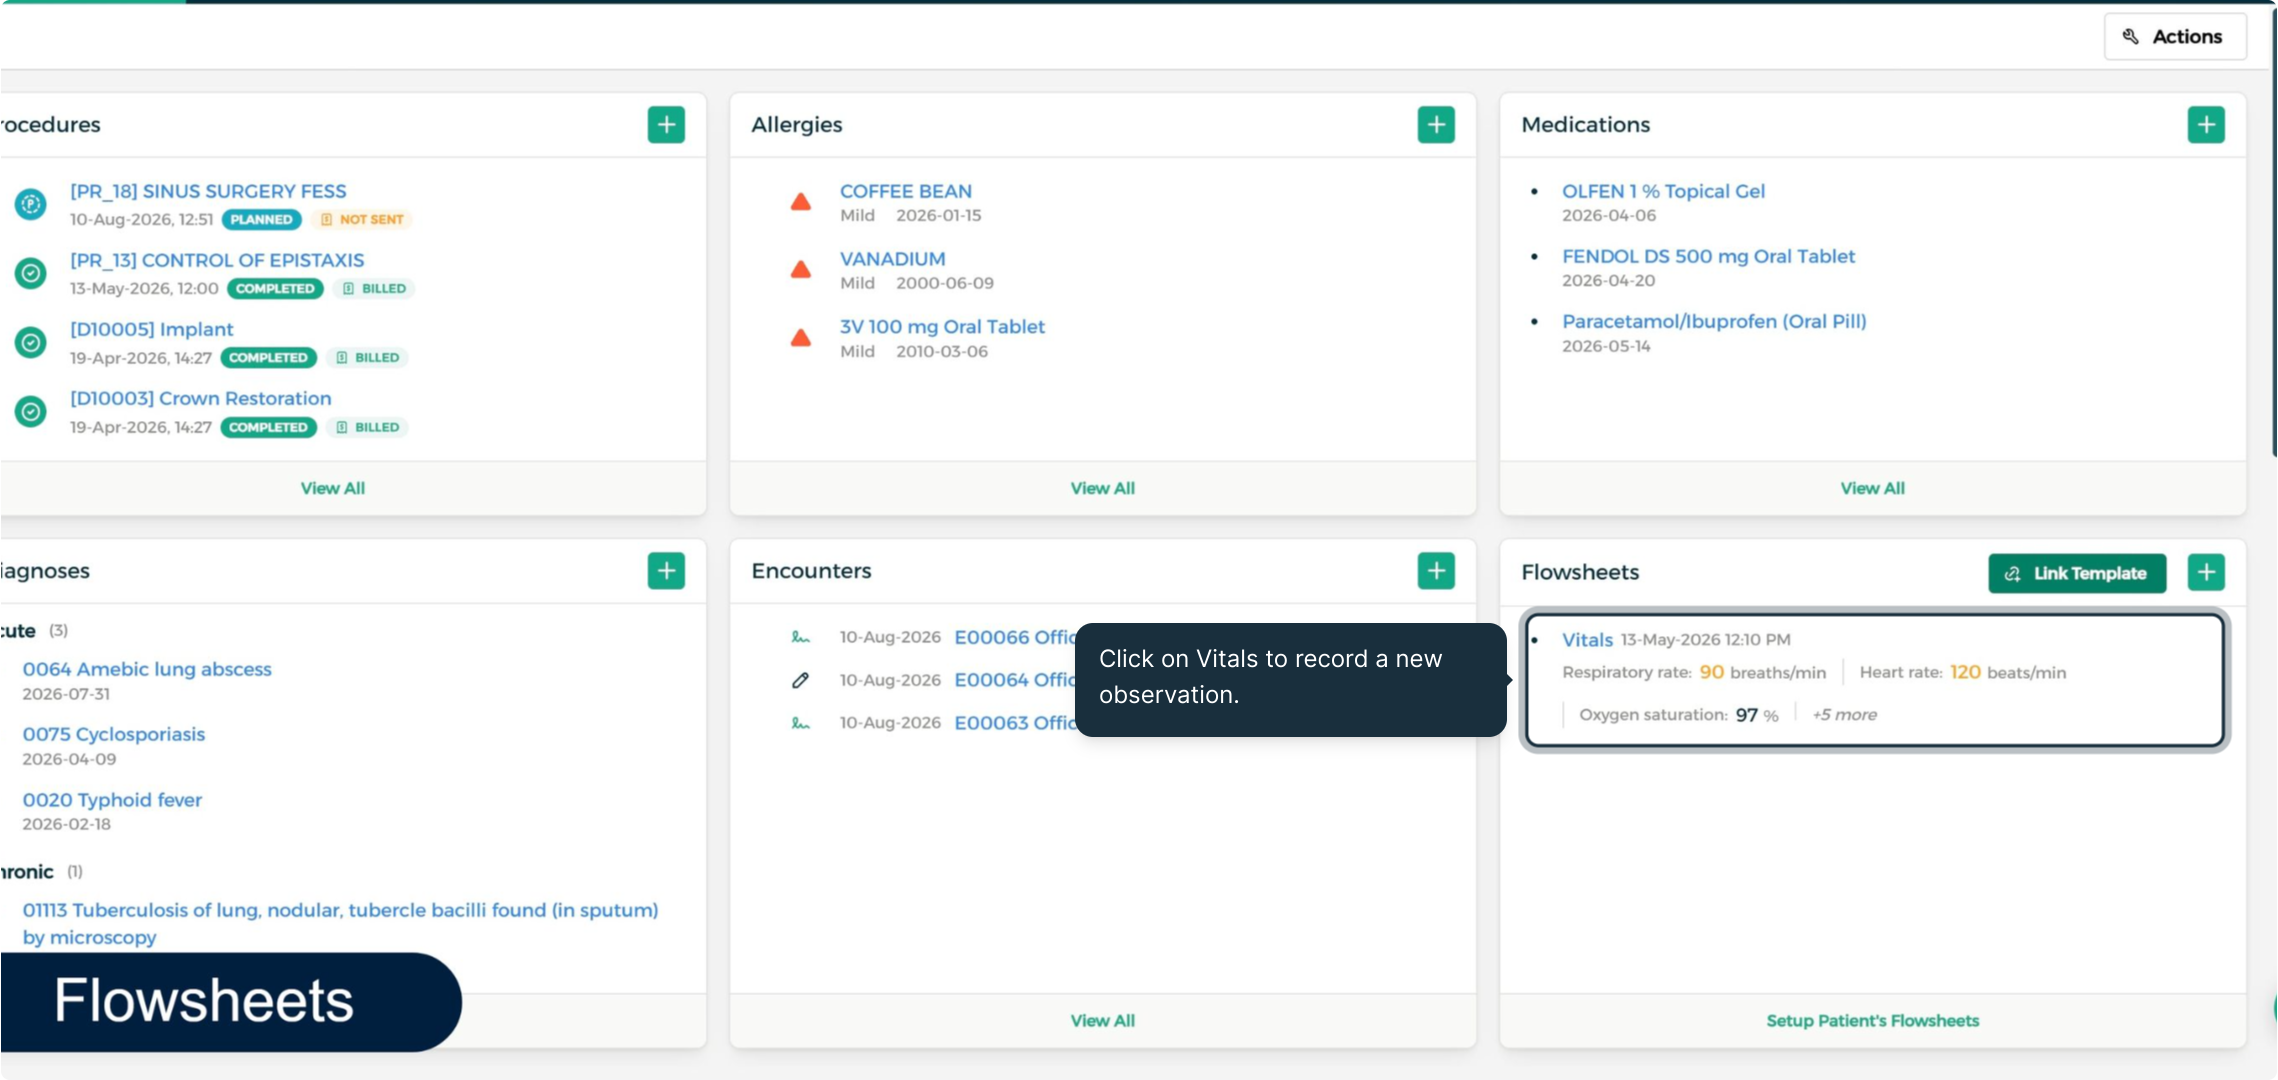
Flowsheets
Step 1: Link a Flowsheet Template
Move to the Flowsheets card and link a flowsheet template to the patient.
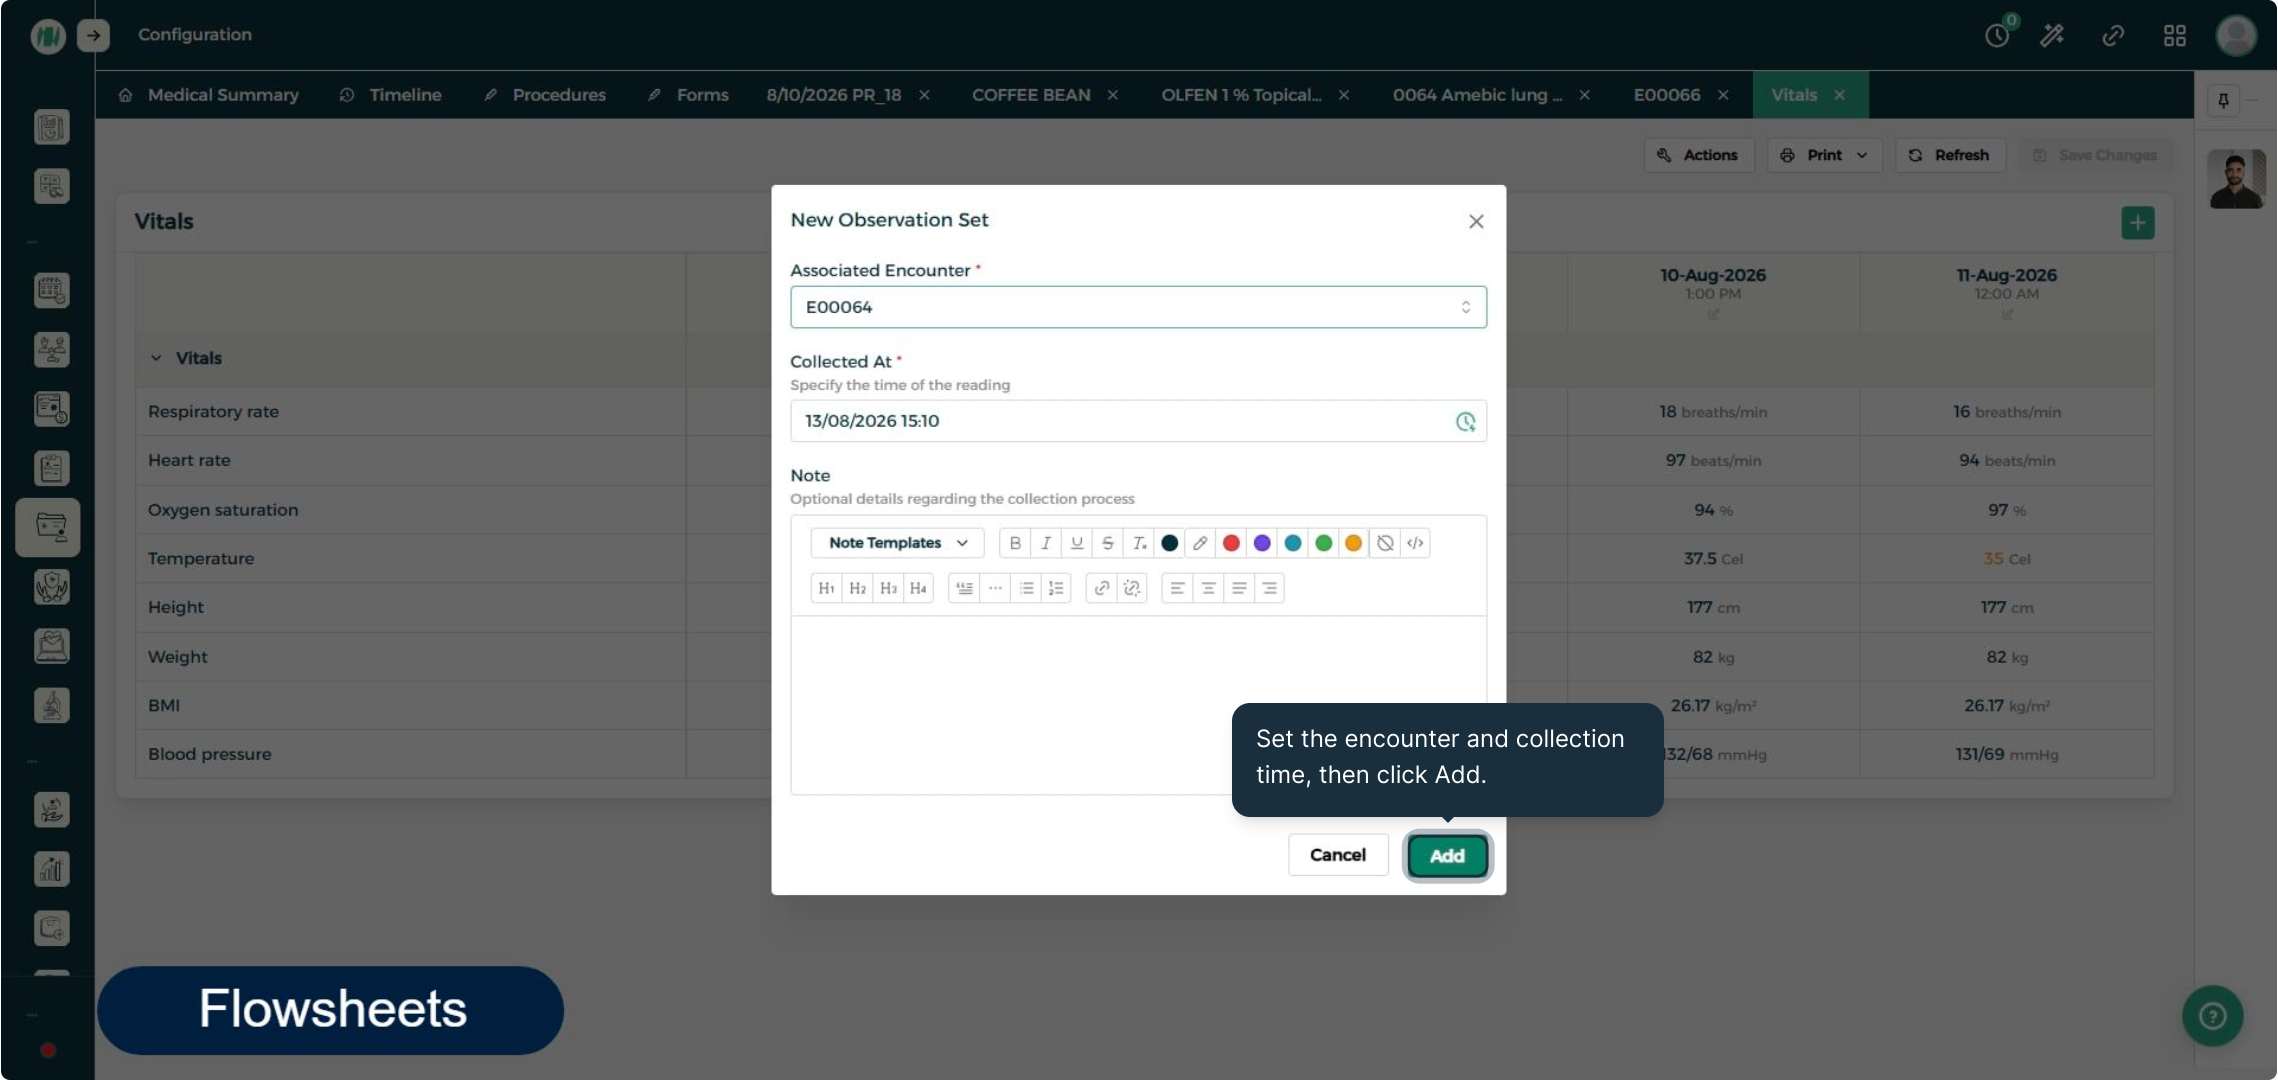
Step 2: Fill In and Save an Observation
Tie the reading to the relevant encounter and note the collection time, then click Add and Save Changes to lock it into the chart.
Observation Charts
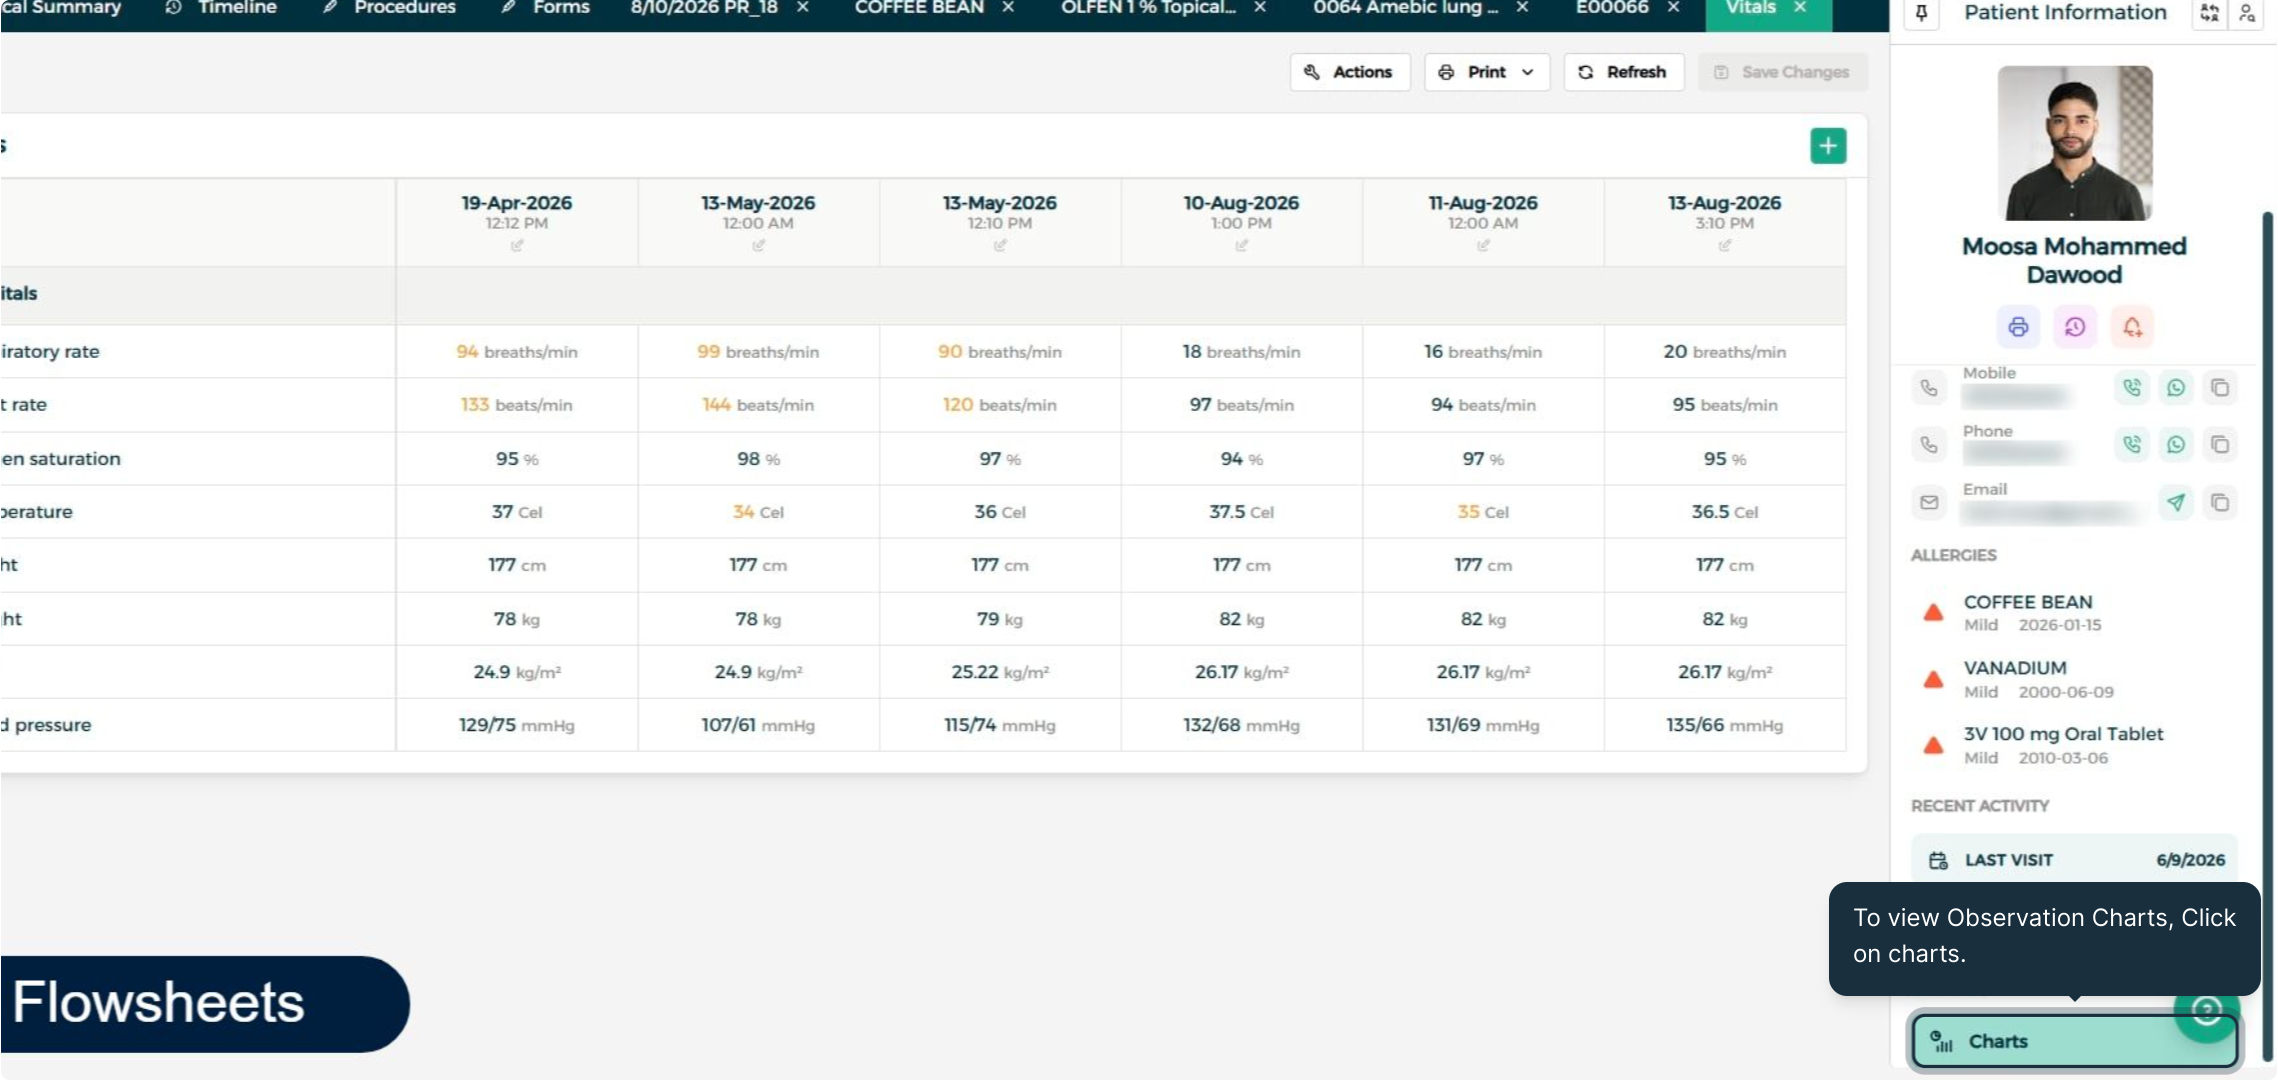
Step 1: Open Observation Charts
Click Charts from the patient profile panel to view trends over time.
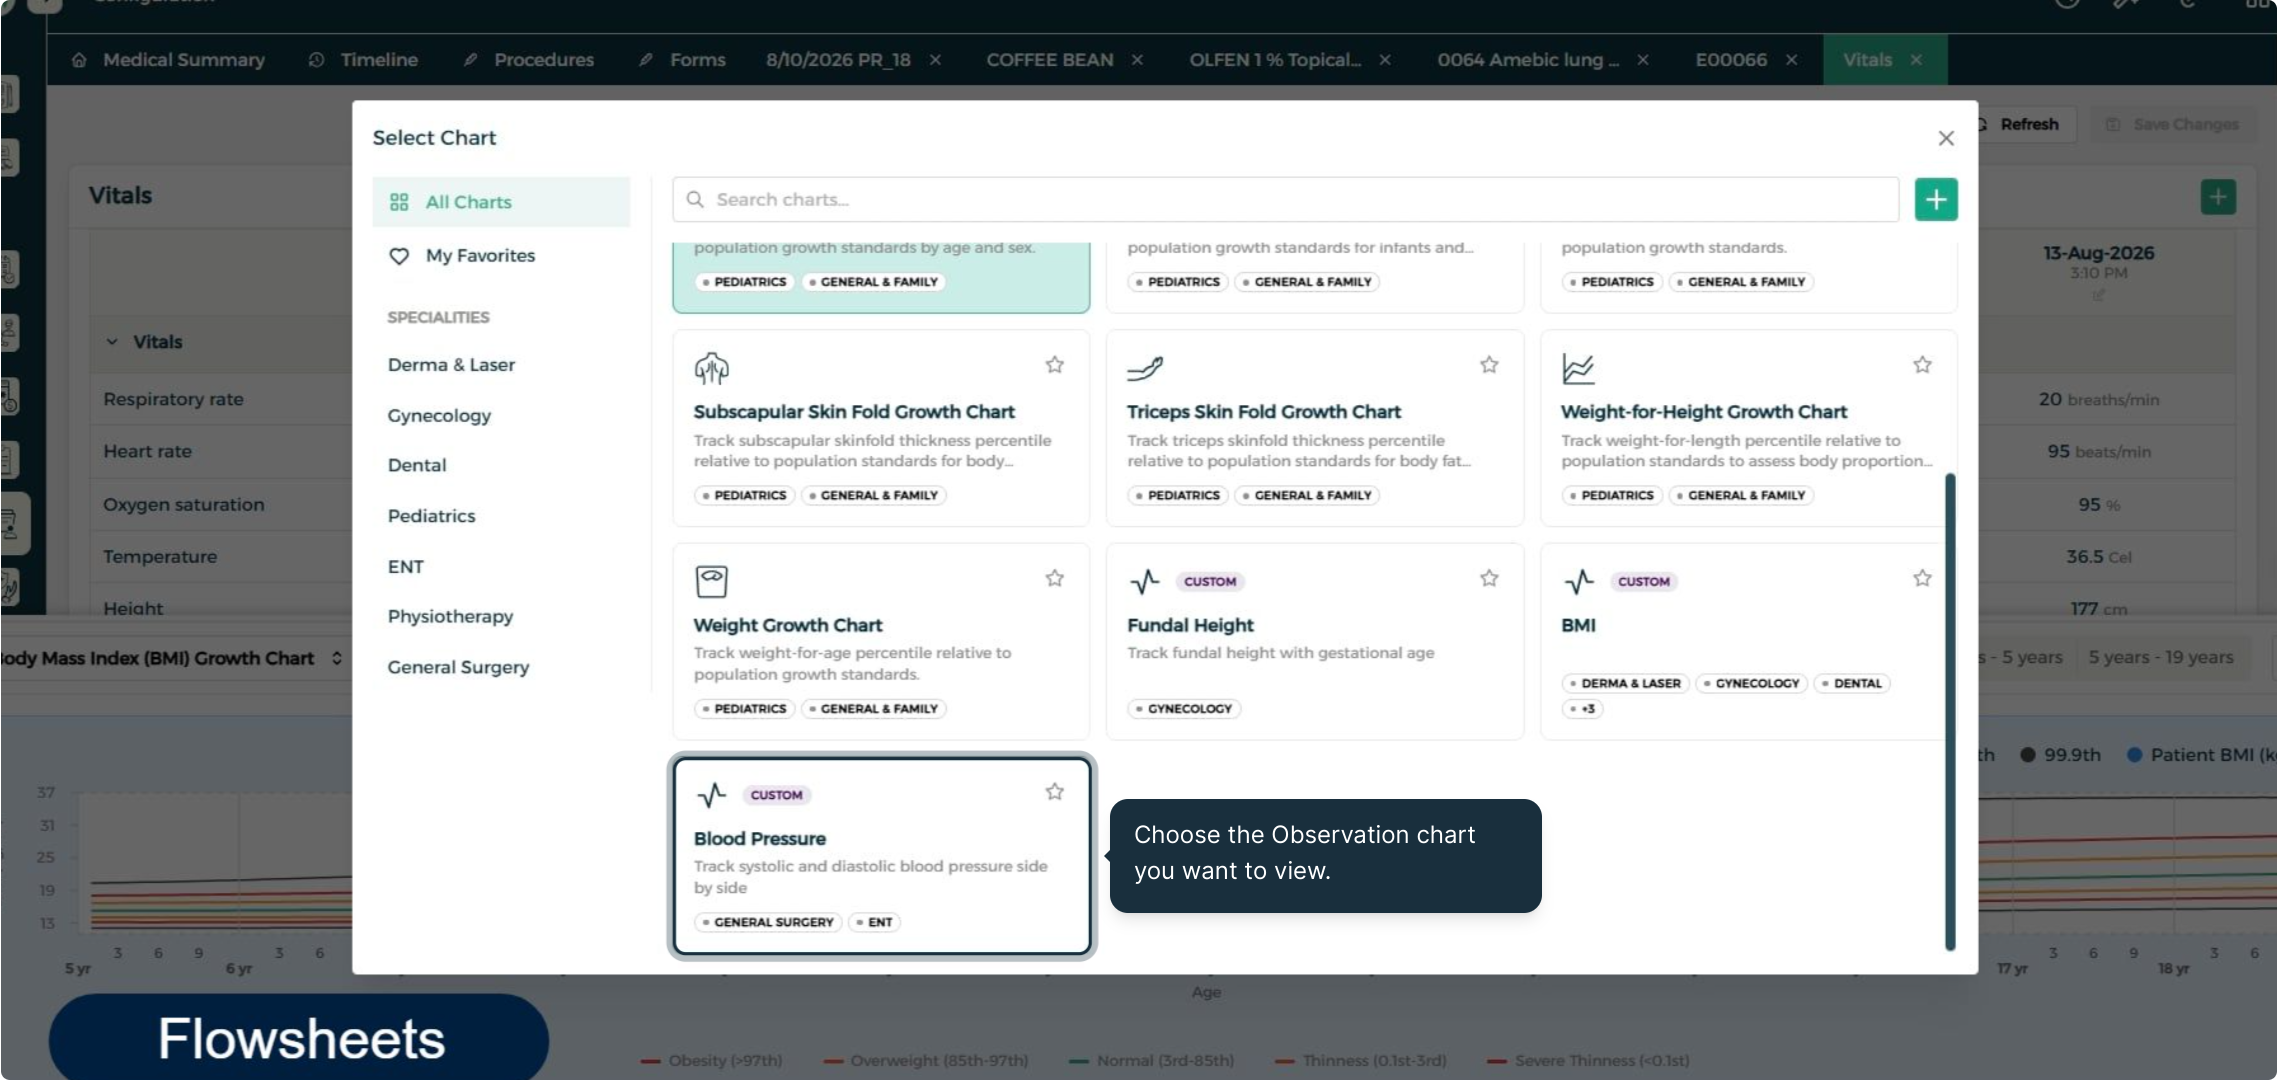
Step 2: Select a Chart
Choose the observation chart you want to view — new charts can be created from the Configuration tab.
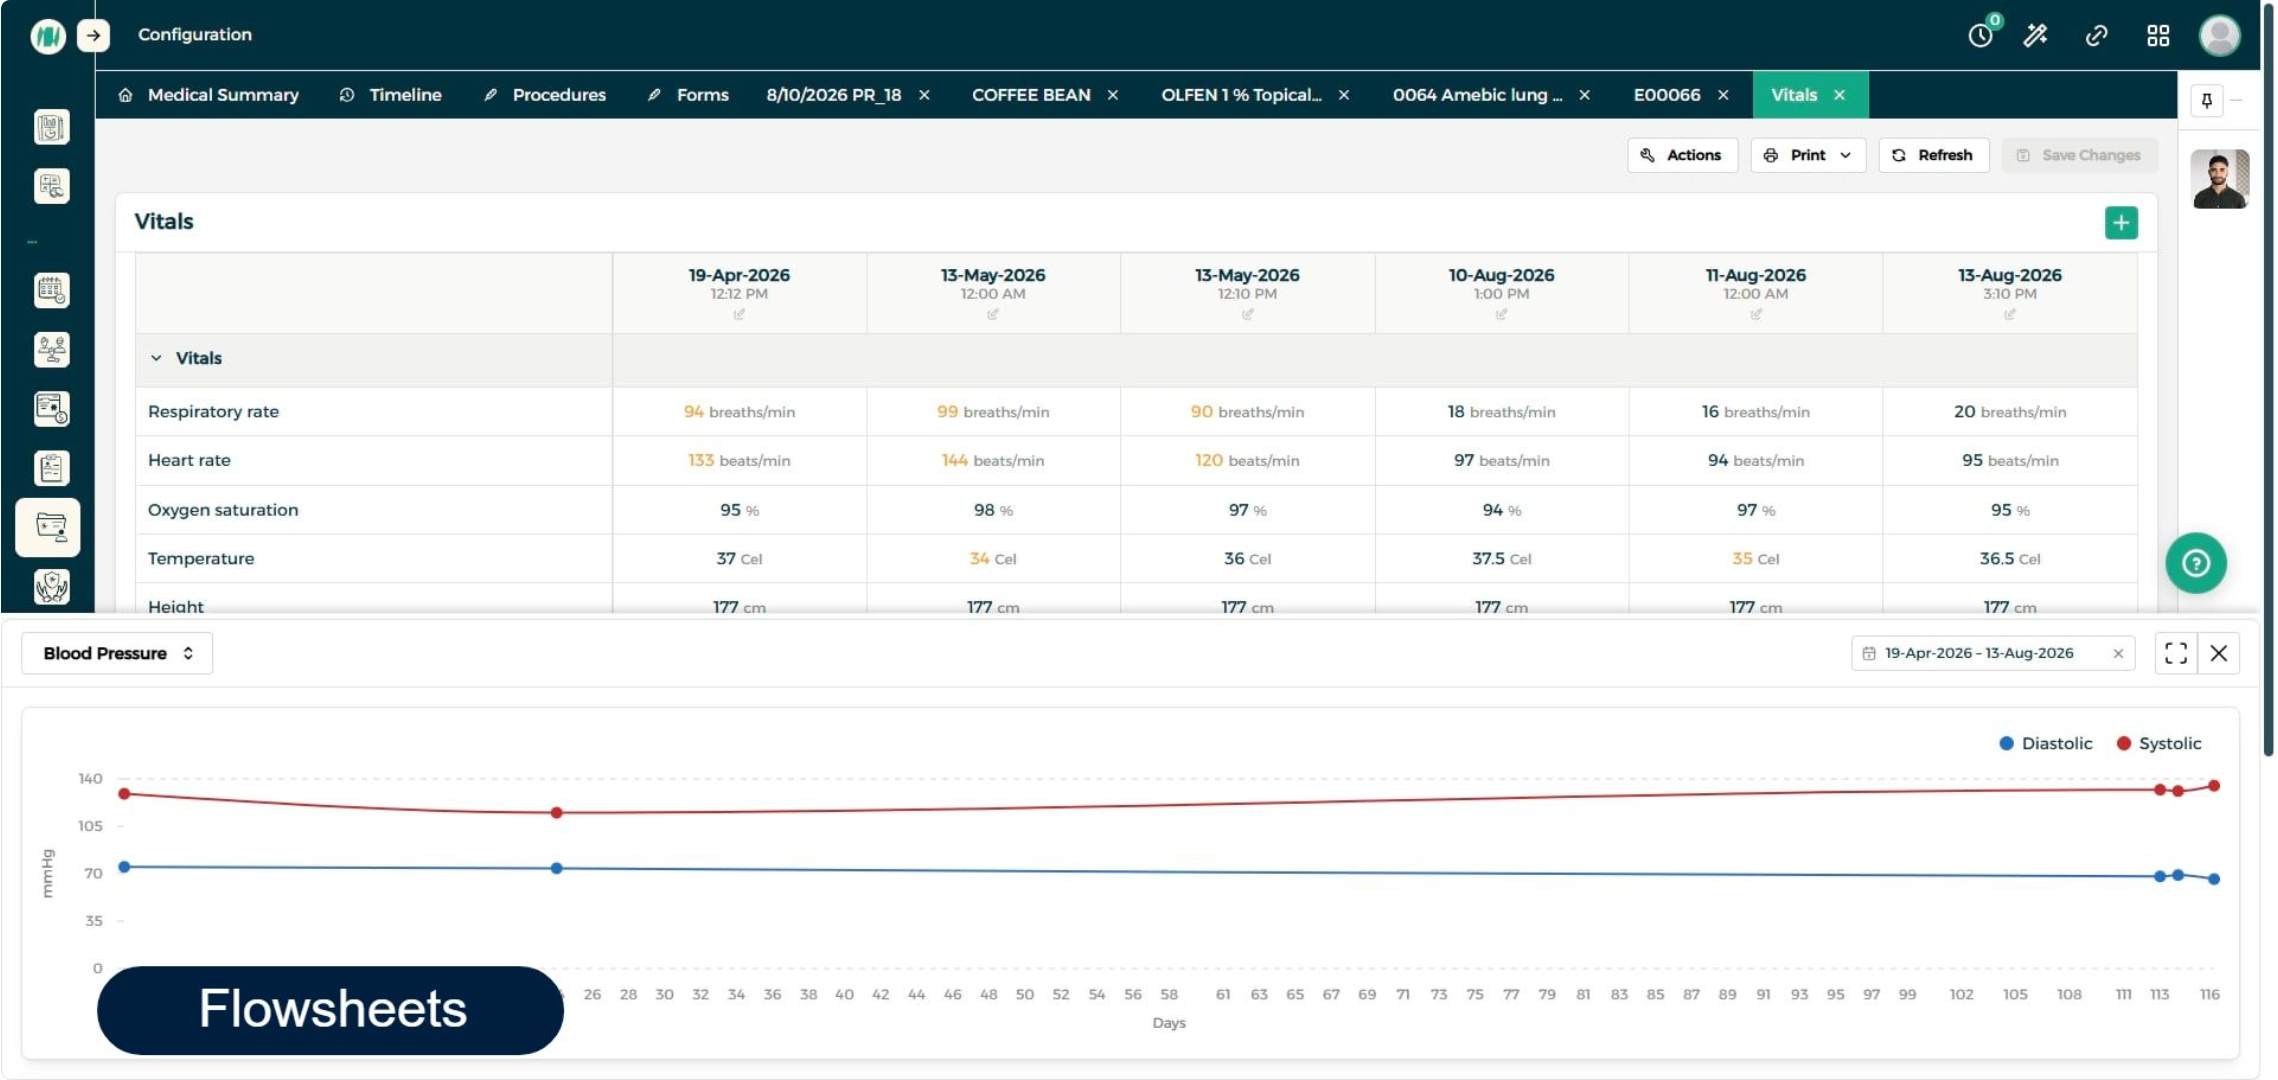
Step 3: View the Chart
The chart opens with the selected data plotted, giving an instant visual read on how the patient's readings are trending over time.
Medical Forms
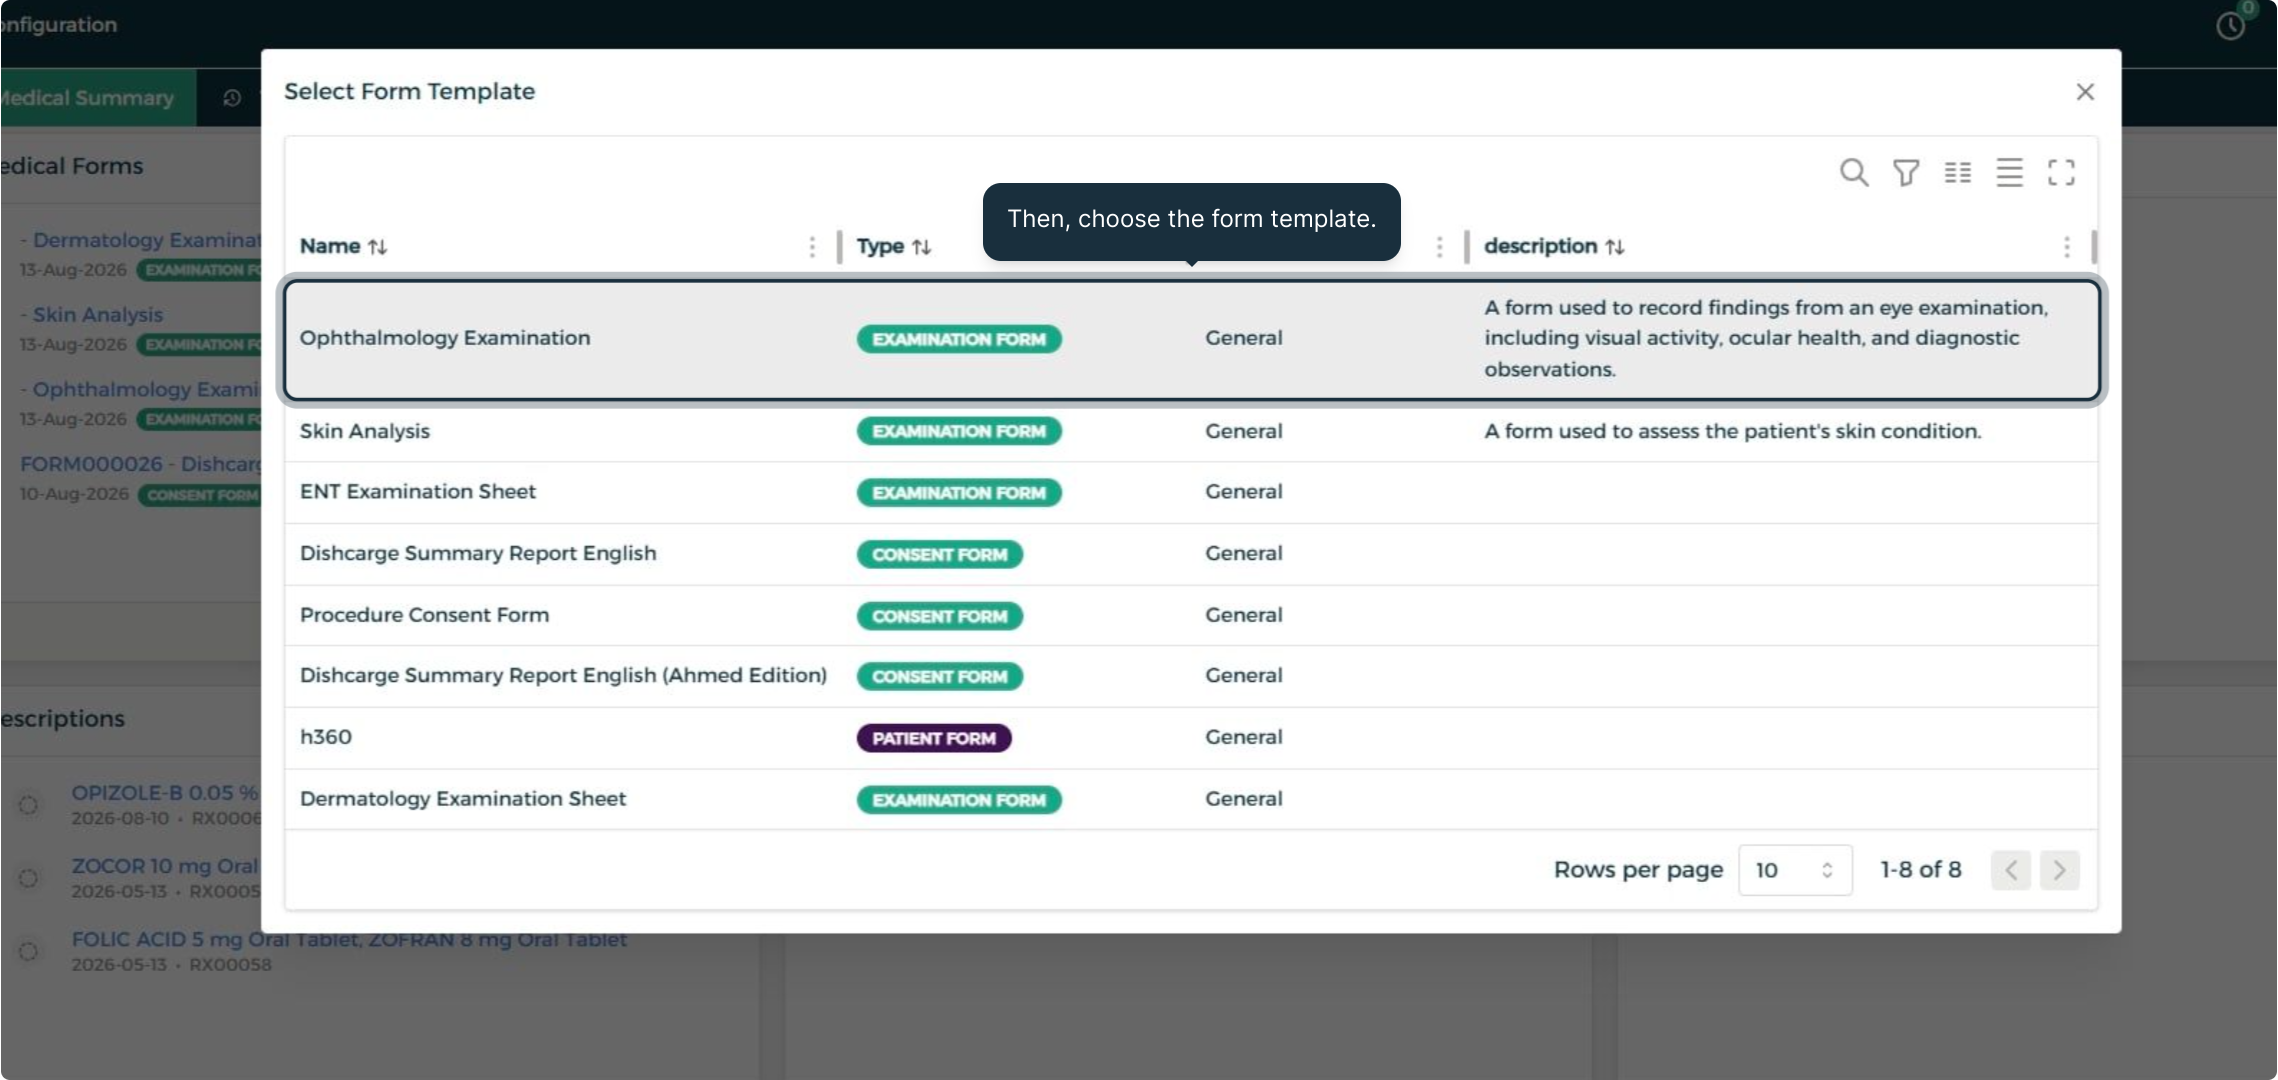
Step 1: Add a New Medical Form
Click the plus icon on the Medical Forms card and choose the form template that fits the purpose of this visit.
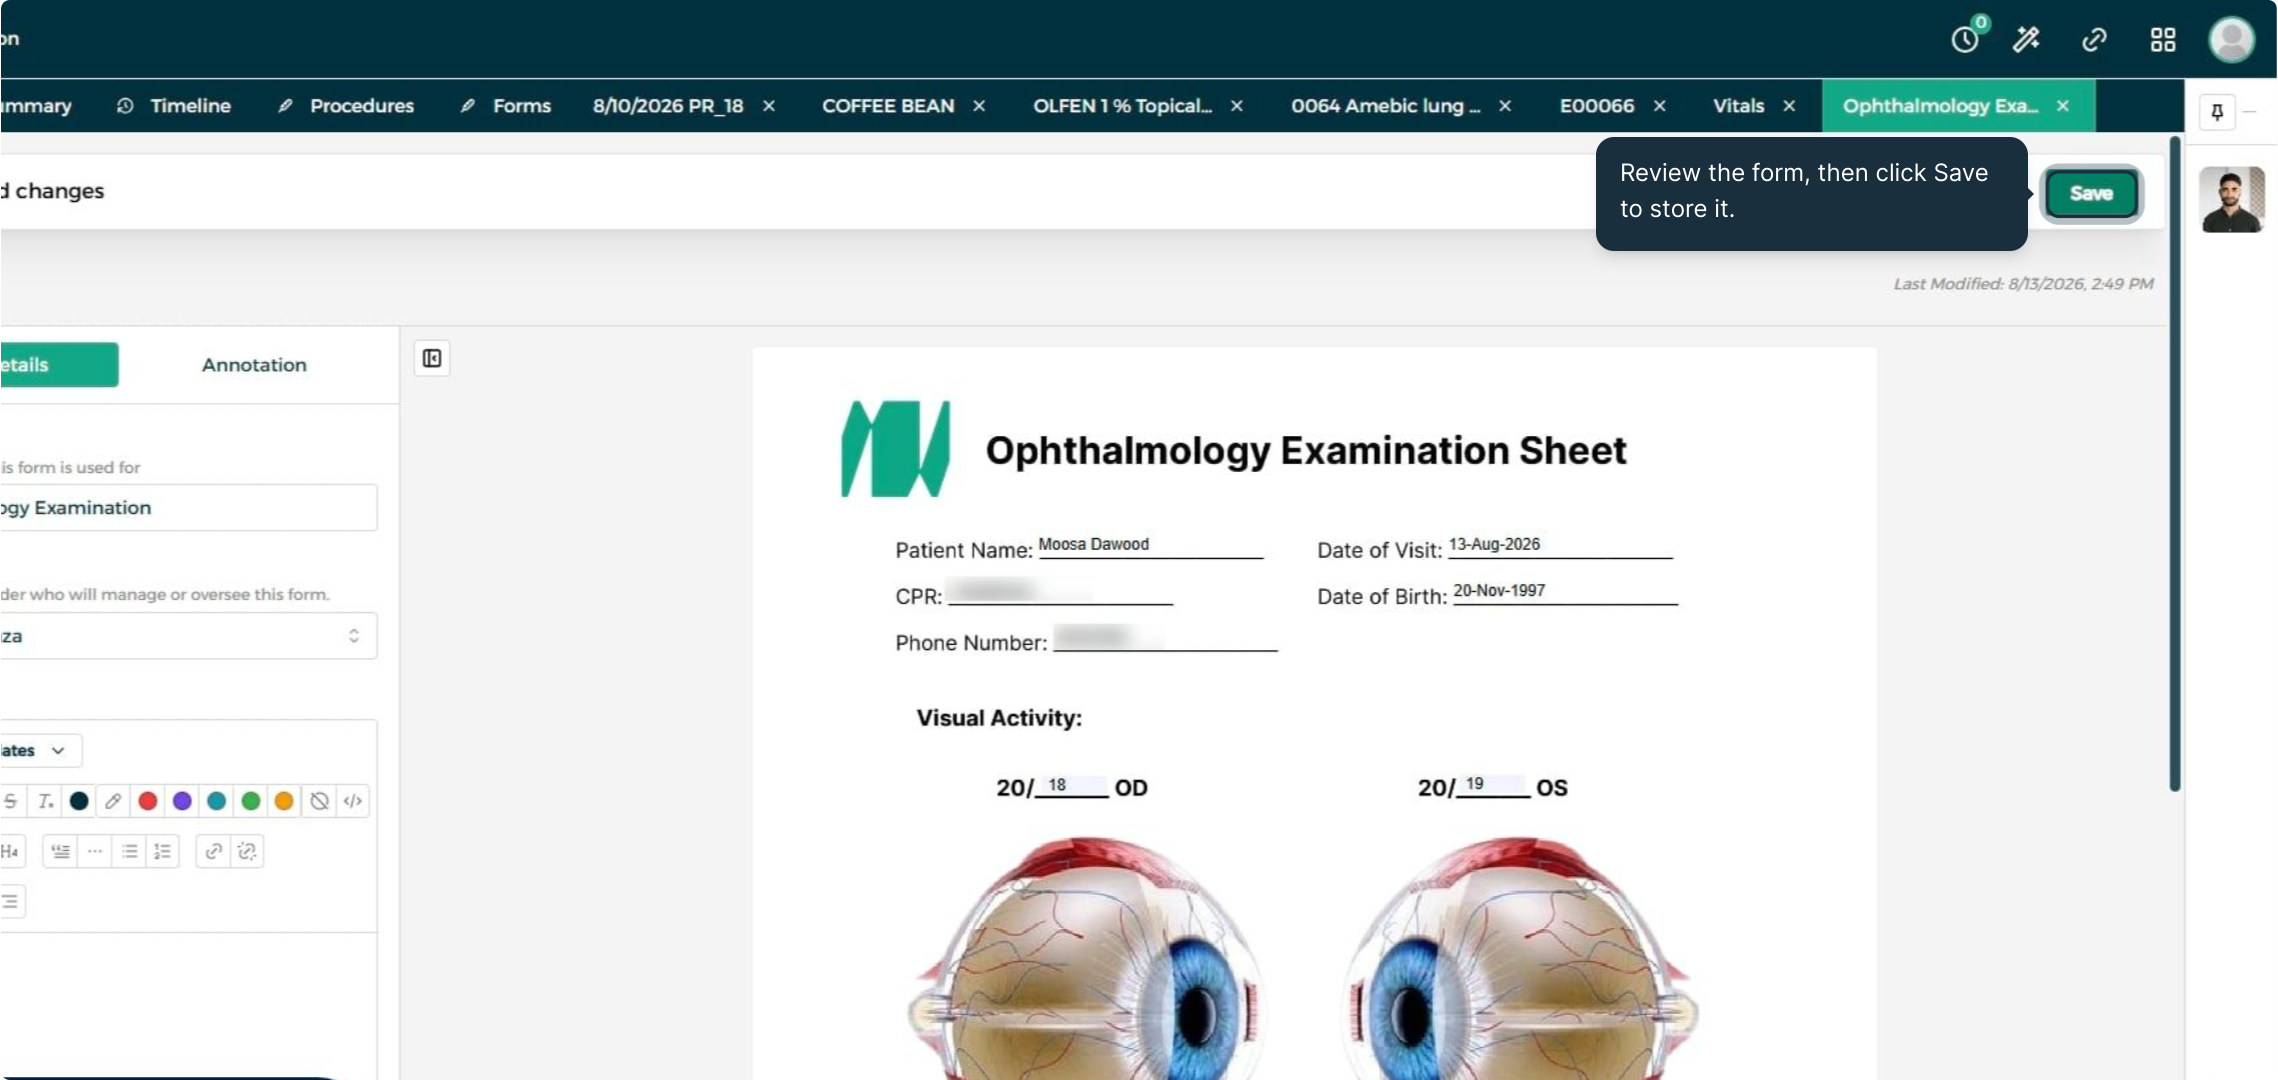
Step 2: Review and Save the Form
With the form filled in, click Save to store it in the patient's file.
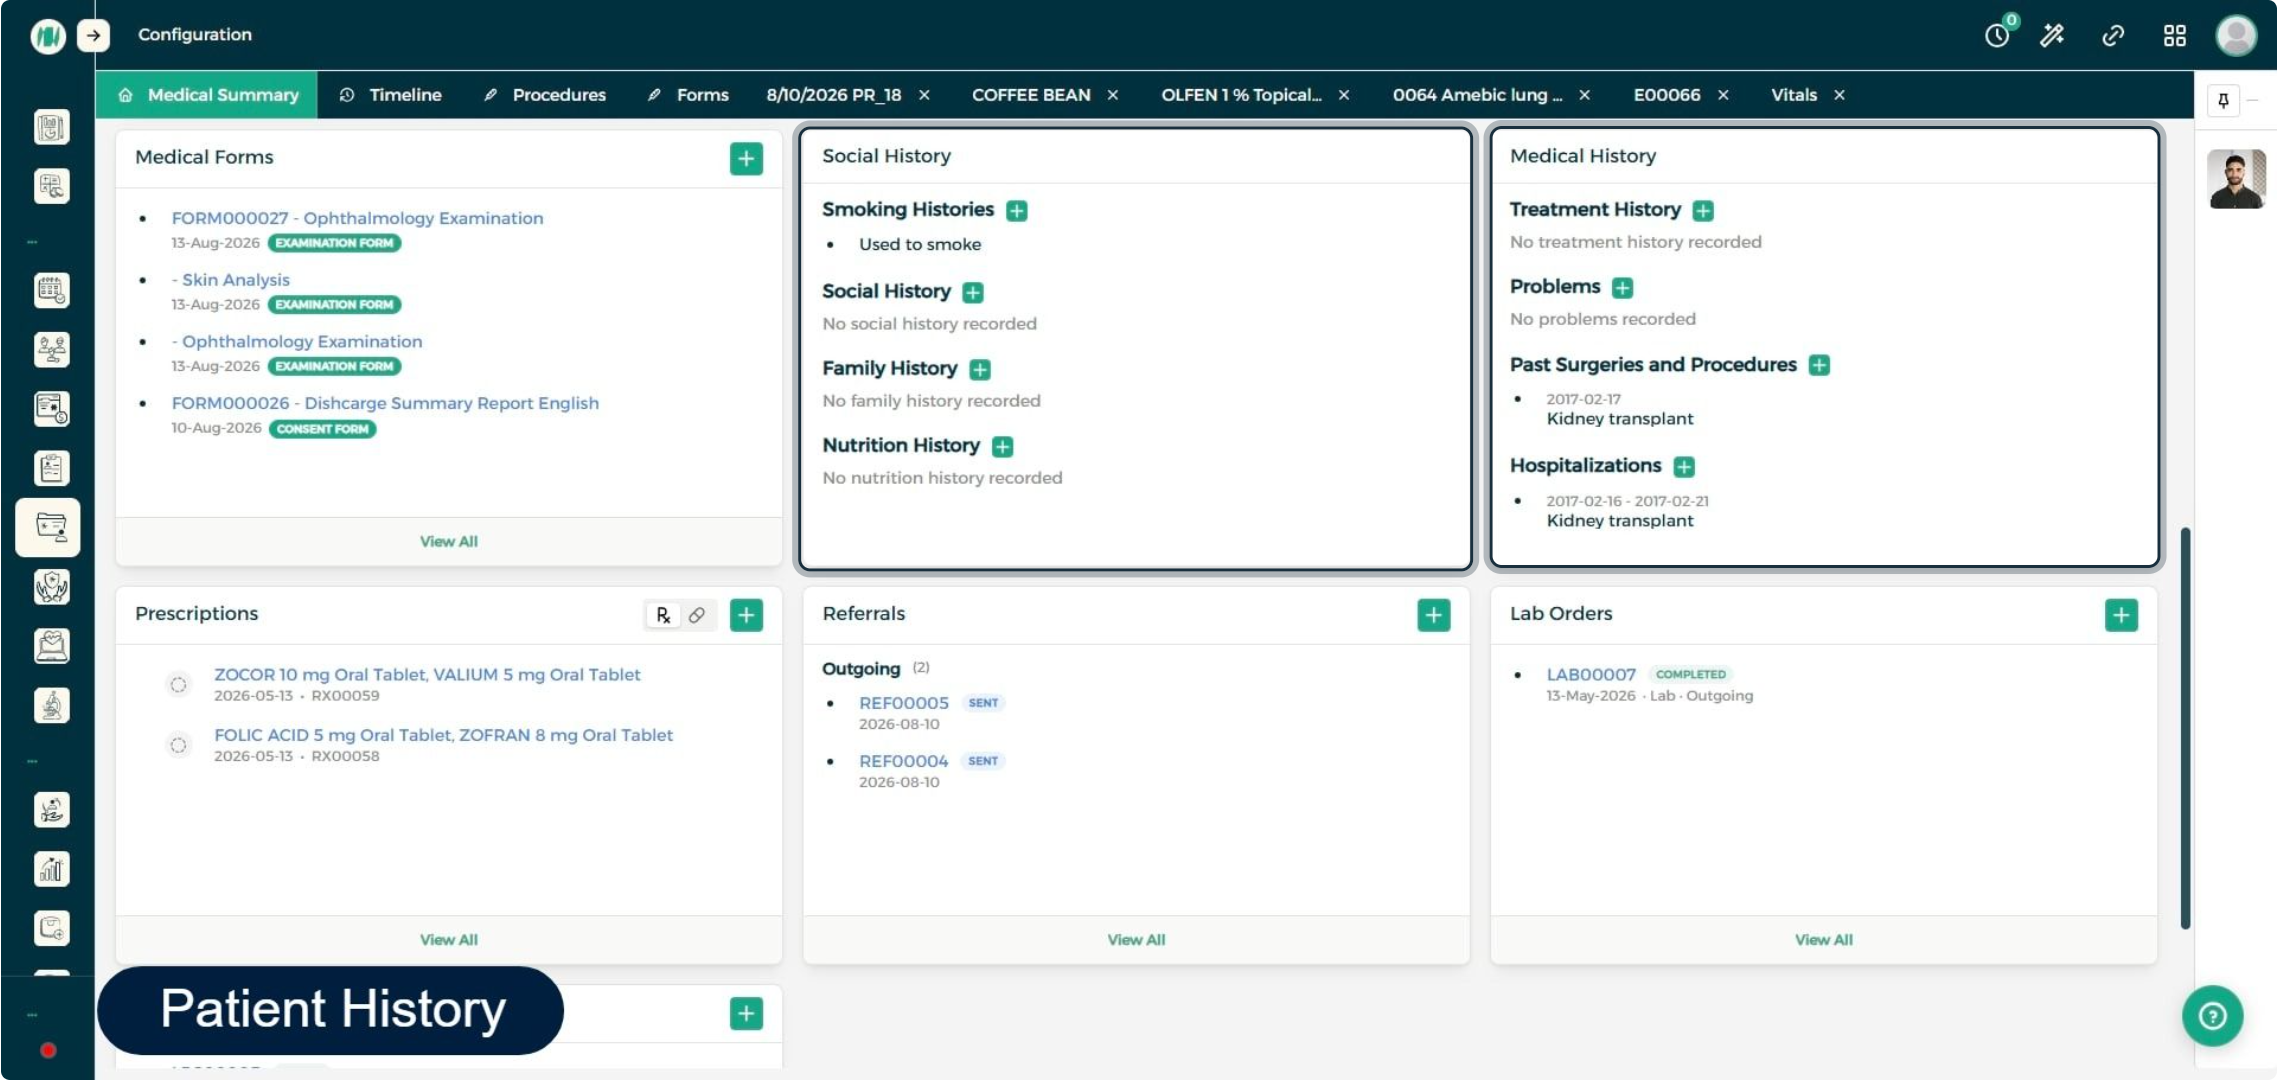
Social & Medical History
Step 1: Add a History Entry
Move to Social and Medical History, where the patient's full background is logged — for example, Family History.
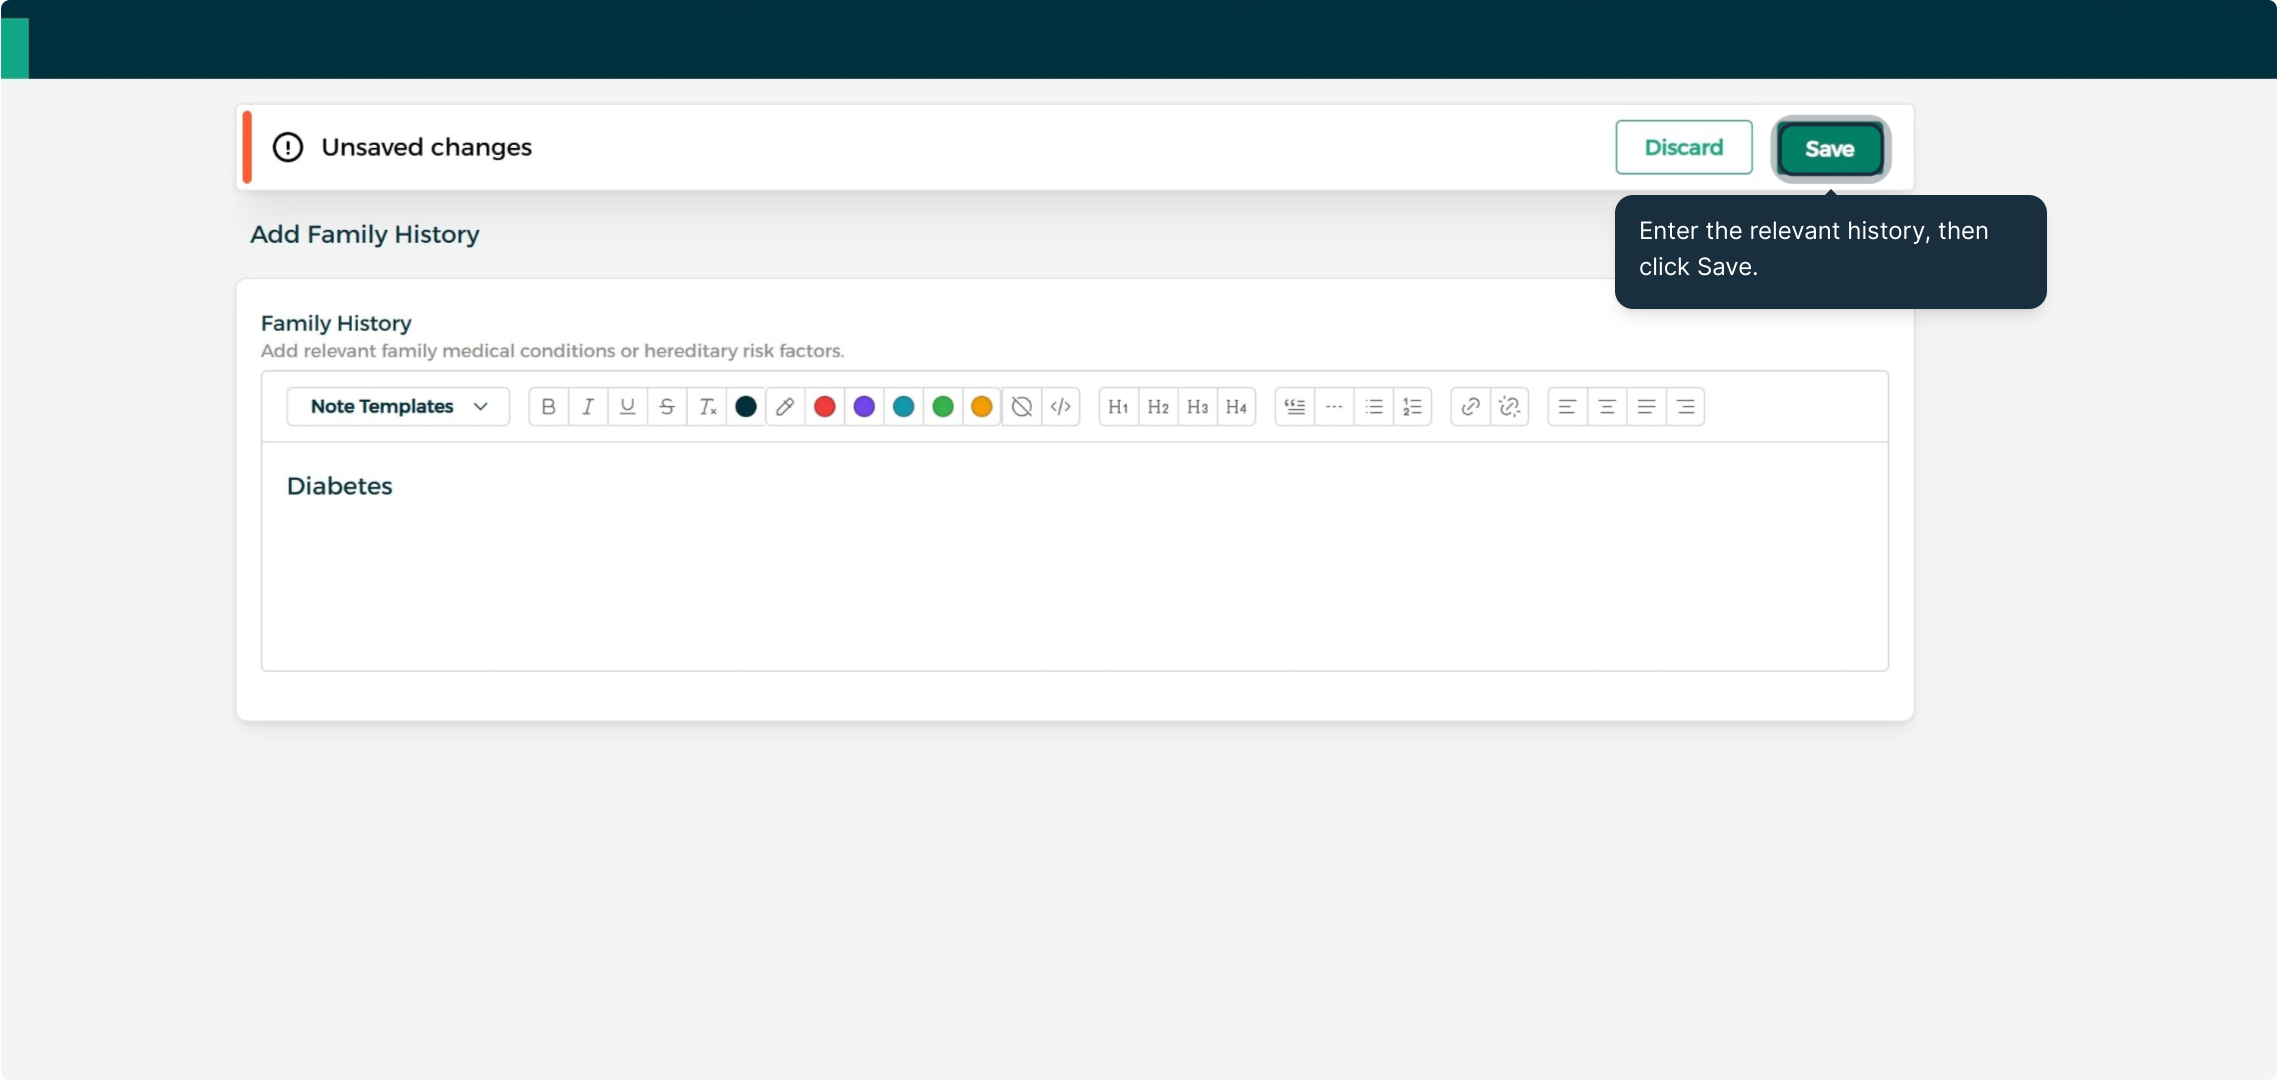
Step 2: Fill In and Save the History
With the relevant history entered, click Save.
Prescriptions
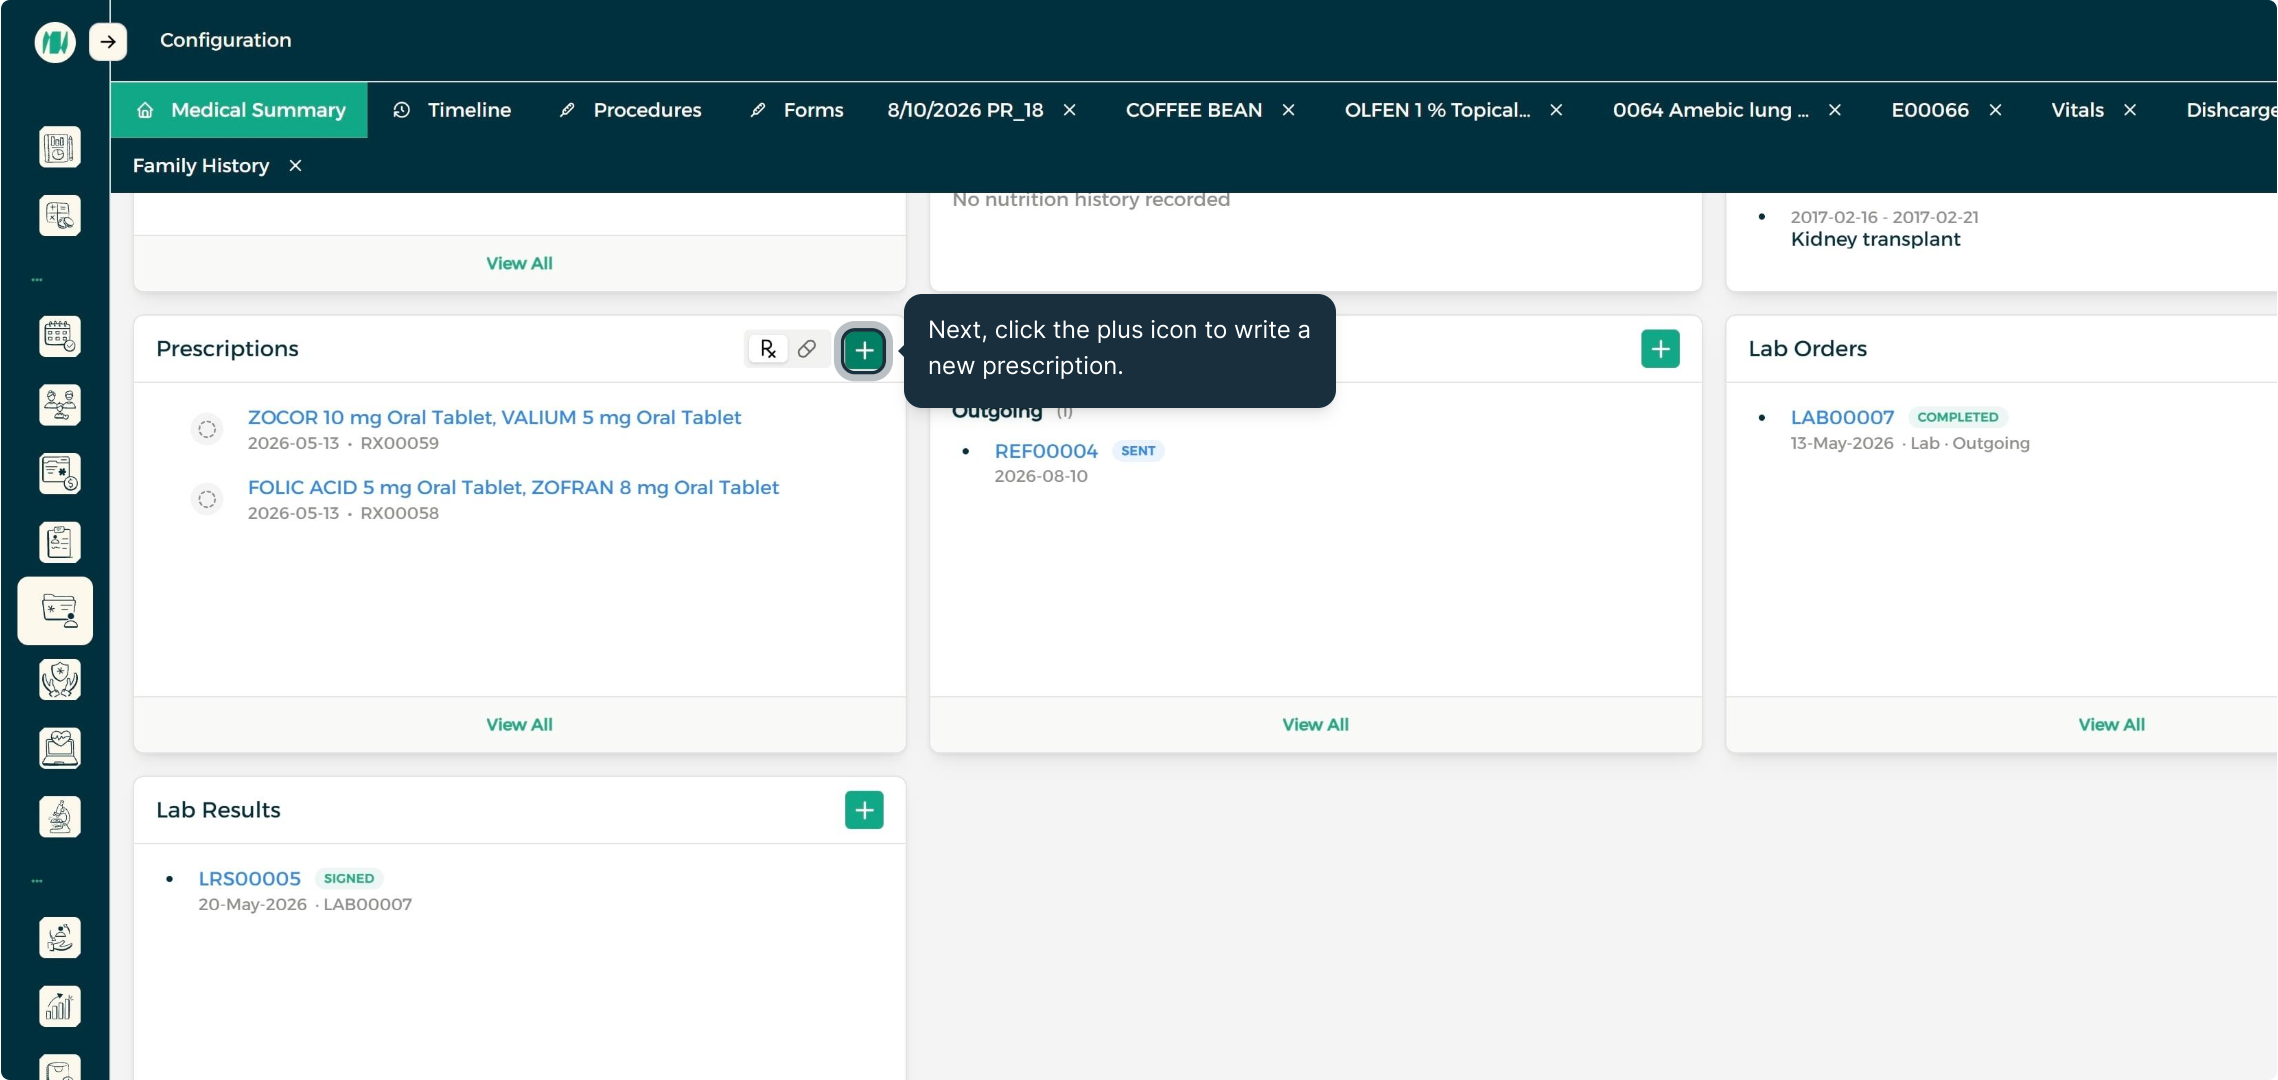
Step 1: Add a New Prescription
Click the plus icon on the Prescriptions card to write a new prescription.
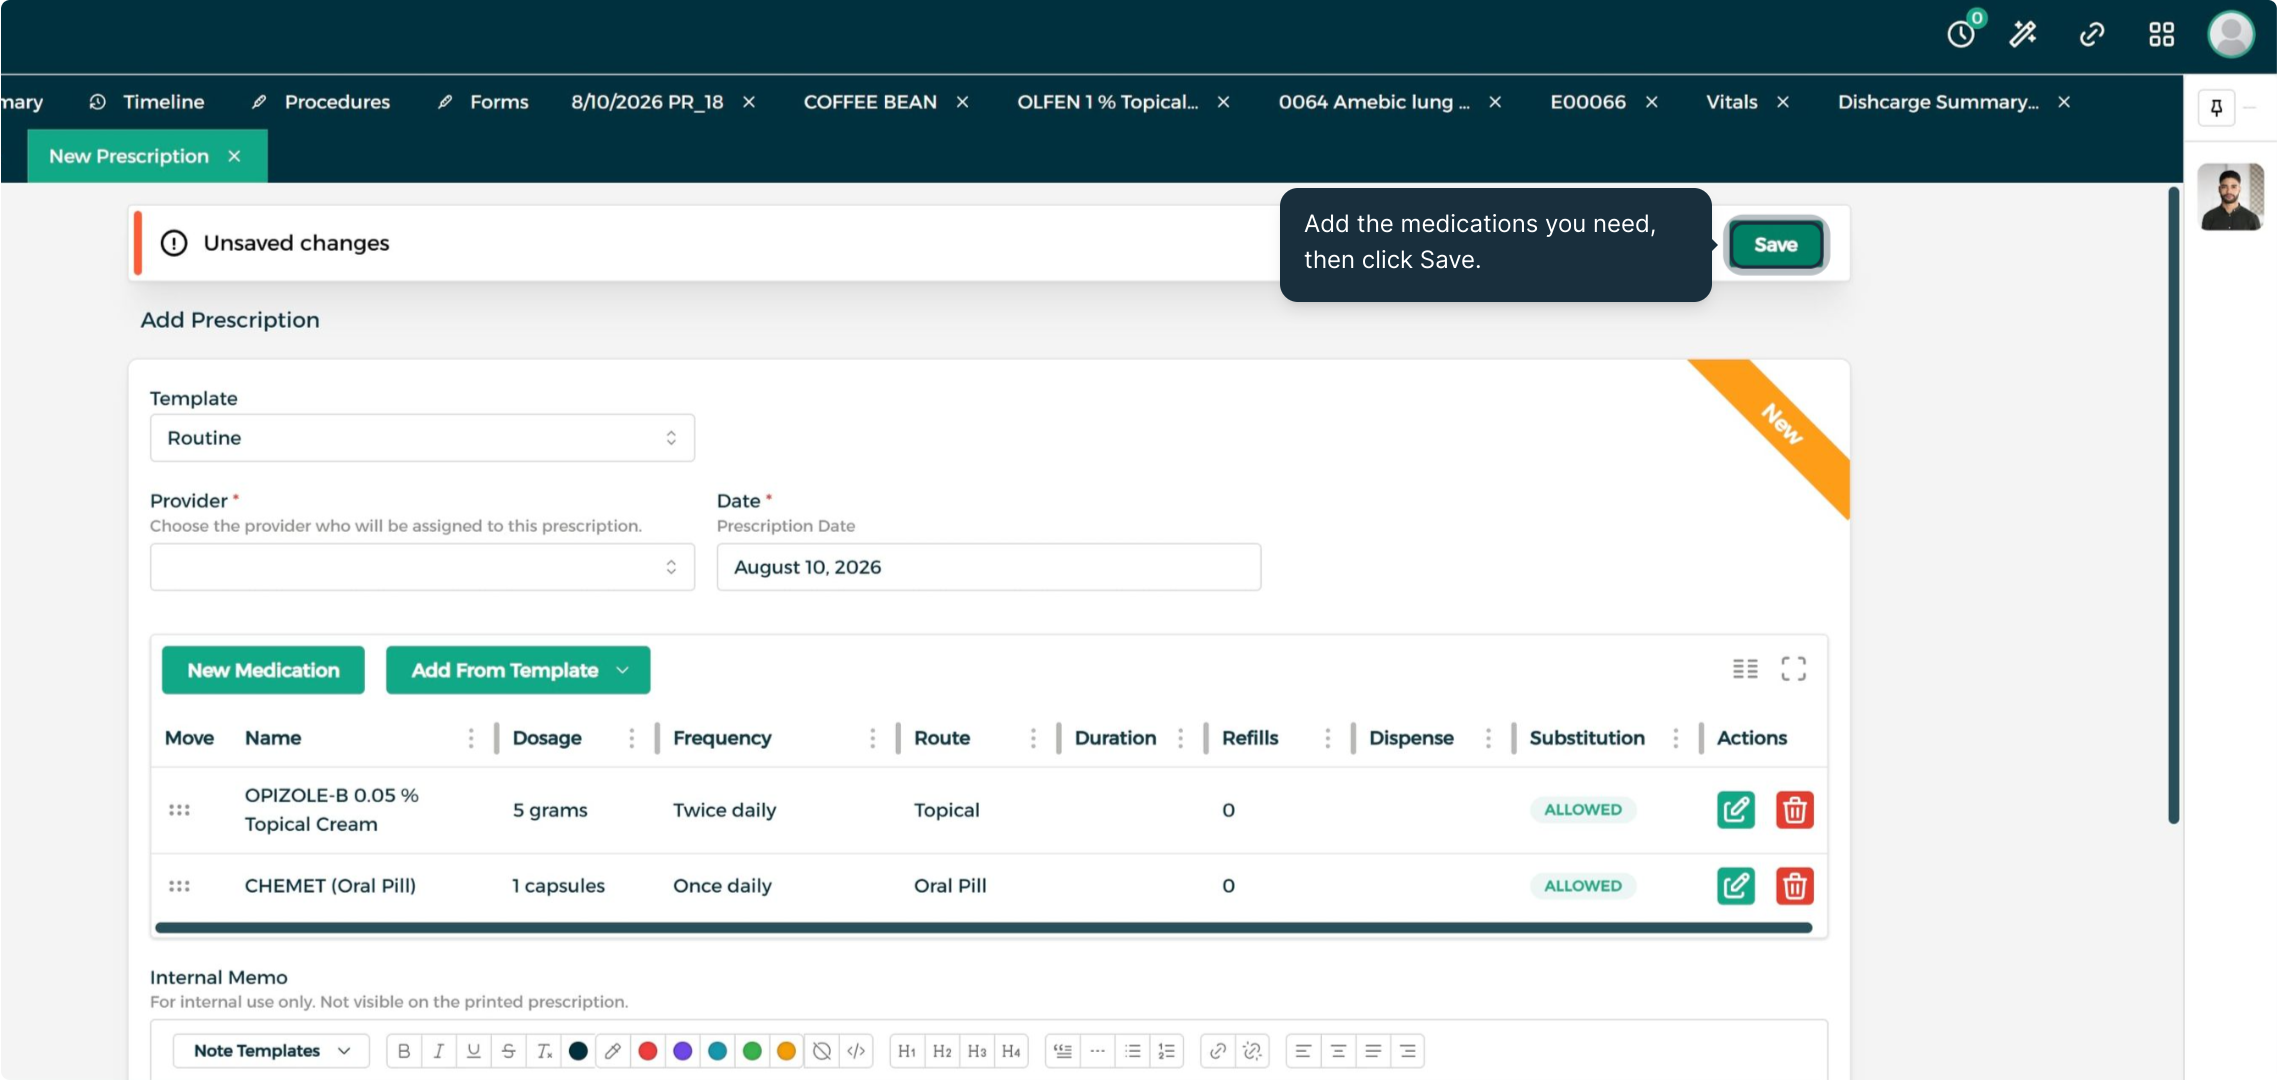
Step 2: Fill In and Save the Prescription
With medications and dosage details added — the system automatically flags contraindications against the patient's allergies and existing medications — click Save.
Referrals
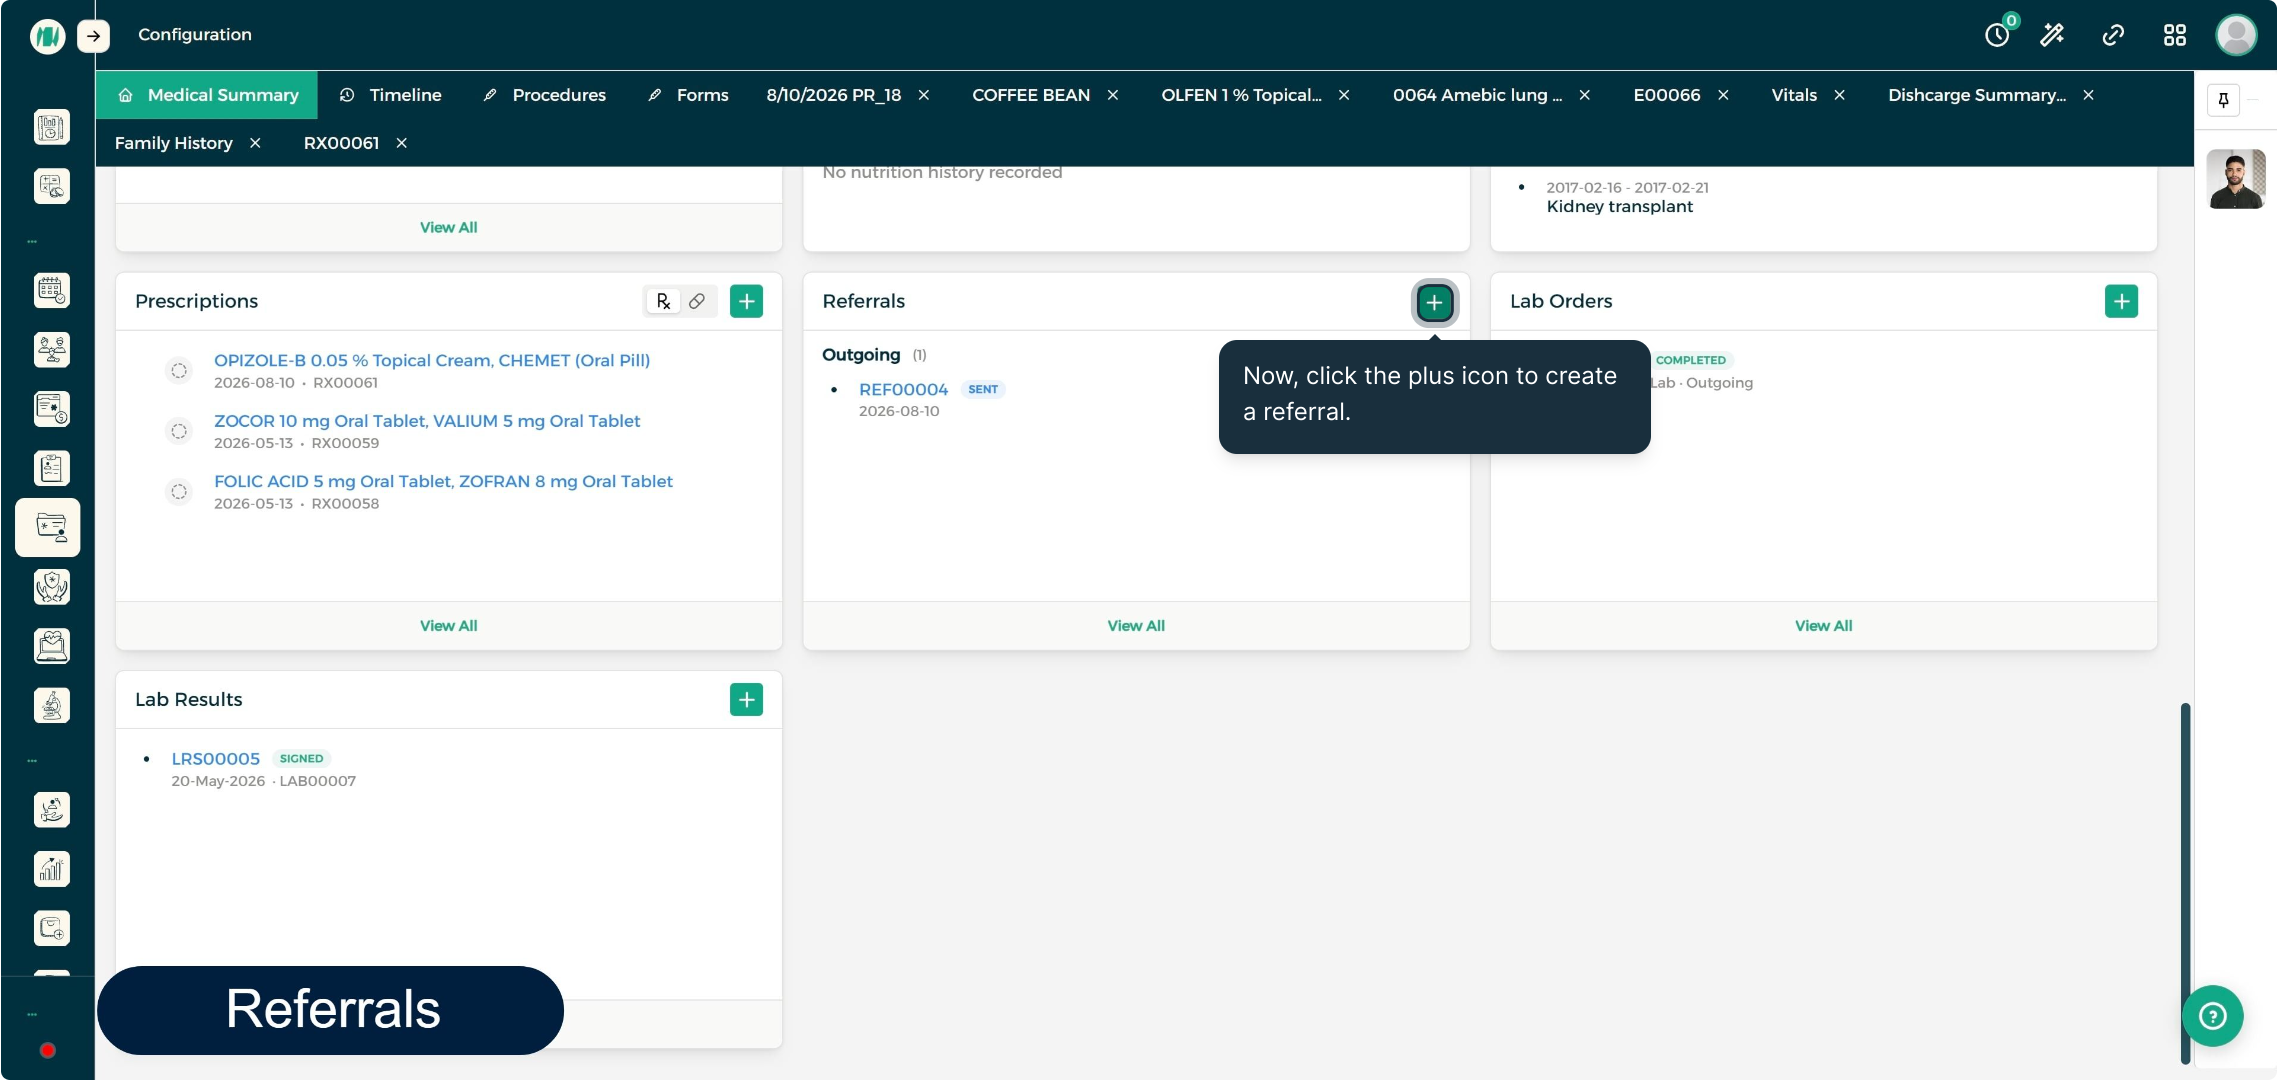
Step 1: Add a New Referral
Click the plus icon on the Referrals card to create a new referral.
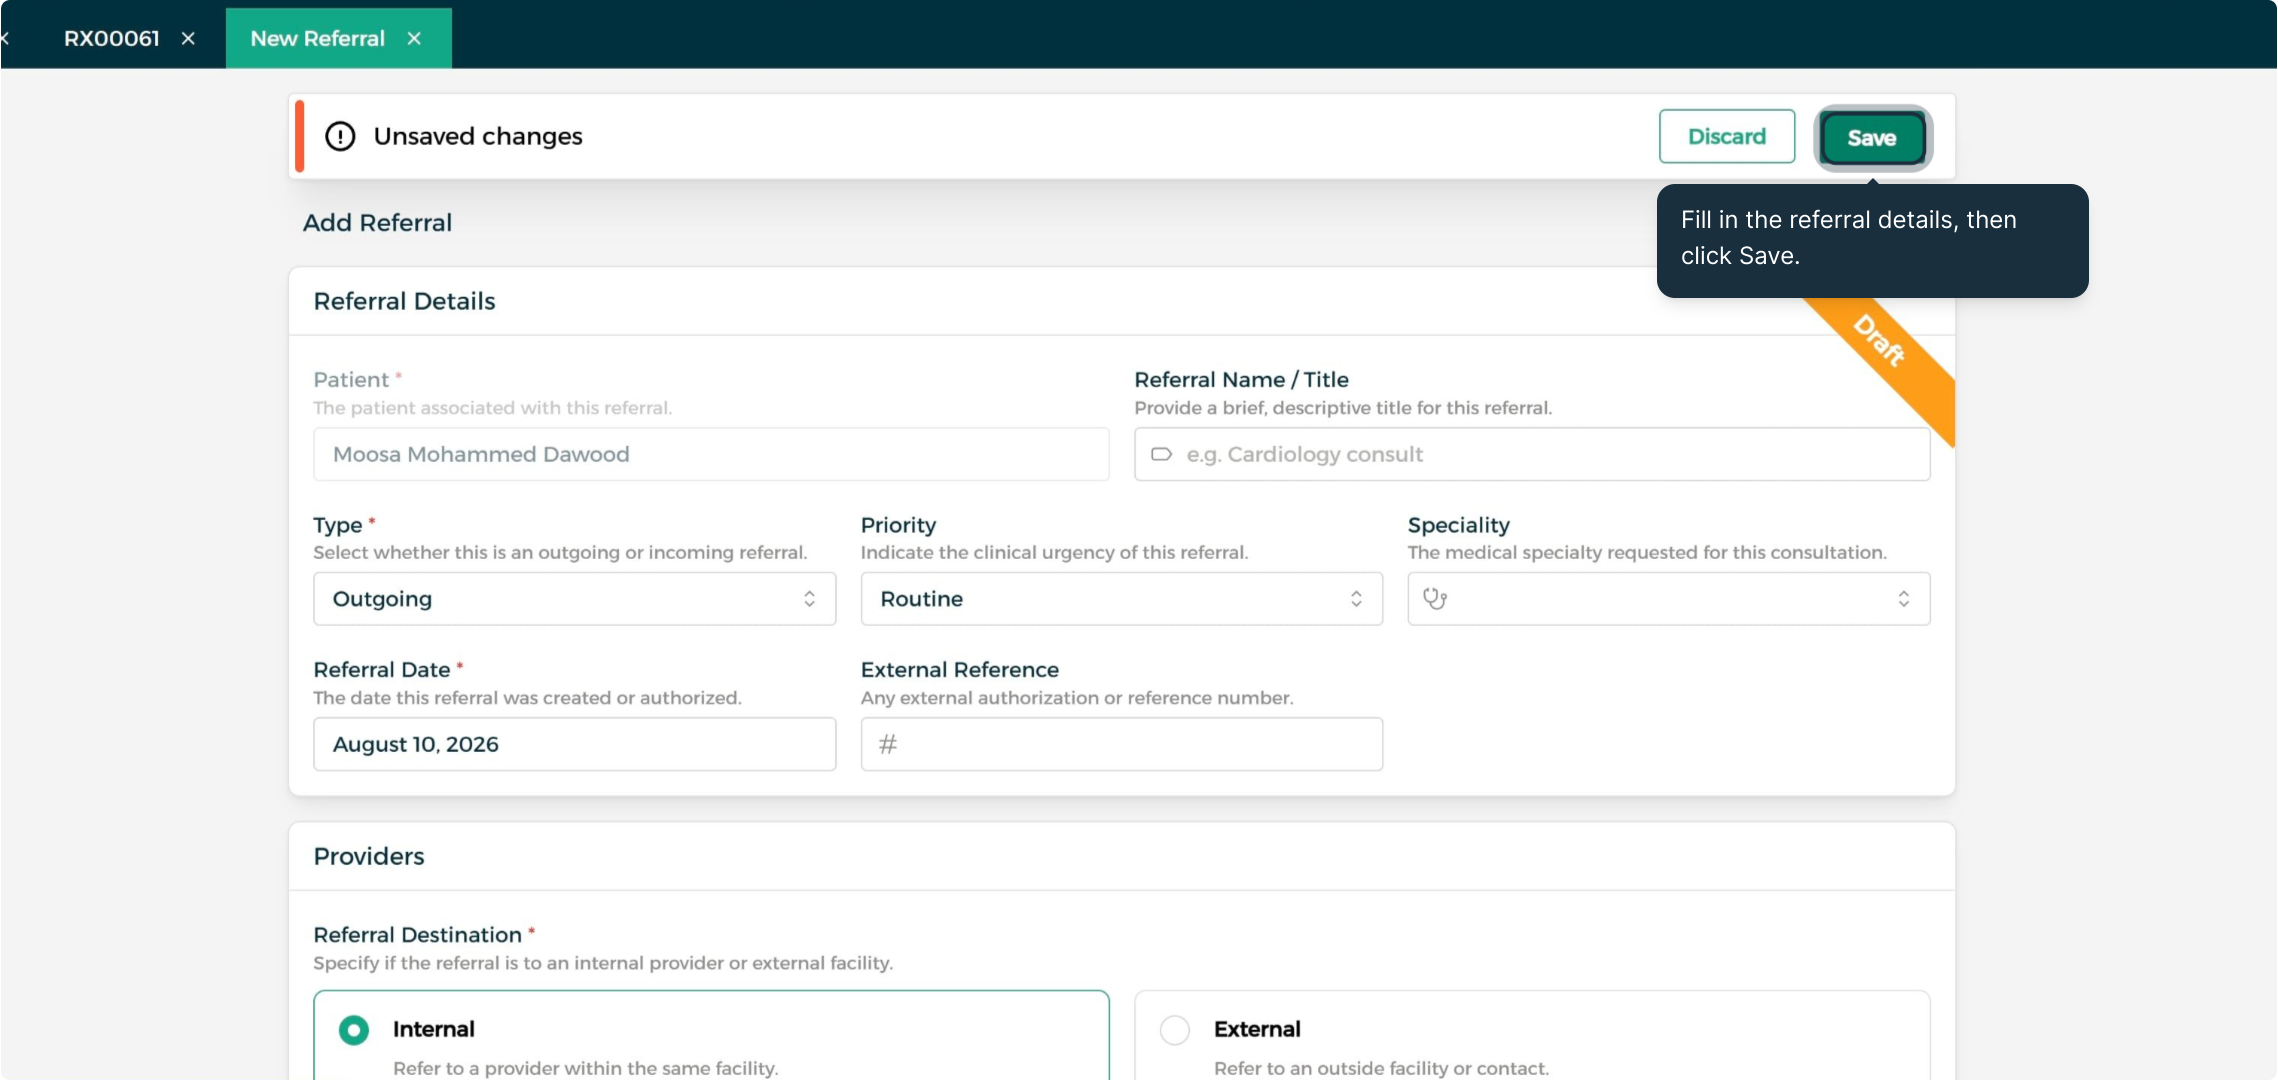
Step 2: Fill In and Save the Referral
With the referral details filled in, click Save.
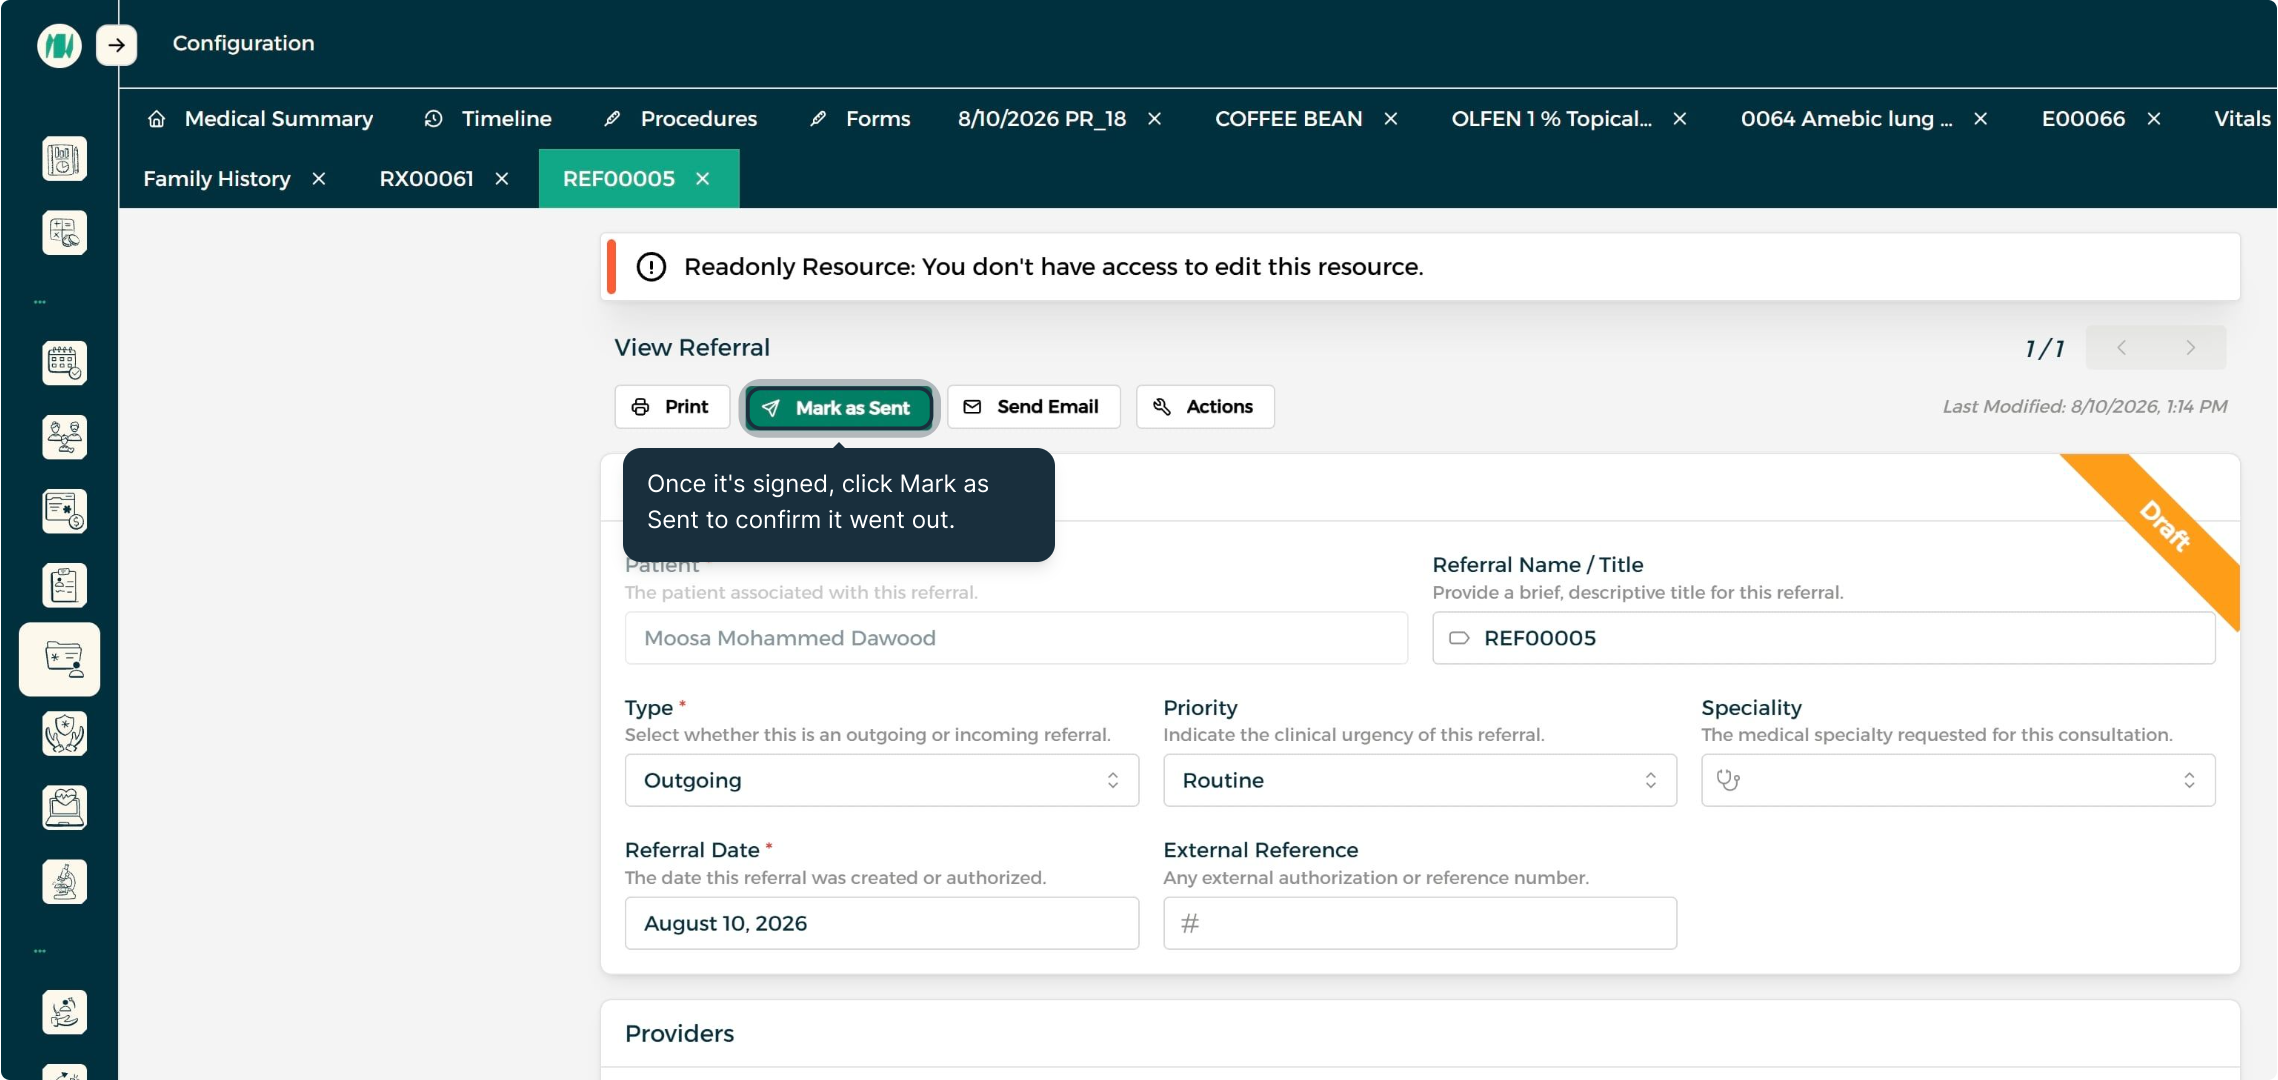
Step 3: Mark the Referral as Sent
Once the referral has gone out, click Mark as Sent to confirm it.
Lab Orders
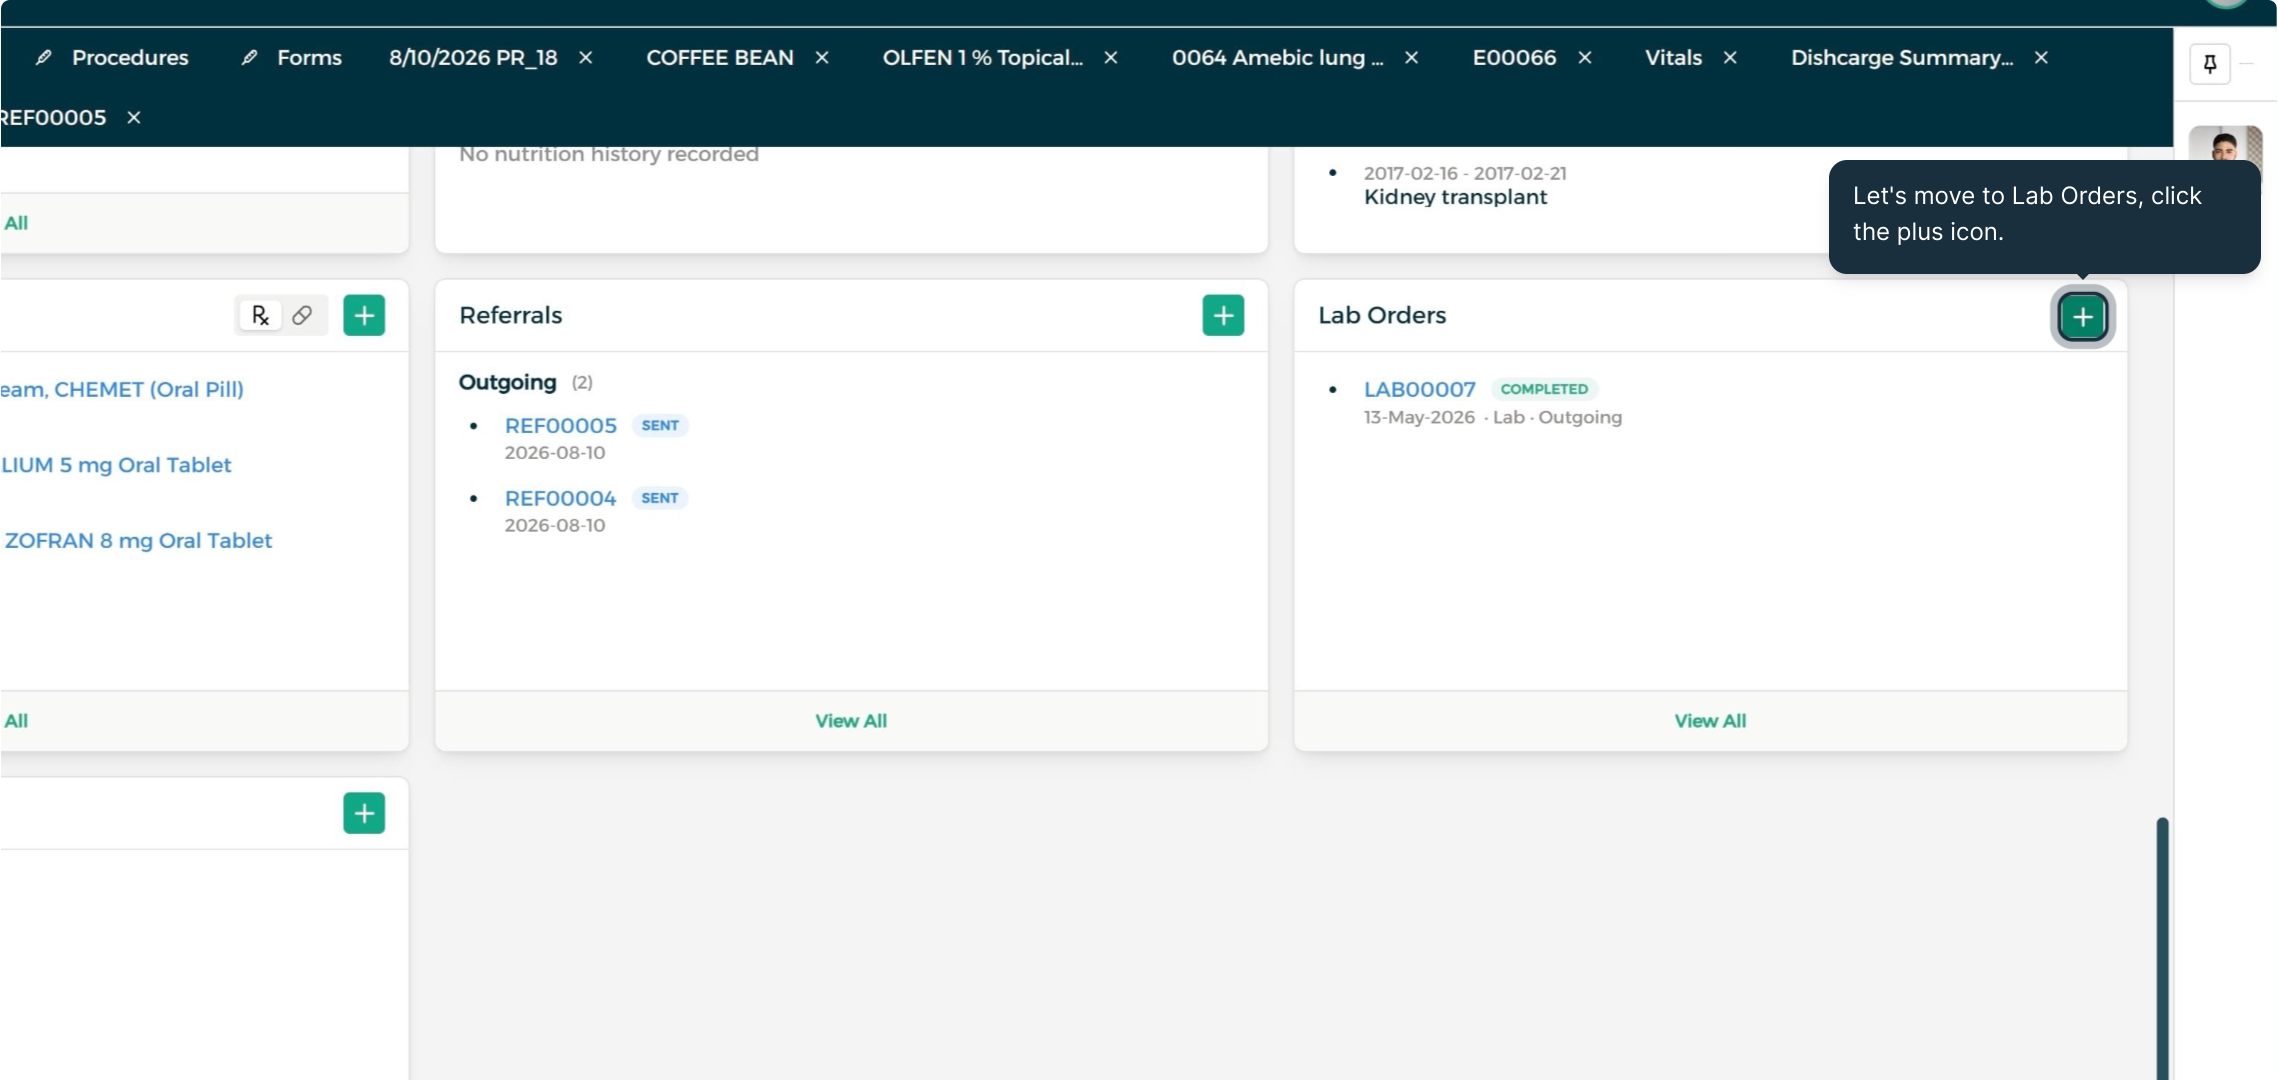
Step 1: Add a New Lab Order
Click the plus icon on the Lab Orders card to create a new order.
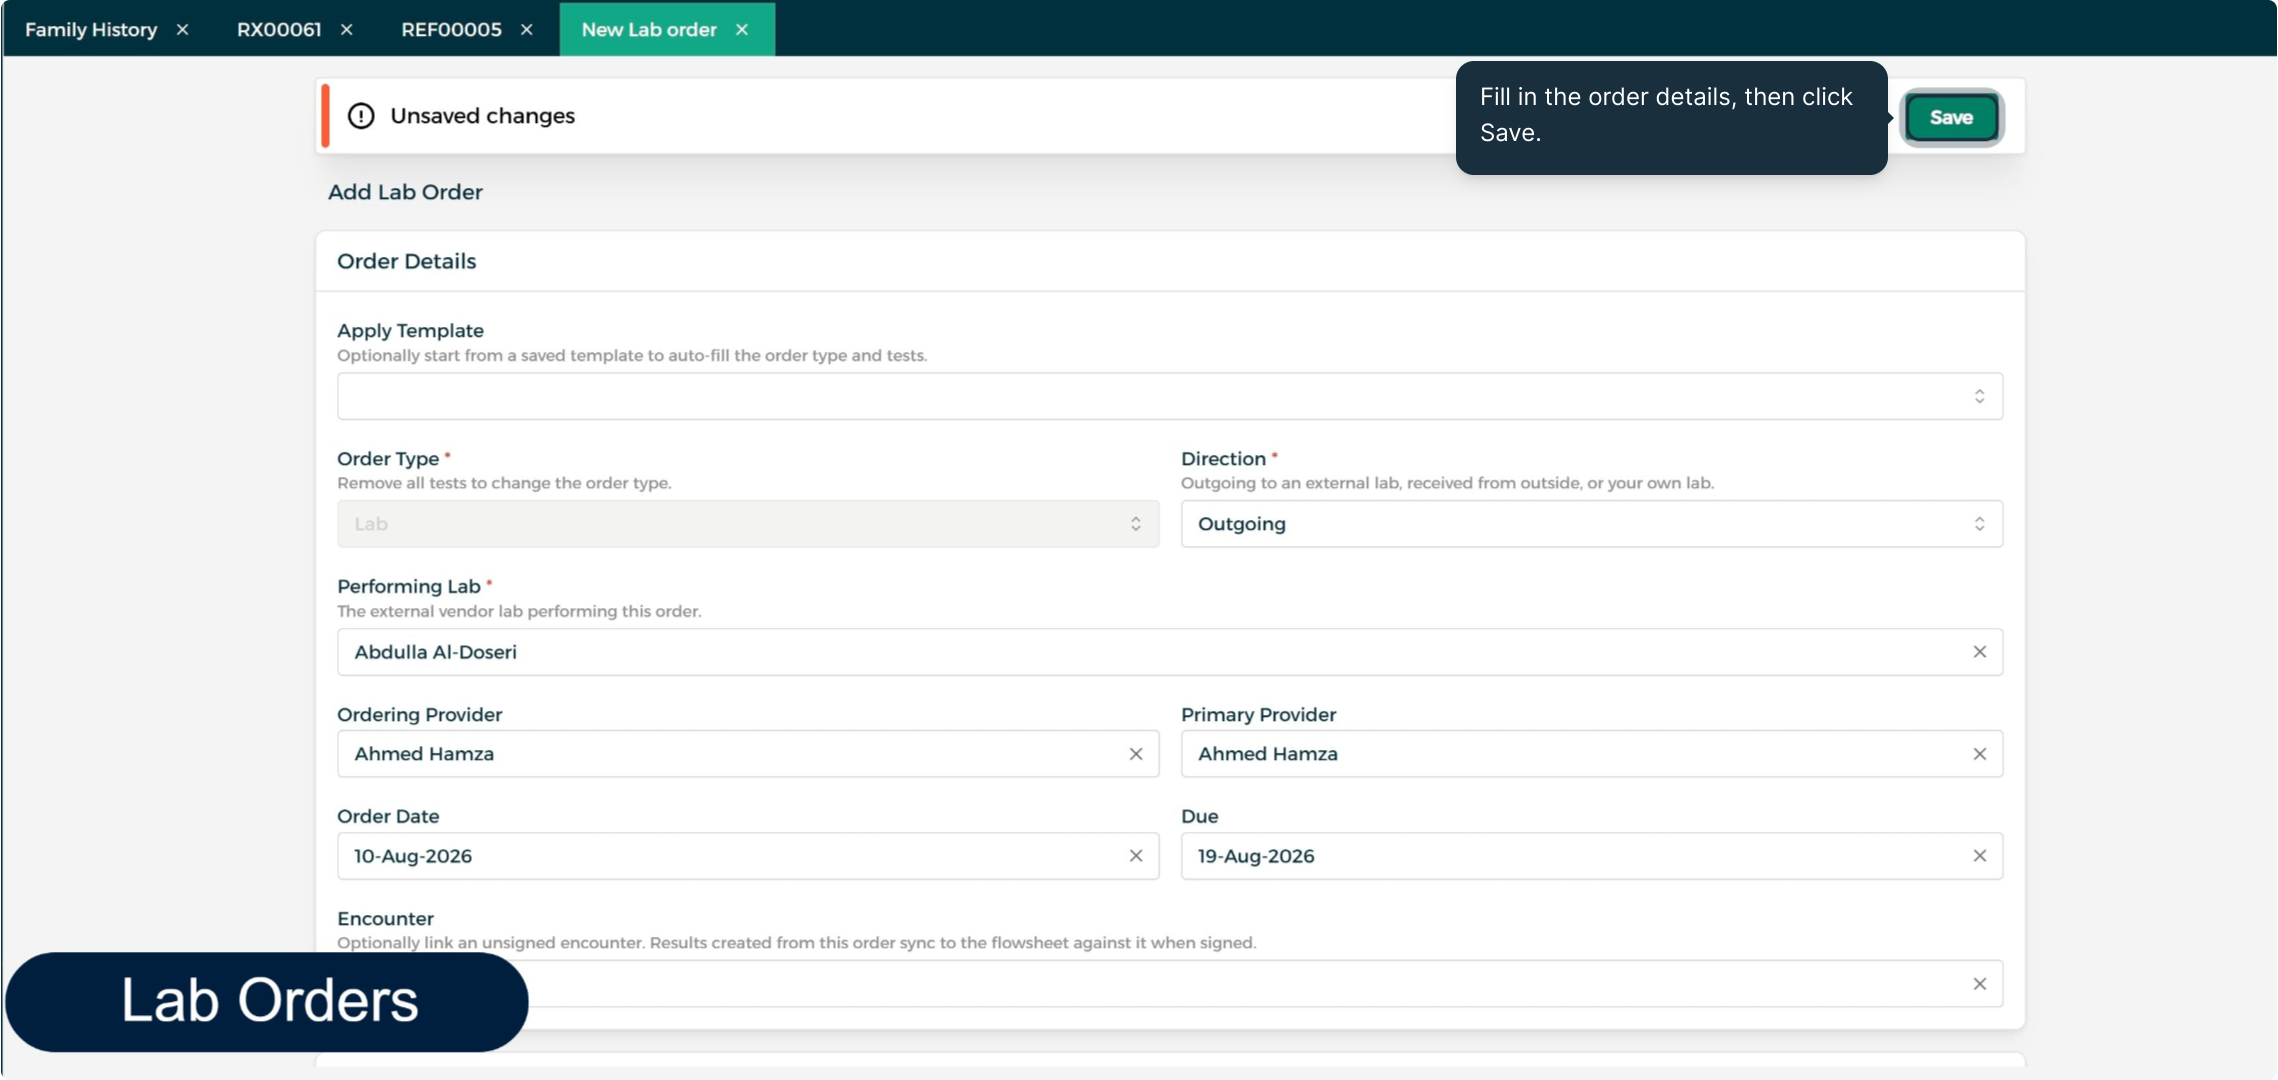
Step 2: Fill In and Save the Lab Order
With the performing lab and ordering provider set, click Save.
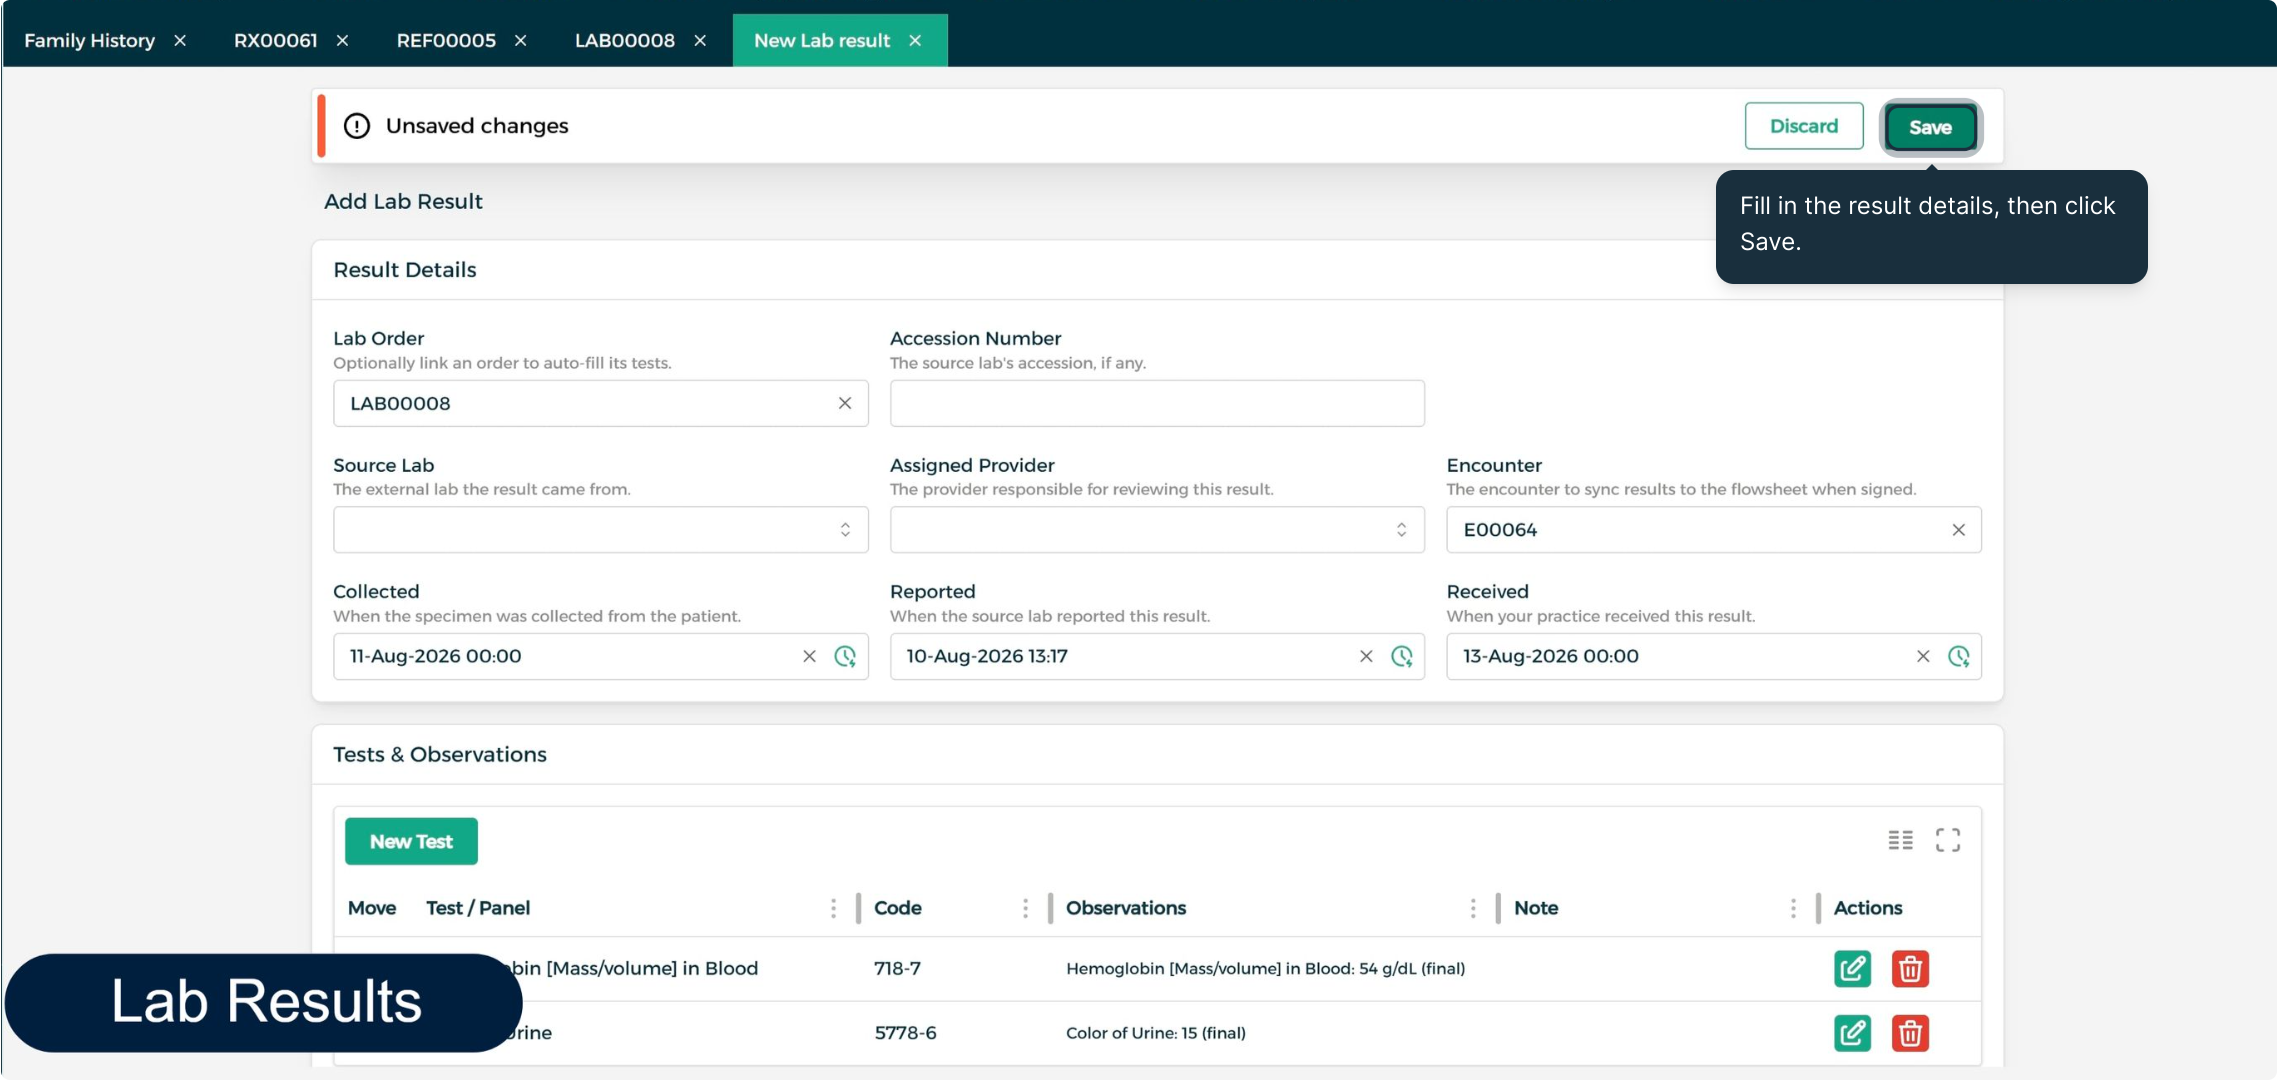
Lab Results
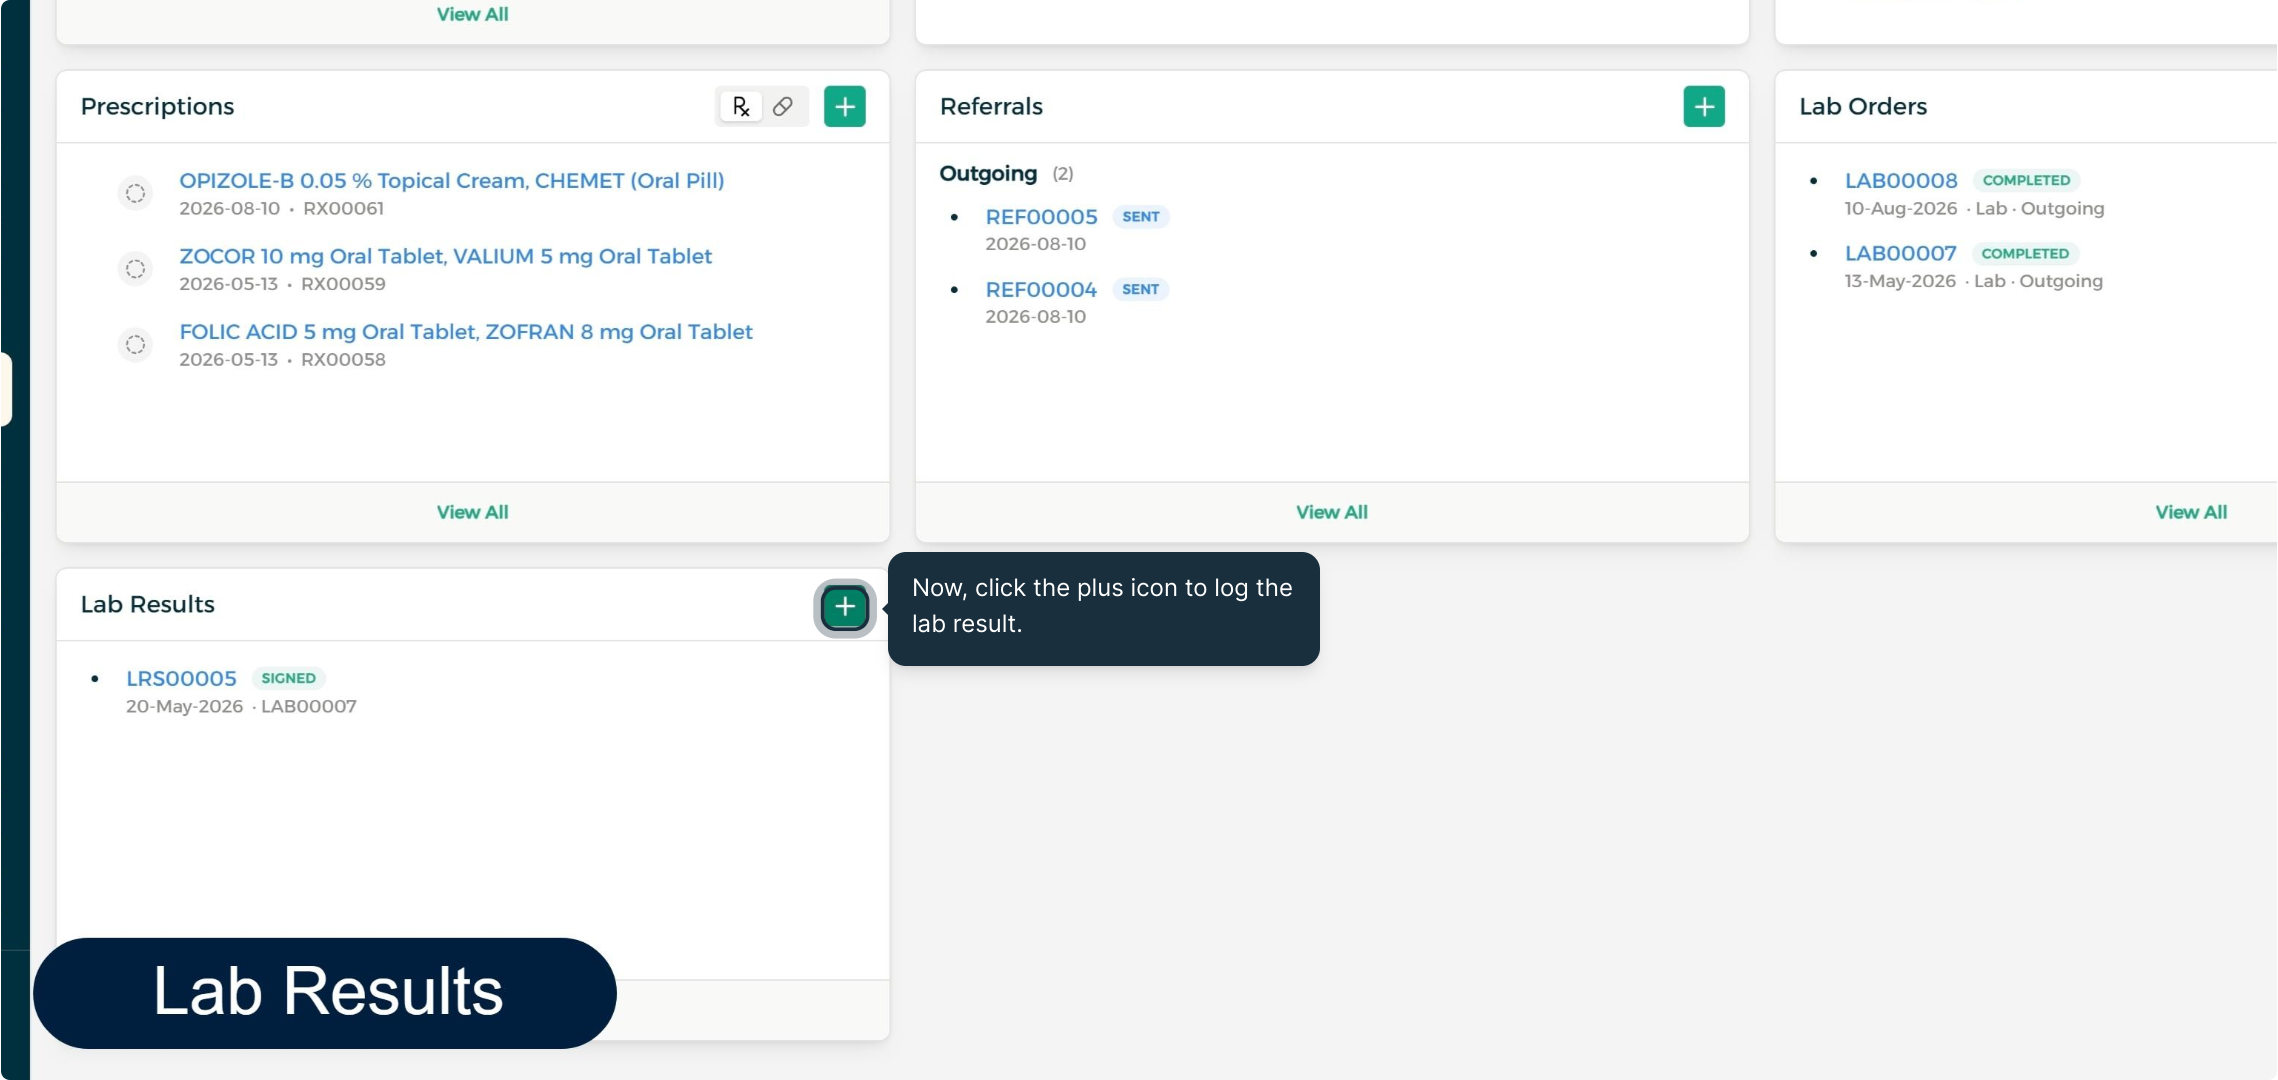
Step 1: Add a New Lab Result
Once results arrive, click the plus icon on the Lab Results card to log them.
Step 2: Fill In and Save the Lab Result
With the result linked to the lab order and the encounter, click Save.
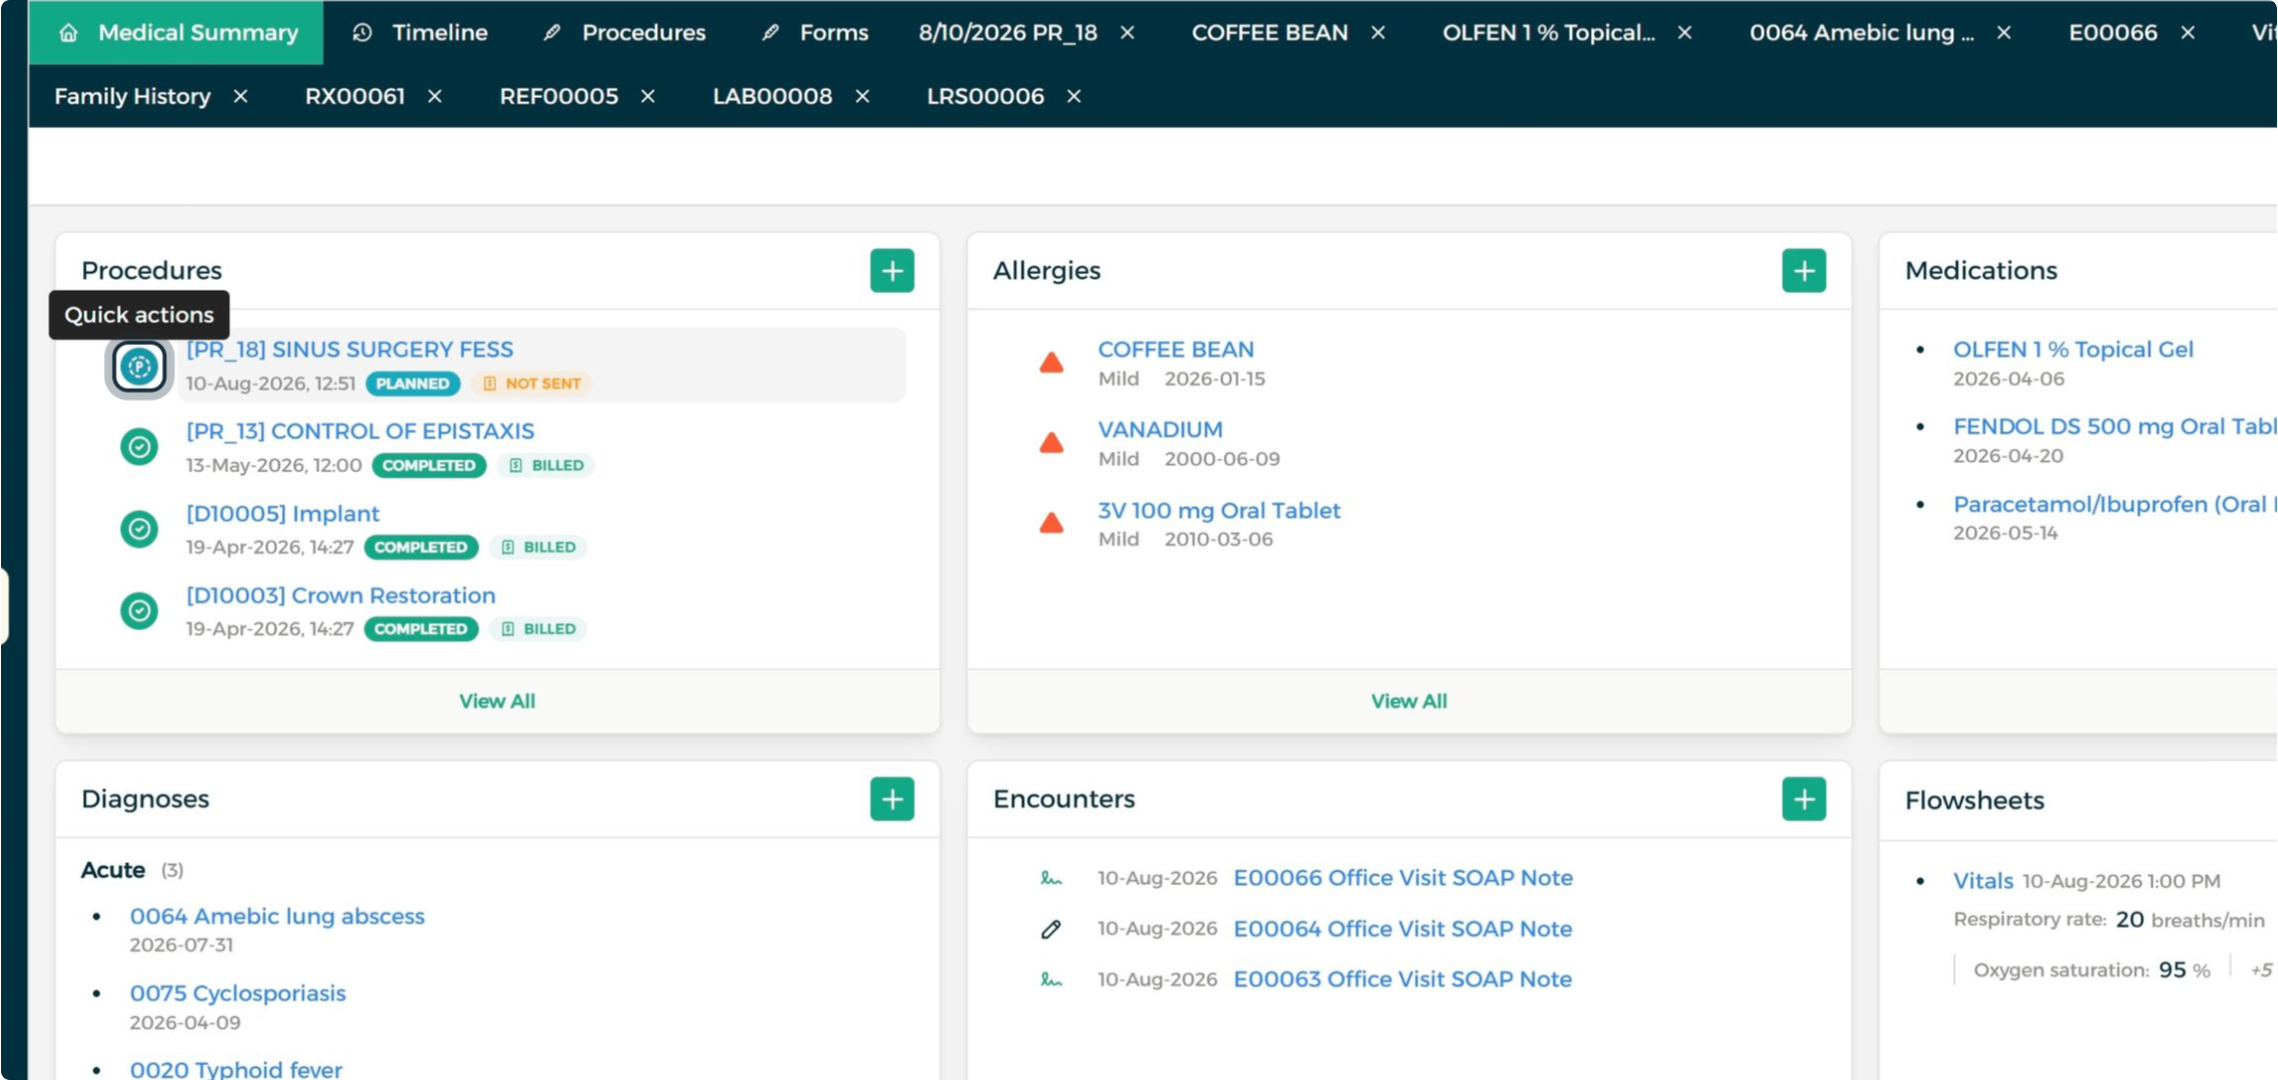
Quick Actions
Step 1: Open Quick Actions
Open a procedure's Quick Actions menu to update its status or send it to billing.
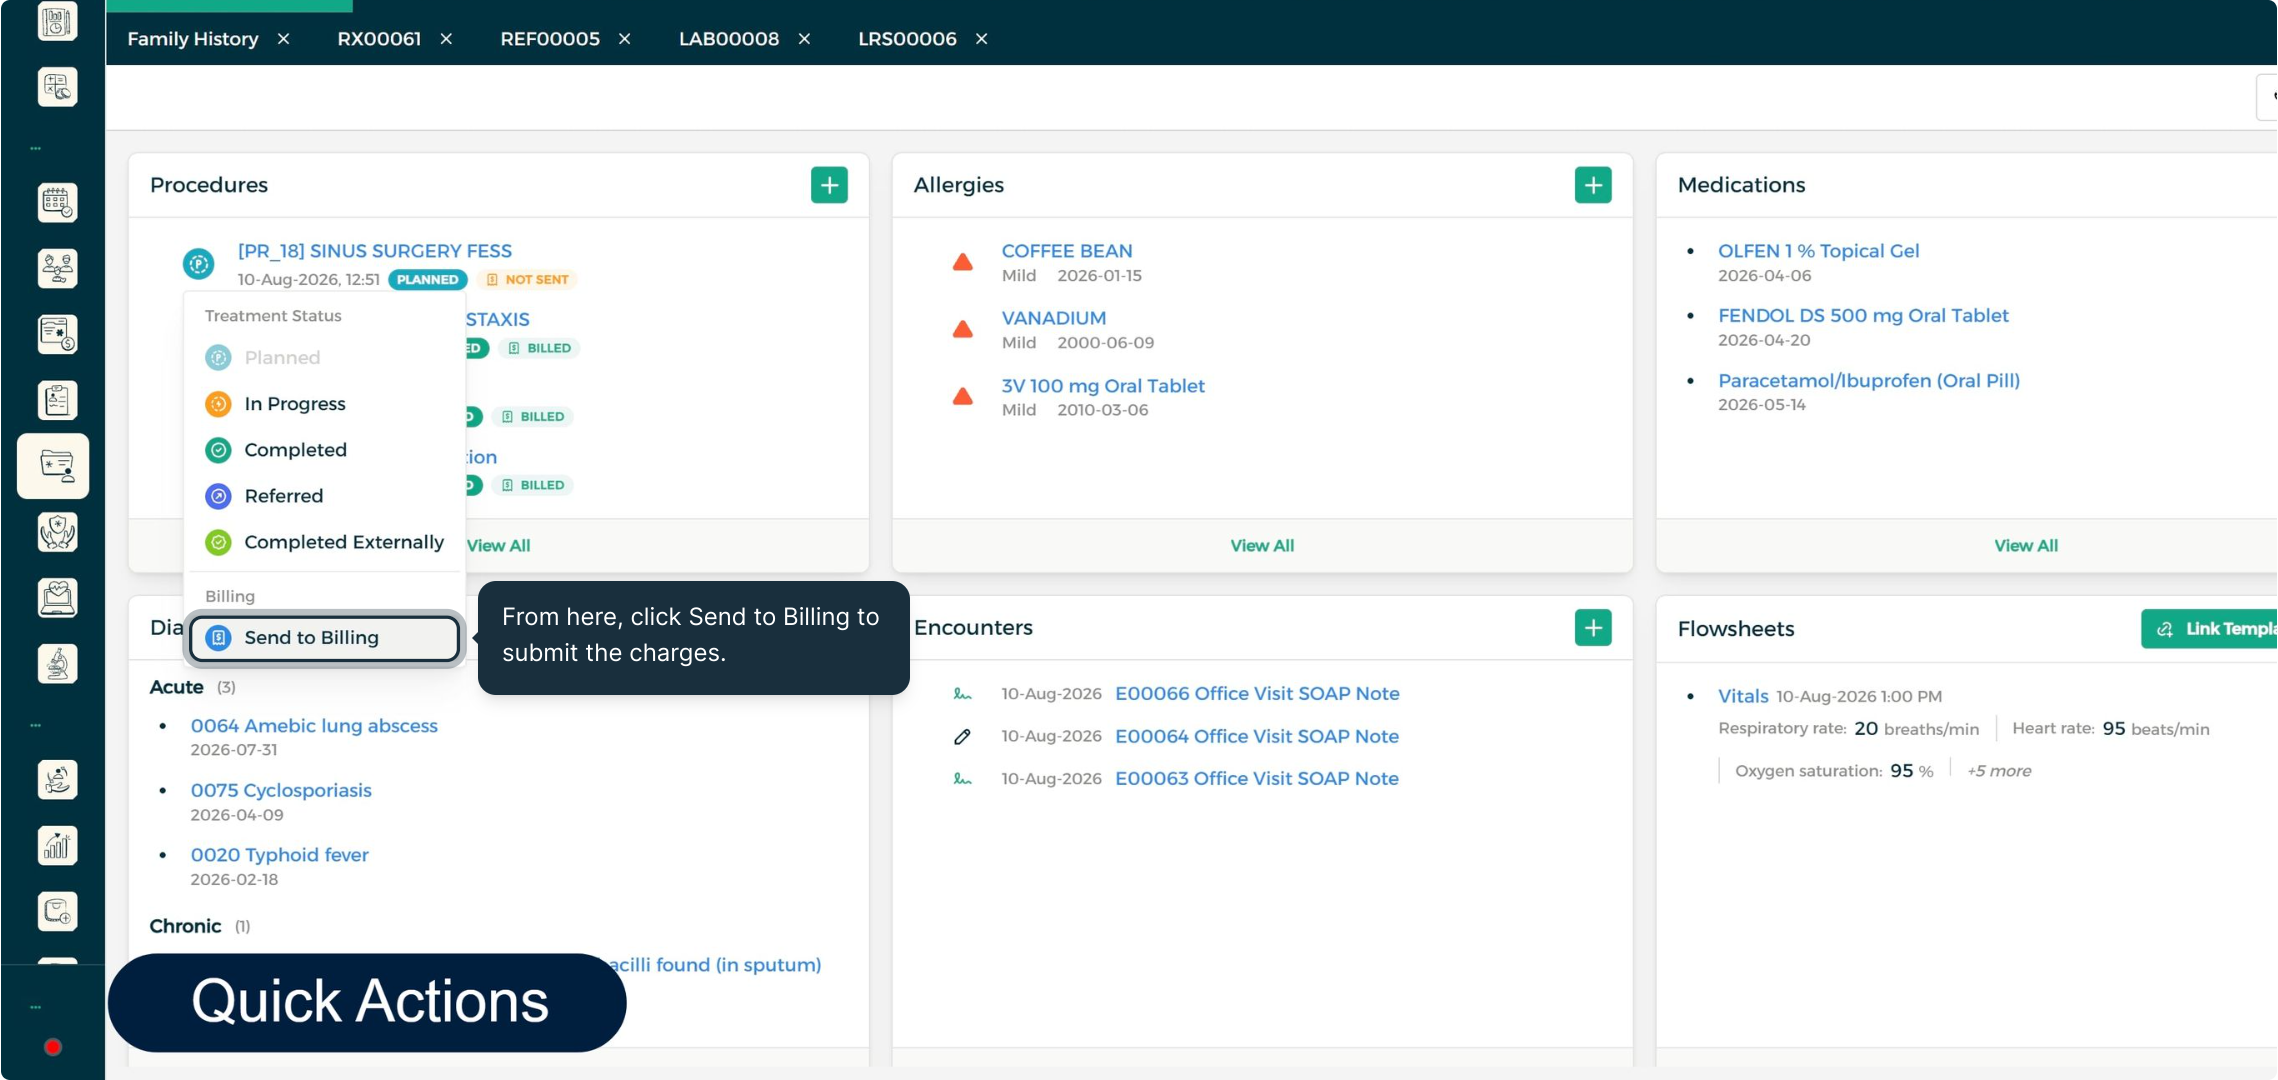
Step 2: Send a Procedure to Billing
Click Send to Billing to submit the charges directly.
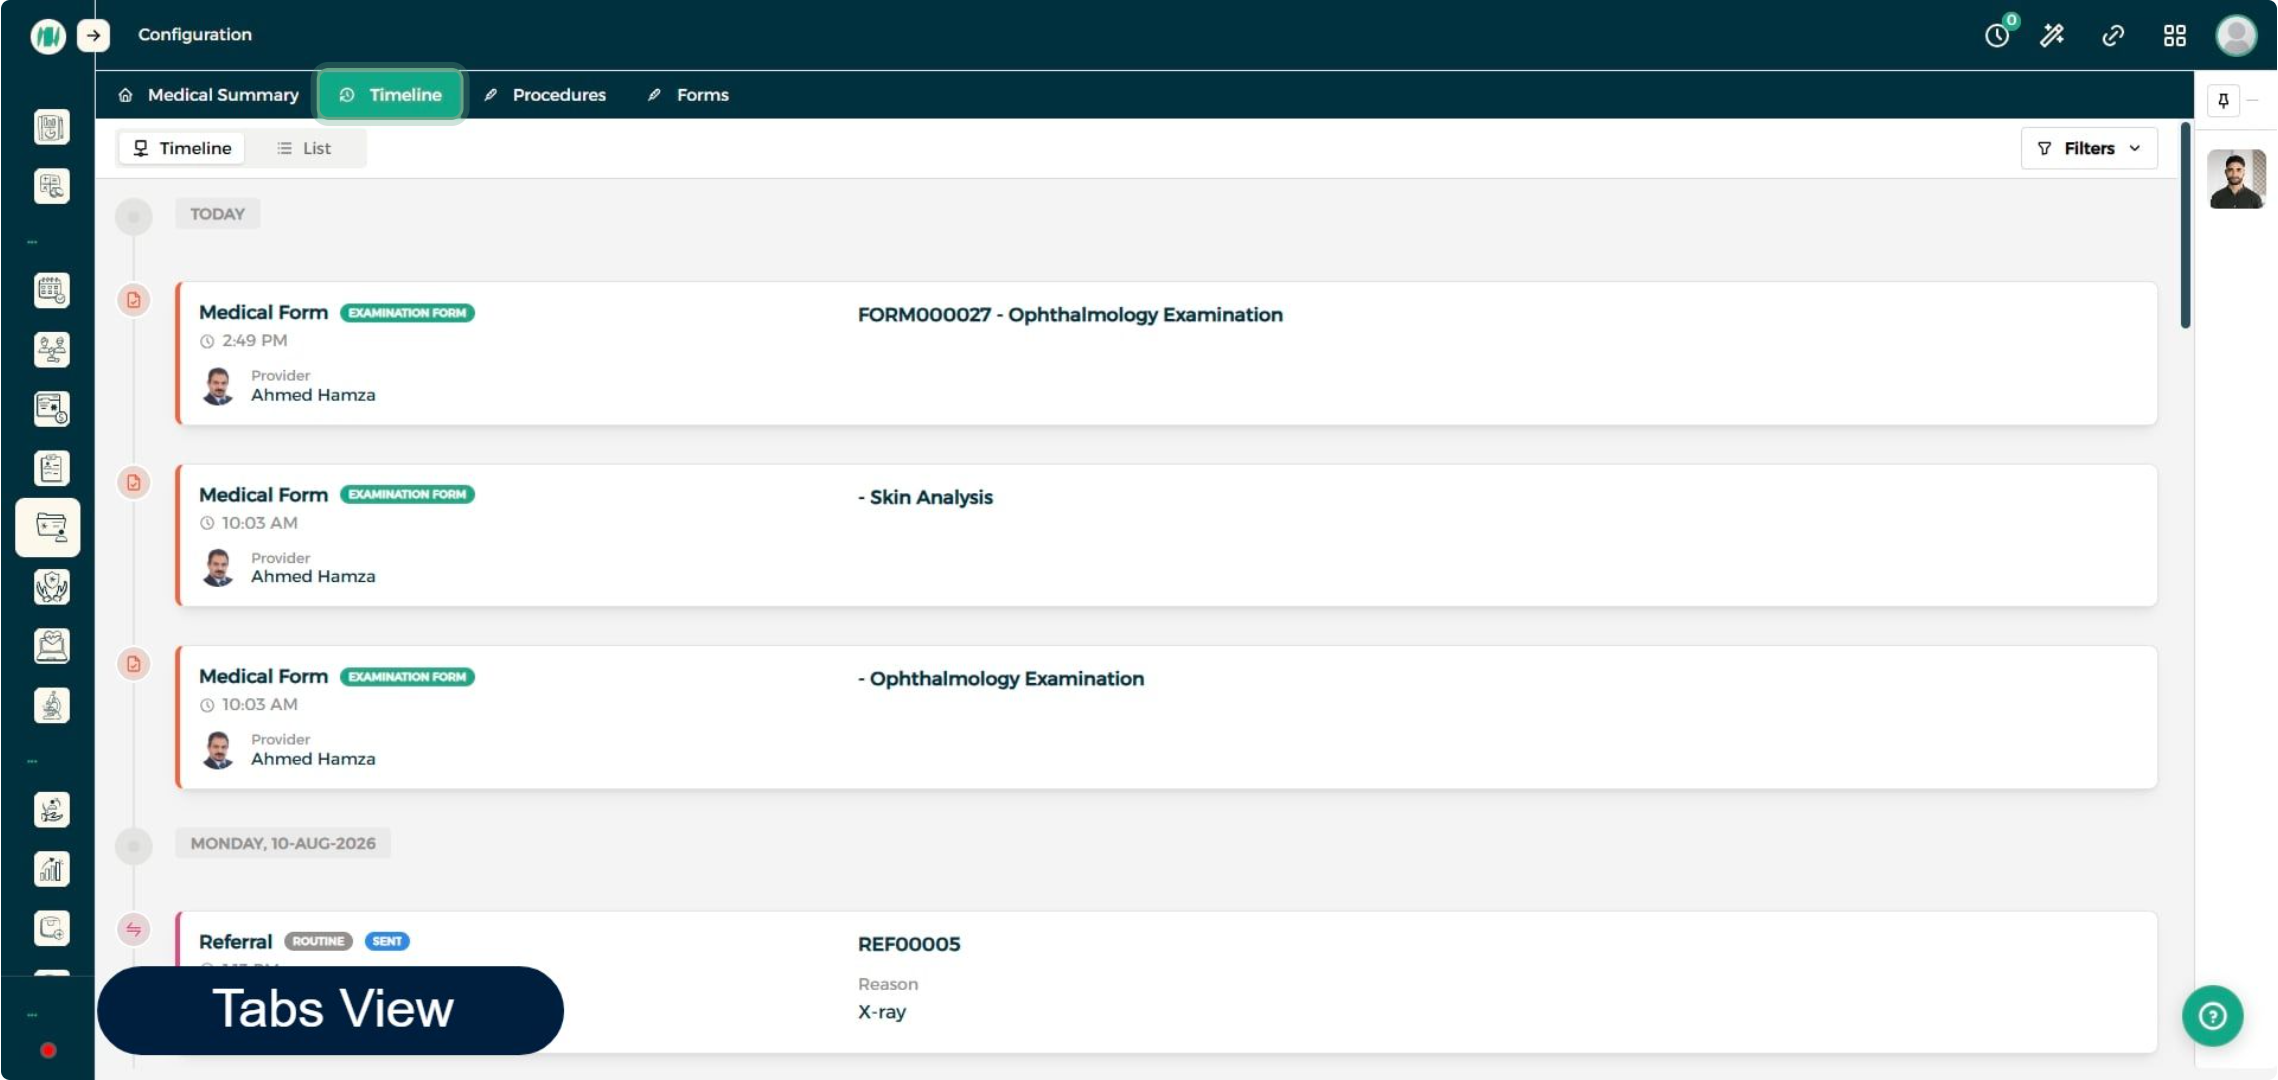
Timeline
Step 1: Browse the Timeline
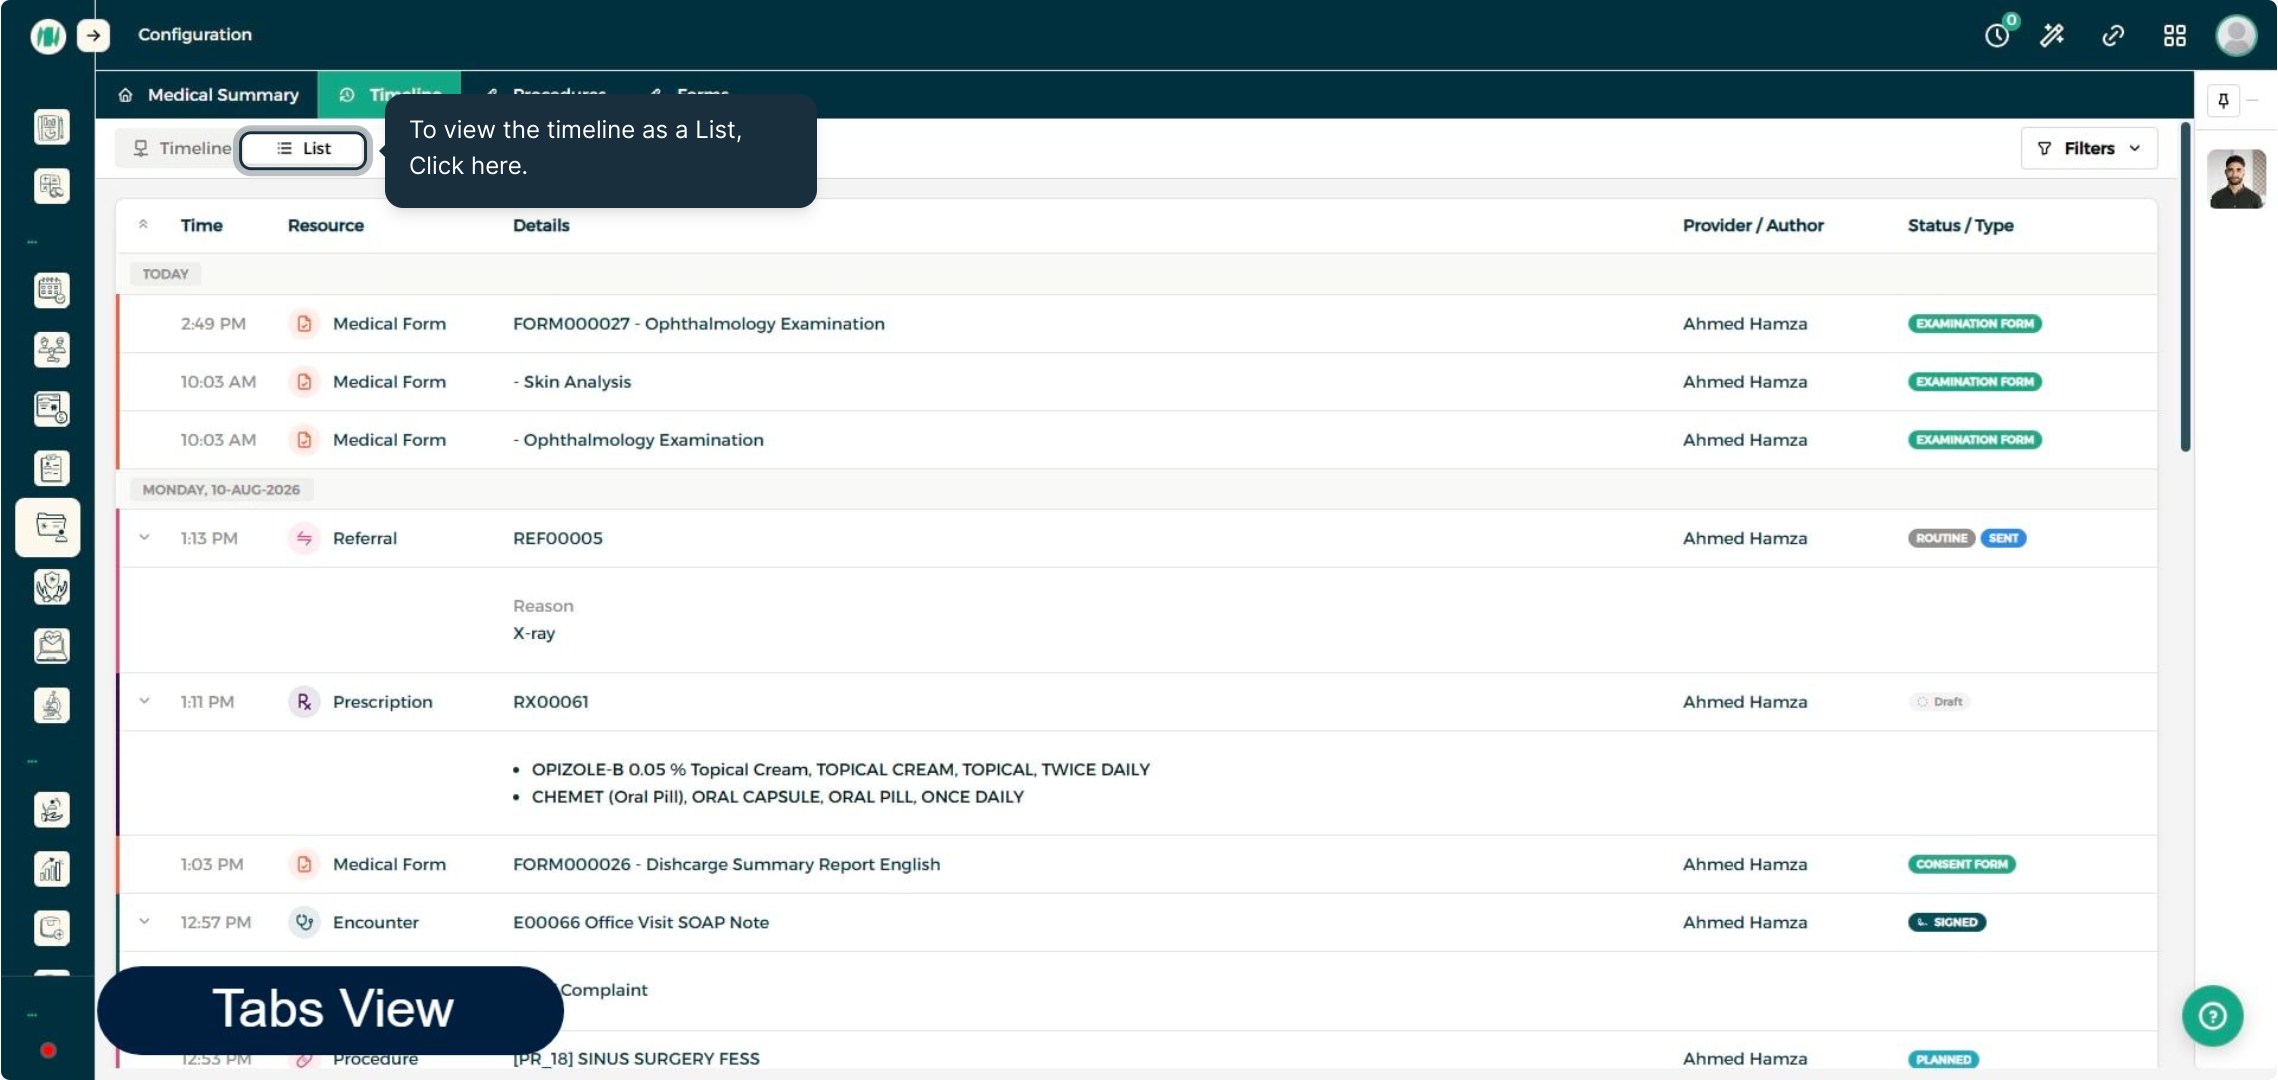
The Timeline tab lines up every recorded action, sorted by most recent.
Step 2: Switch to List View
Click the List toggle to view the timeline as a filterable table instead.
Procedures & Forms Tabs
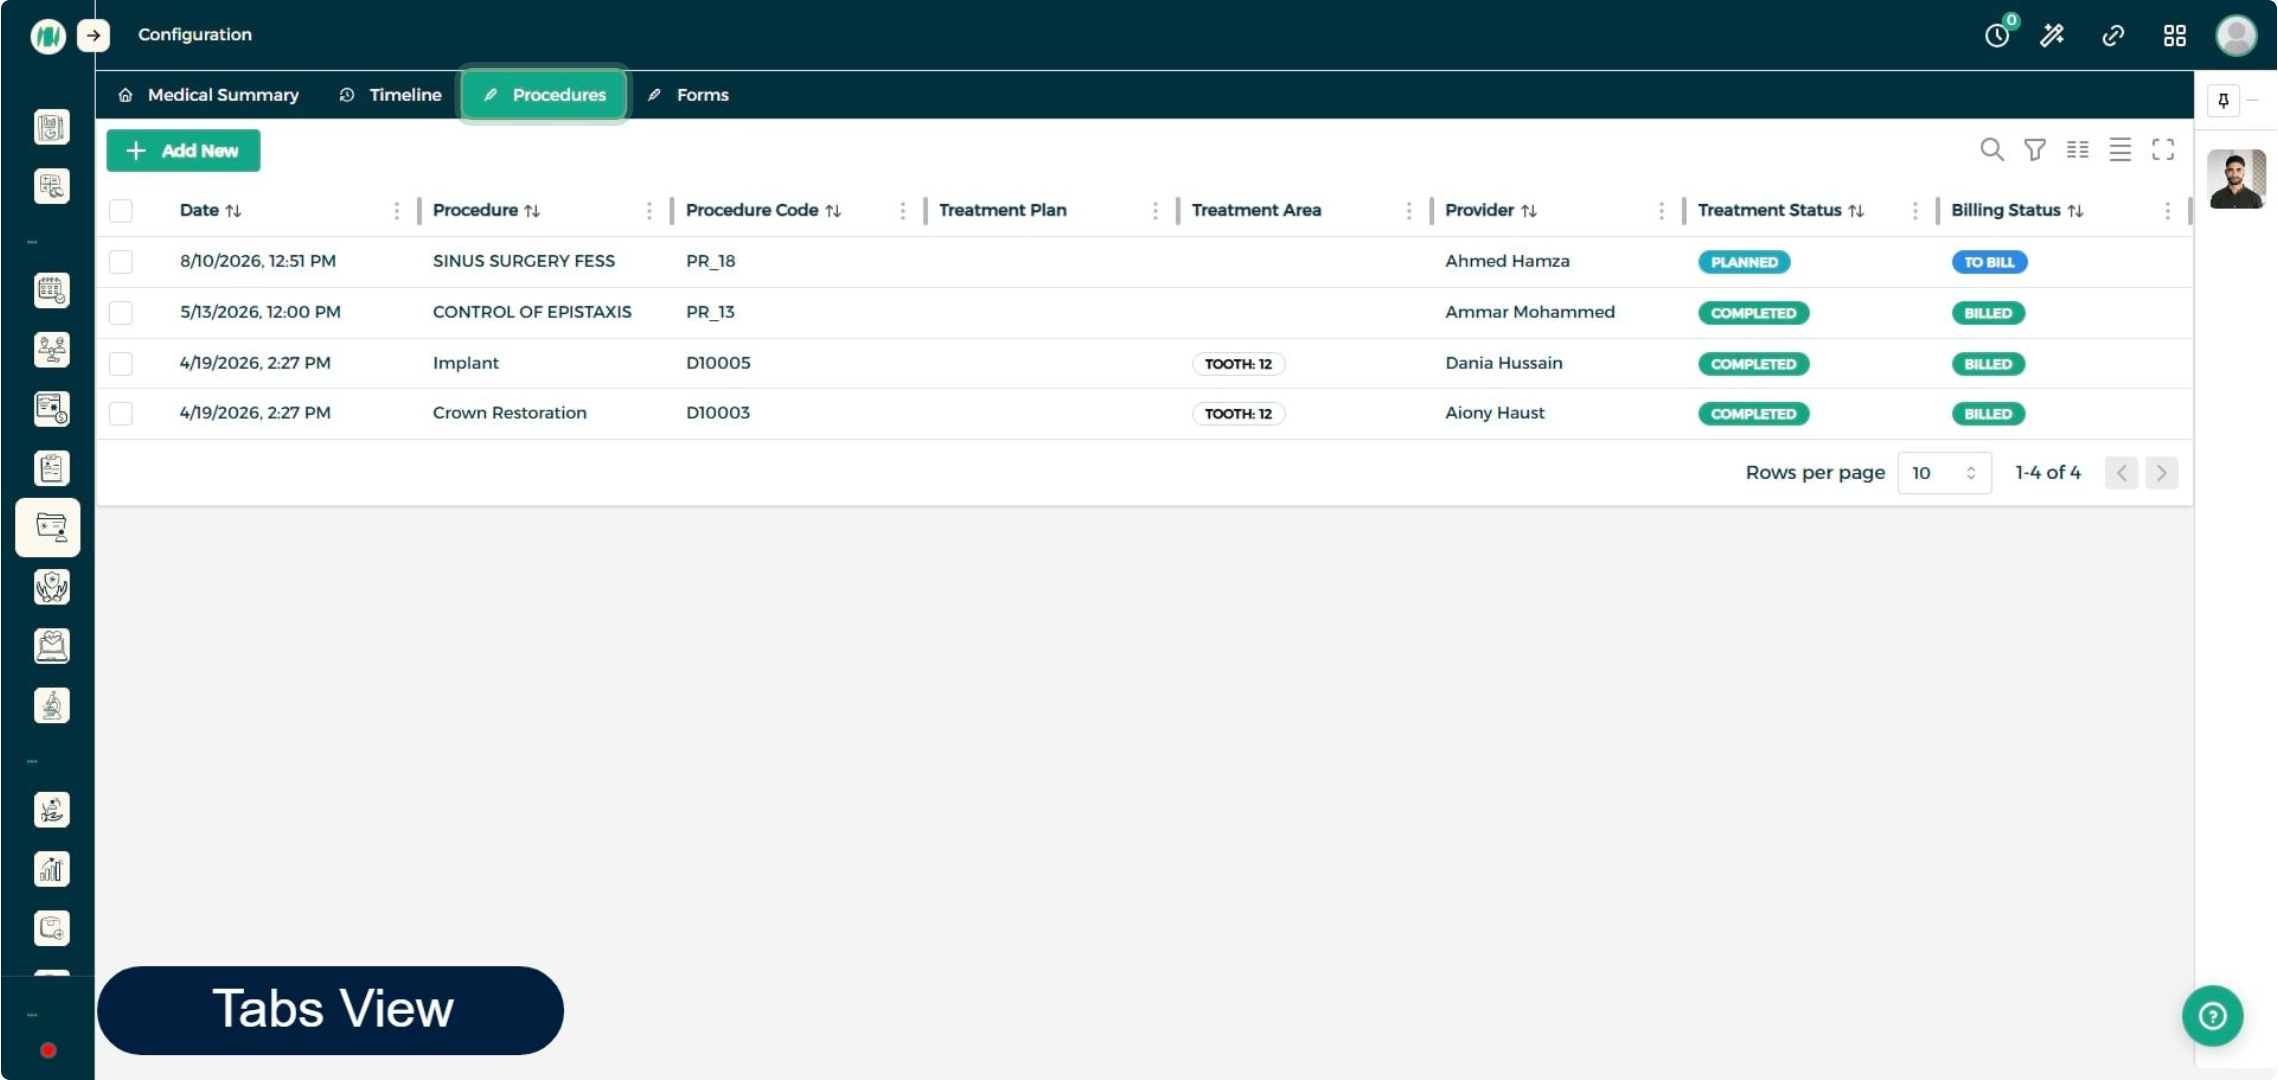
Step 1: Review the Procedures Tab
The Procedures tab keeps every procedure listed alongside its billing and treatment status.
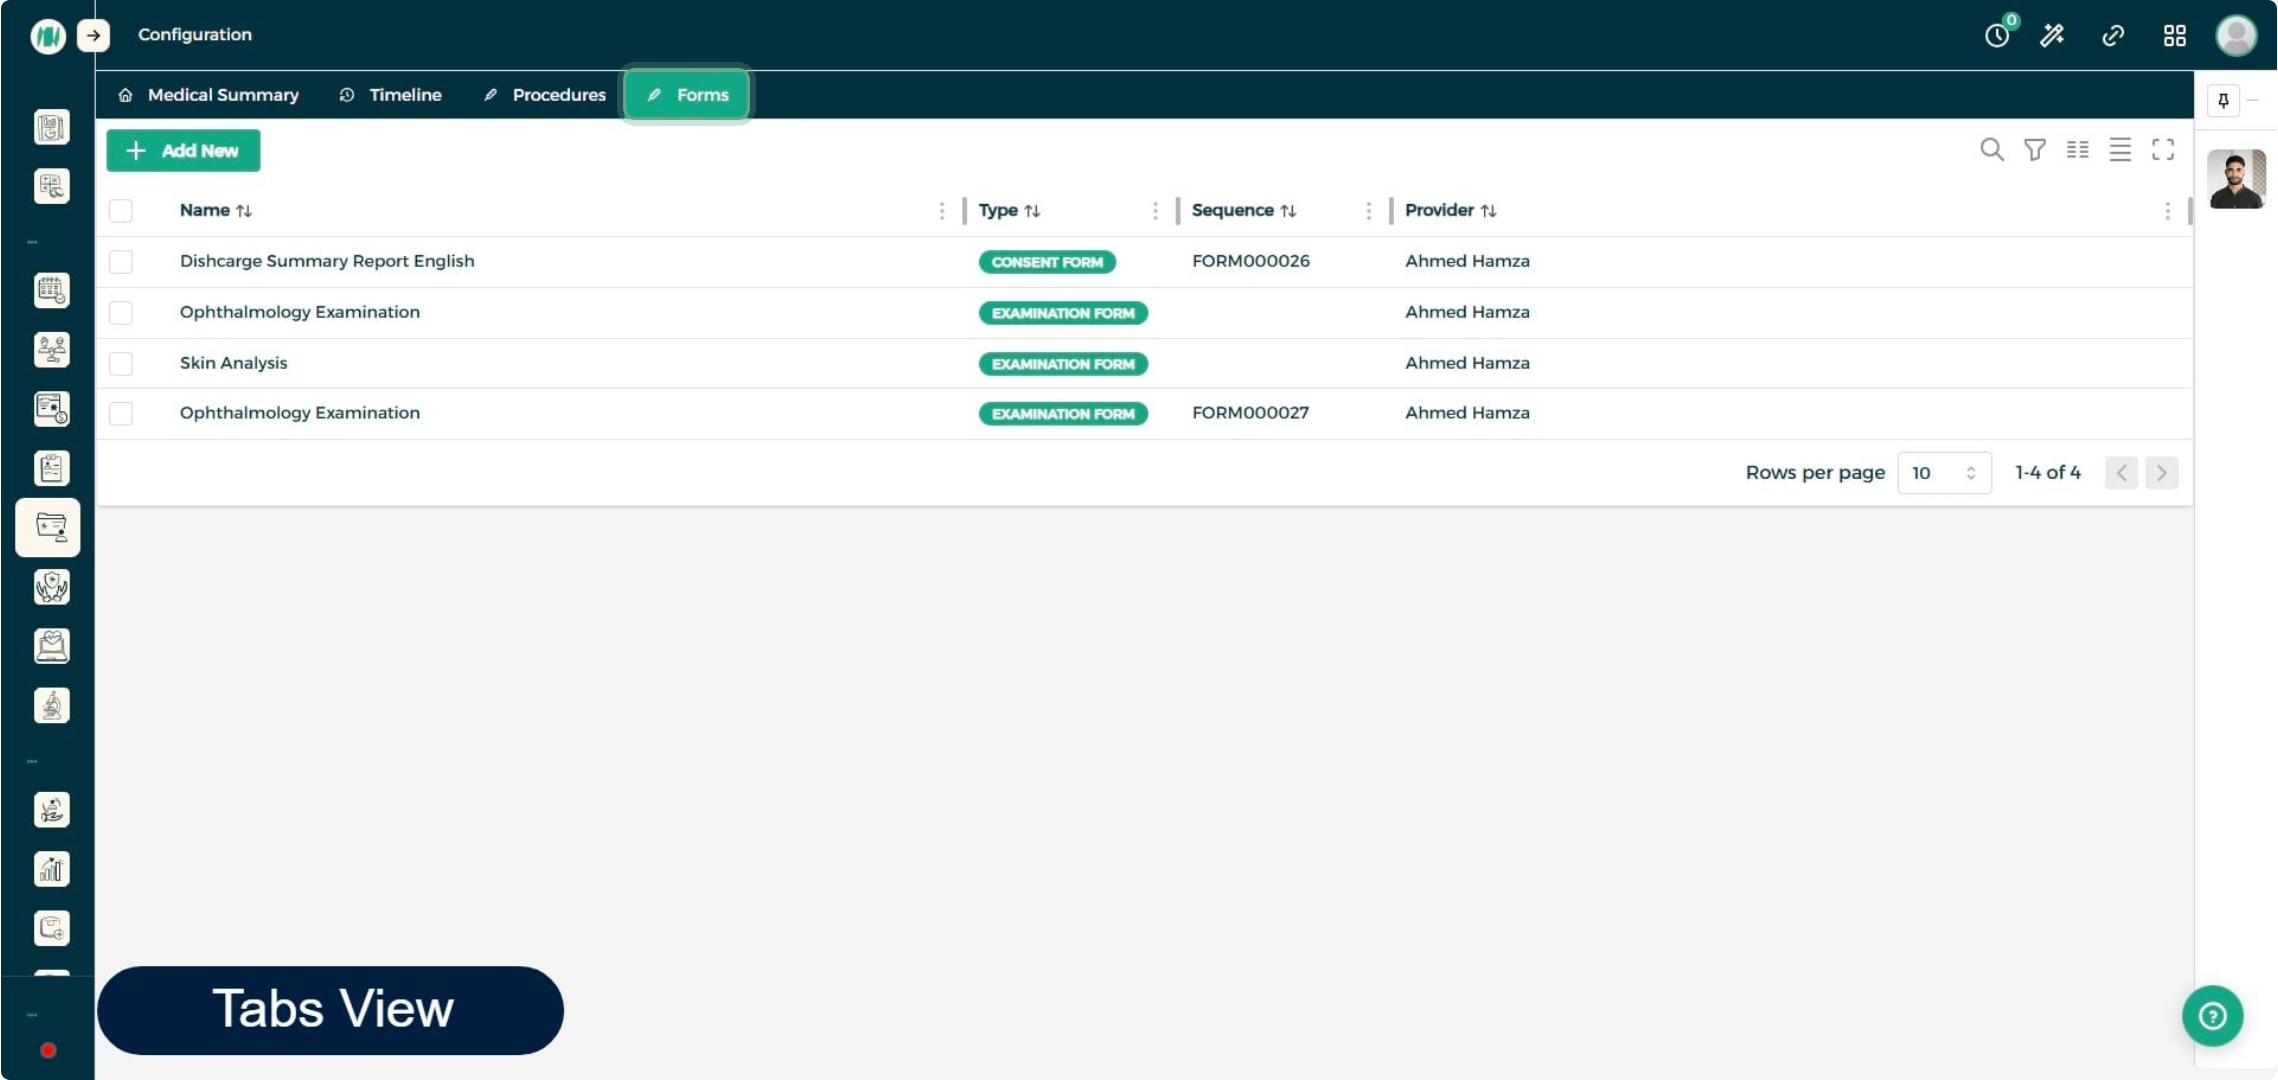
Step 2: Review the Forms Tab
The Forms tab holds every document filed for this patient.
Dashboard Layout
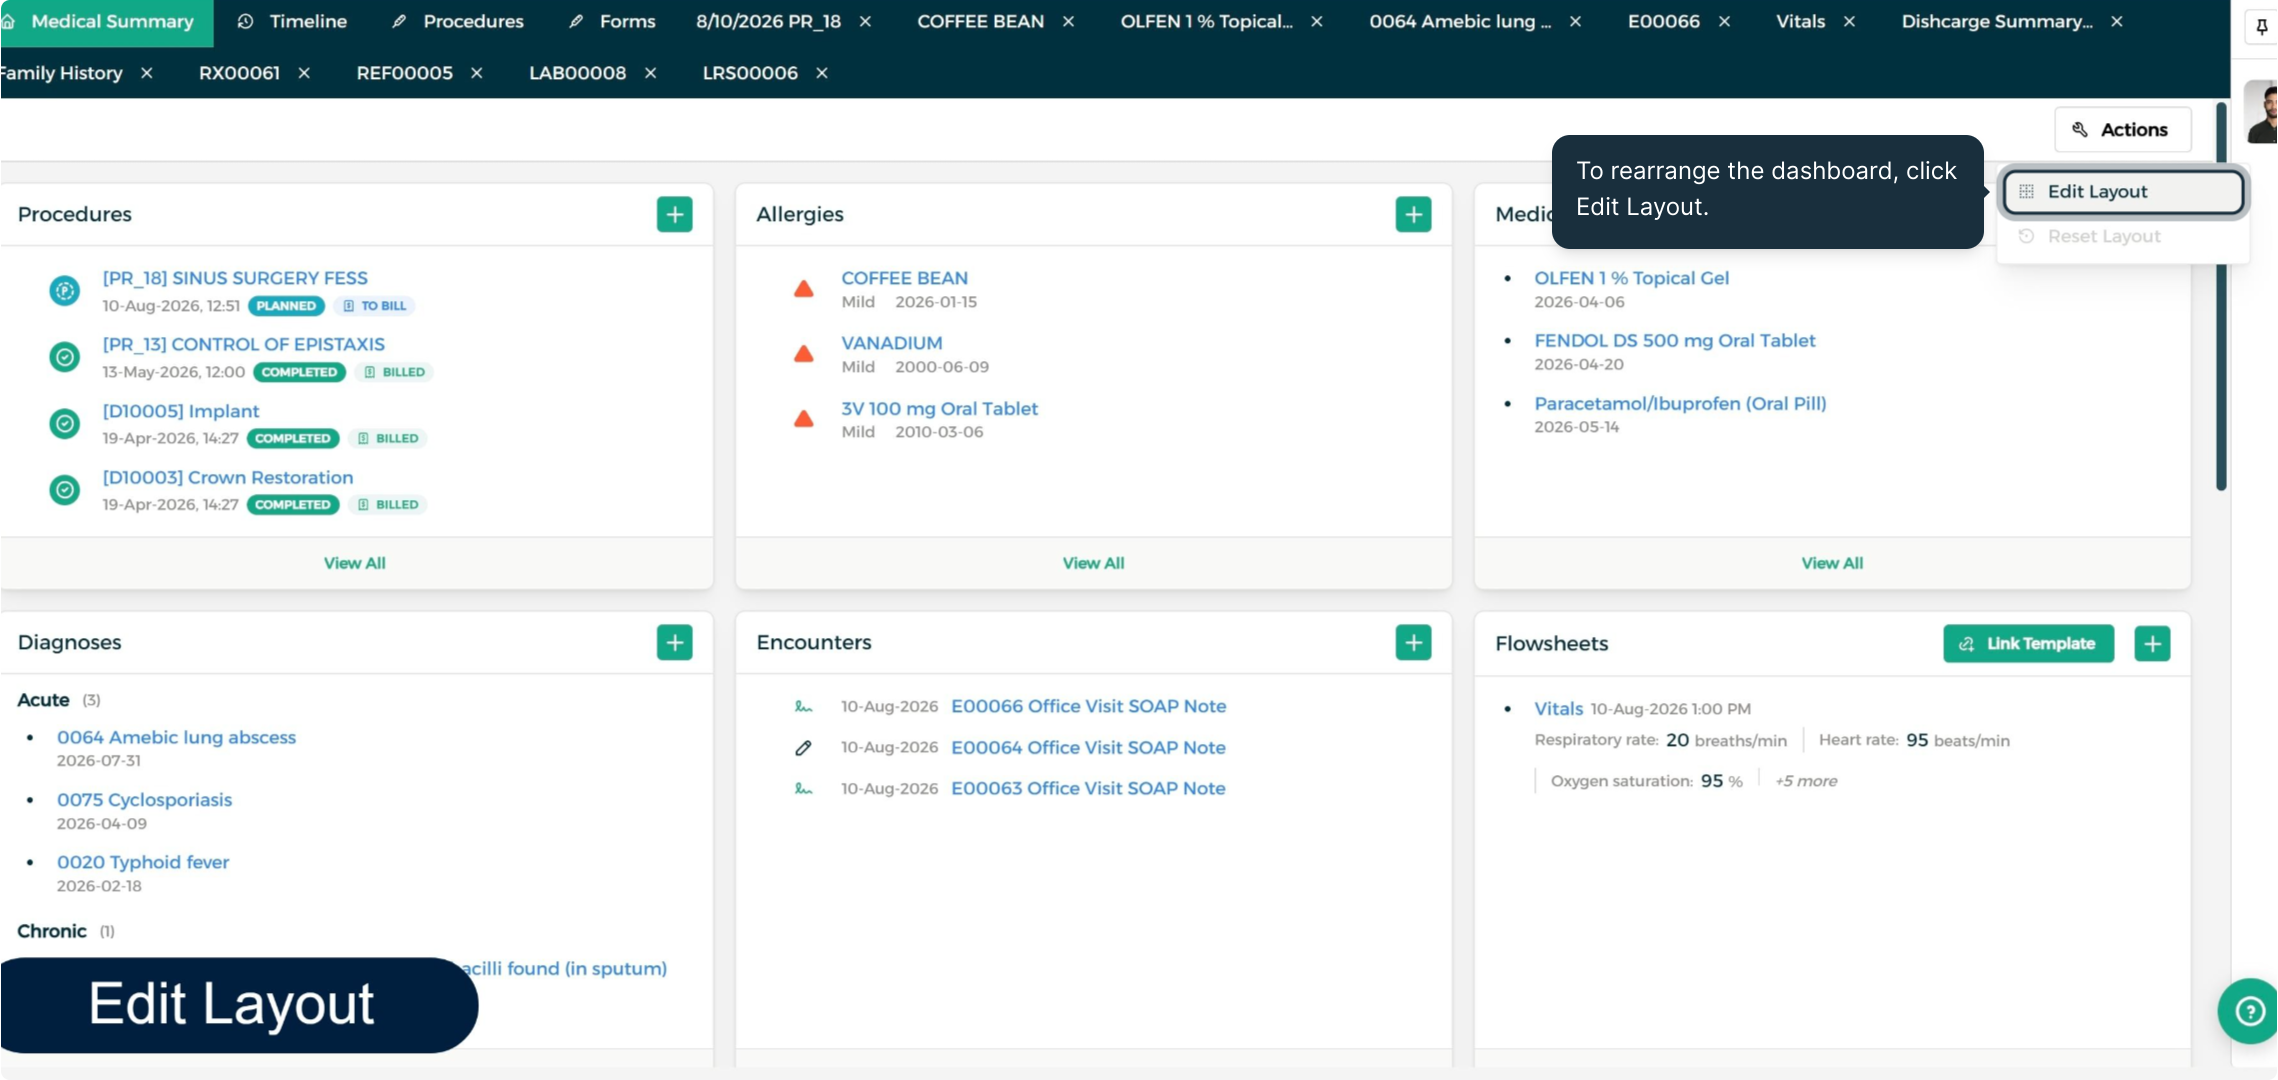
Rearrange the Dashboard
On the Summary tab, click Edit Layout to rearrange the dashboard cards however you like.
End-to-End Workflow
From a patient's Medical Summary screen, doctors and clinical staff can move through a full visit:
- Log the basics — procedures, allergies, medications, and diagnoses — as they come up during the visit
- Document and lock the Encounter itself using the appropriate note template
- Record vitals through Flowsheets, and review trends using Observation Charts
- Attach Medical Forms and update Social & Medical History as needed
- Write prescriptions, relying on the system's built-in contraindication checks
- Create referrals and order or log lab results tied to the visit
- Send completed procedures to billing directly from Quick Actions
- Review the full patient file at any point via the Timeline, Procedures, and Forms tabs
Best Practices
- Lock an encounter once documentation is finalized — this protects the note from accidental edits while keeping it fully readable.
- Log allergies and current medications before writing a prescription so the system's contraindication checks have full information to work with.
- Link flowsheet observations and lab results to the relevant encounter — this keeps the visit history accurate and makes trend charts more meaningful.
- Use note, form, and flowsheet templates rather than starting from scratch each time — new templates can be added from the Configuration tab as your clinic's needs grow.
- Check the Timeline tab regularly for a chronological, audit-ready view of everything recorded on a patient's file.
- Send completed, billable procedures to billing as soon as they're finished to keep revenue cycles moving.
FAQ
Q: Can I edit an encounter after it's been locked? No — locking an encounter protects it from further edits, which keeps the clinical record trustworthy.
Q: Will the system warn me about drug interactions when prescribing? Yes. When adding a prescription, the system automatically checks the new medication against the patient's recorded allergies and existing medications, and flags potential contraindications.
Q: Do I need to create a new flowsheet template for every patient? No — flowsheet templates are reusable. Link an existing template to a patient's file, then add new observation entries to it over time.
Q: Where can I add custom note, form, or observation chart templates? All of these are managed from the Configuration tab, so your clinic can build out templates that match its own specialties and workflows.
Q: How do I see everything that's happened on a patient's file in one place? Use the Timeline tab — it lists every recorded action sorted by most recent, with a toggle to switch to a filterable list view.
Q: Can I send a procedure to billing directly from the Encounters module? Yes — open the procedure's Quick Actions menu and select Send to Billing to submit the charges without leaving the patient's clinical record.